My dude, thank you so much! This should really kickstart my project. I’ll share some pictures once my version of the dashboard is finished!
1 Like
You’re very welcome! I’m so glad others are finding my setup useful. Yours looks great! I love the frame. If you have any improvements to the layout/setup you came across please let me know.
Can you share the wind rose code?
How to make Monday the start of the week and not Sunday?
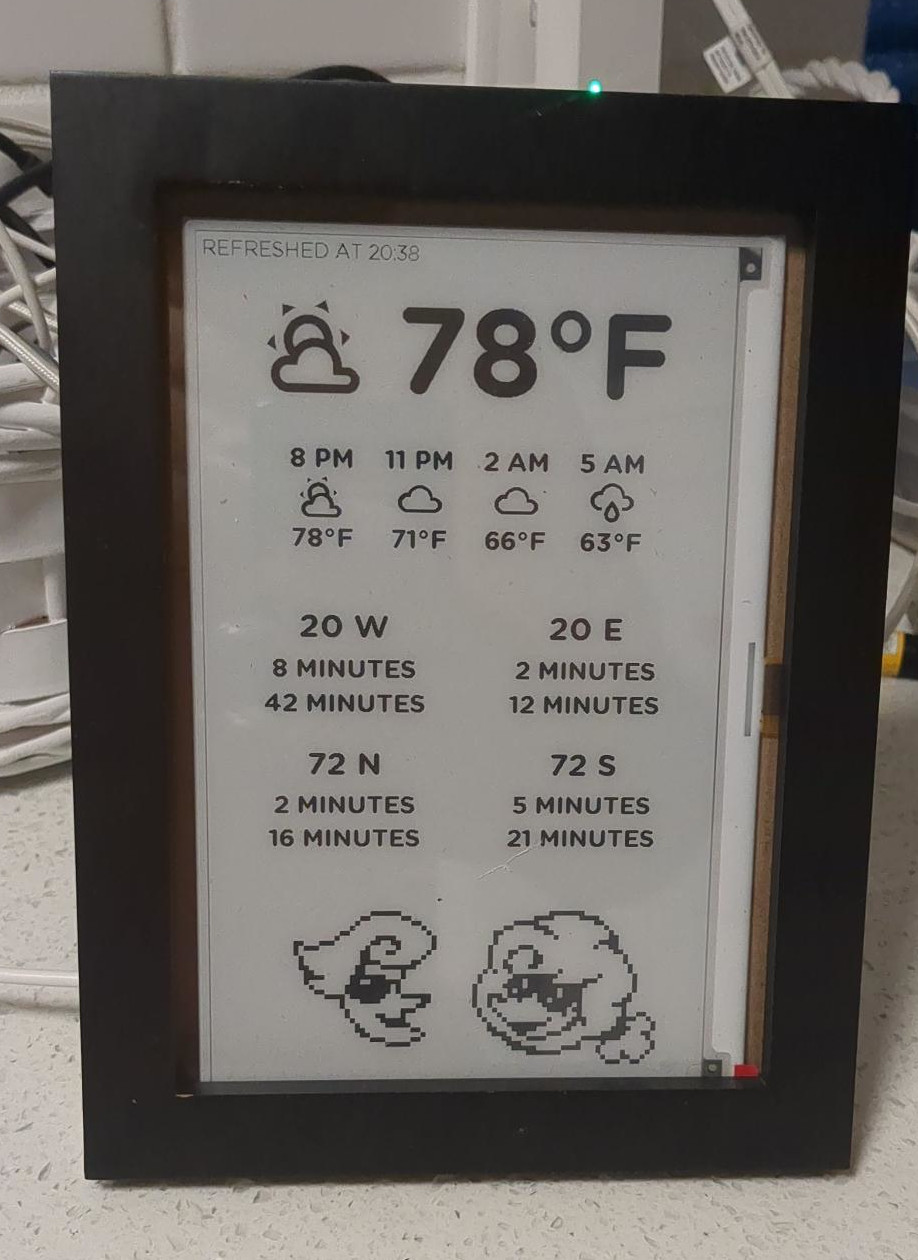
I got this working! It shows:
- current temperature and weather icon
- row of temperatures and weather icons for: now, now+3h, now+6h, now+9h
- This is useful because I want to know how hot it will be this evening, for example
- Uses PirateWeather
- two bus stops near my house and their departure/arrival times
- Uses the Portland-area transit Trimet Web Services API for arrival/departure times instead of GTFS
- I had to do this because TriMet supports GTFS but not realtime GTFS
- Uses the Portland-area transit Trimet Web Services API for arrival/departure times instead of GTFS
- Art of some weather-related characters I like from Deltarune

I ended up putting it in a freestanding picture frame and just plugging it in, with the ESP device coming out the back and sitting right behind it:
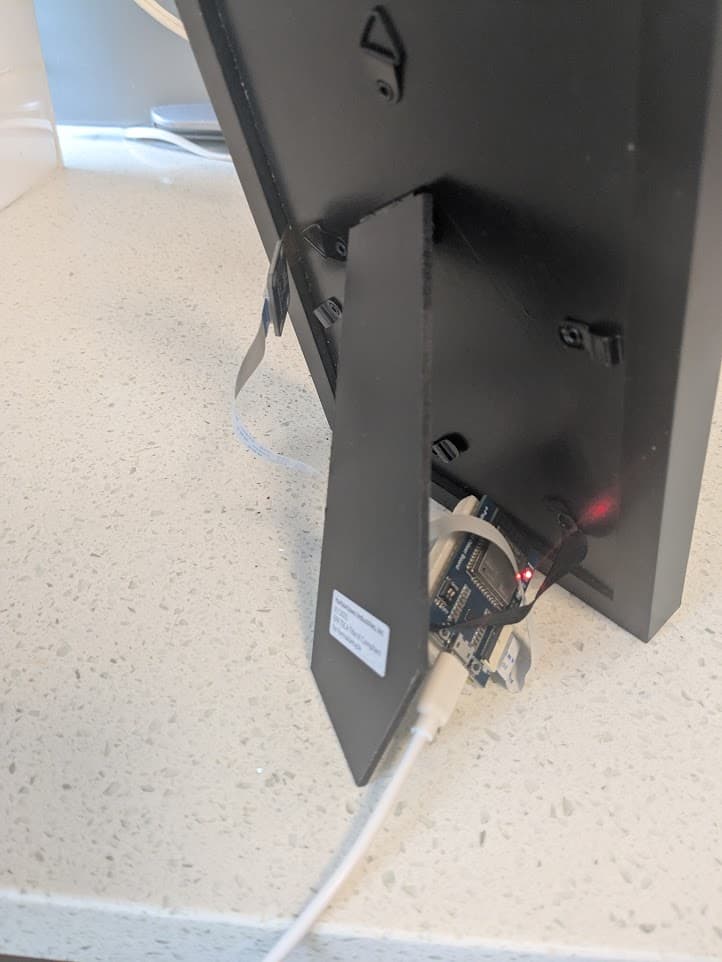
Crucially, the device is plugged into a smart plug that I have configured to turn off between 11pm and 6am, which means the device is off 7 hours a day. I did this because I don’t have a motion sensor at home and the original code had some clever stuff that only refreshed the display when motion was detected (since the device is only good for a high-but-fixed number of refreshes). So I wrote an override setting the “motion detector” to just be a state variable that is always on. The manufacturer also recommends keeping the device unpowered from time to time, so having it plugged in to a smart plug that is off 7 hours a day kills two birds with one stone.
My code is all here:
I included inline comments all throughout, I hope it helps someone!
1 Like
Sure but I did not write it to share easily … I have magic numbers and running variables for coordinates as I build the layout, which make this not great for copy/paste.
here is the whole left-hand side centre section, which contains the wind widget, hopefully you see the general technique:
      //************************ Centre Section *******************

      int const centreT = margin + titleH; // the top of the centre section
      int const centreH = footerT - centreT - margin; // the height of the centre section
      int const colC = width / 4 - margin; // the horizontal centre of the icons
      int const rowC = (centreH / 3) + (titleH / 2); // the vertical centre spacing of the icons

      // Condition Icon
      it.printf(colC, rowC, id(icon_today), TextAlign::CENTER, "%s", weather_icon_map[id(today_condition).state.c_str()].c_str());

      // Wind Speed
      int bearing = int(id(wind_bearing).state);
      // By convention, the arrow should point in the direction of travel, not the direction of source
      int dir = bearing > 180 ? bearing - 180 : bearing + 180;
      int speed = int(id(wind_speed).state);
      int dia=84; // rose diameter
      int rowCR = rowC * 2 + titleH;

      // Wind direction indicator
      it.regular_polygon(colC + (75 * (cos((dir-90)*PI/180))), rowCR + (75 * (sin((dir-90)*PI/180))), 30, 3, VARIATION_POINTY_TOP, dir, COLOR_ON, DRAWING_FILLED);

      // Compass rose
      it.filled_circle(colC, rowCR, dia + 3, COLOR_OFF);
      it.filled_ring(colC, rowCR, dia, dia - 20);

      // Cardinals
      it.print(colC, rowCR - 72, id(font_cardinals), COLOR_OFF, TextAlign::CENTER, "N");
      it.print(colC, rowCR + 76, id(font_cardinals), COLOR_OFF, TextAlign::CENTER, "S");
      it.print(colC - 74, rowCR + 3, id(font_cardinals), COLOR_OFF, TextAlign::CENTER, "W");
      it.print(colC + 74, rowCR + 3, id(font_cardinals), COLOR_OFF, TextAlign::CENTER, "E");

      // Direction
      it.printf(colC, rowCR + 4, id(font_medium), TextAlign::CENTER, "%s", id(wind_direction).state.c_str());

      // Speed
      it.printf(colC, rowCR + 140, id(font_title), TextAlign::BASELINE_RIGHT, "%d", speed);
      it.print(colC, rowCR + 140, id(font_unit), TextAlign::BASELINE_LEFT, "kph");
NB.
The wind direction indicator is a polygon that is rotated around the outside of the compass rose.
The compass rose is made up of a black ring, plus a white circle that effectively trims the inside edge of the polygon.
I hope this helps.
1 Like
Hello! You just need to modify the calendar_utilities.h file (located in \includes\calendar_utilities.h). On line 20 you’ll see the following:
    // Adjust day of week to start from 0 for Sunday
    //day_of_week = (day_of_week + 5) % 7;
    day_of_week = (day_of_week + 6) % 7; // Adjust to start from 0 for Sunday
Just uncomment the second line and comment the third line. That will shift the calendar display to start from Monday. I just pushed up an update better explaining that in the readme and adding better comments to that file.
1 Like
Thanks, I already found it myself. If you update the readme, you can point out that there is no Unicode support in the calendar event list. Due to limitations of std::string, especially in the substr part, and I would advise you to replace … with the symbol …
I have finally broken the spell and gotten my E-Paper showing something.
I have a Waveshare7.5 inch e-paper HAT (B) and i (Foolishly maybe) bought one that was tricolor.
I have never been able to get the red working and the white has a reddish tint.
Have tried getting ChatGPT to help me solve it, it has suggest many many things but nothing has worked.
ChatGPT says the red is not supported yet so i tried using it as “black/white” but it never turns really white, just this reddish hue white.
Has anyone got any tips that might help to get it to show white.
The driver is a Waveshare E-paper ESP32
This is the yaml i send it, this shows black screen with reddish tinted text, i have tried it the other way round, then it is just reddish white background with black text.
> esphome:
>   name: epaper_display
>   friendly_name: epaper display
>
> esp32:
>   board: esp32dev
>   framework:
>     type: arduino
>
> logger:
>
> ota:
>   - platform: esphome
>     password: "password"
>
> api:
>
> wifi:
>   ssid: "Redacted"
>   password: "Redacted"
>   manual_ip:
>     static_ip: 10.0.0.22
>     gateway: 10.0.0.1
>     subnet: 255.255.255.0
>   ap:
>     ssid: "Fallback Hotspot"
>     password: "fallbackpass"
>
> captive_portal:
>
> spi:
>   clk_pin: GPIO13
>   mosi_pin: GPIO14
>
> font:
>   - file: "Roboto.ttf"
>     id: main_font
>     size: 30
>
> color:
>   - id: color_white
>     red: 100%
>     green: 100%
>     blue: 100%
>   - id: color_black
>     red: 0%
>     green: 0%
>     blue: 0%
>
> display:
>   - platform: waveshare_epaper
>     id: eink_display
>     model: 7.50in-bv3
>     cs_pin: GPIO15
>     dc_pin: GPIO27
>     reset_pin: GPIO26
>     busy_pin:
>       number: GPIO25
>       inverted: true
>     rotation: 270°
>     update_interval: 60s
>     auto_clear_enabled: false
>     lambda: |-
>       // Force full white background
>       it.fill(id(color_white));
>       it.rectangle(0, 0, it.get_width(), it.get_height(), id(color_white));
>
>       // Add black test text to verify contrast and draw success
>       it.printf(100, 100, id(main_font), id(color_black), TextAlign::TOP_LEFT, "Test Text");
As said, ChatGPT has really tried to help me, it has suggested changing the type of display and a slew of other ideas, but nothing has worked i still get the reddish ting instead of “real white”.
Hello @hmadsen:
have you tried to change the mode switch, my display worked in the “wrong” mode (Mode A).
ESP-Home Config (display-part)
display:
  - platform: waveshare_epaper
    id: eink_display
    cs_pin: GPIO15
    dc_pin: GPIO27
    busy_pin: GPIO25
    reset_pin: GPIO26
    reset_duration: 2ms
    model: 7.50in-bV3
www.waveshare.com/wiki/7.5inch_e-Paper_HAT
Best wishes!
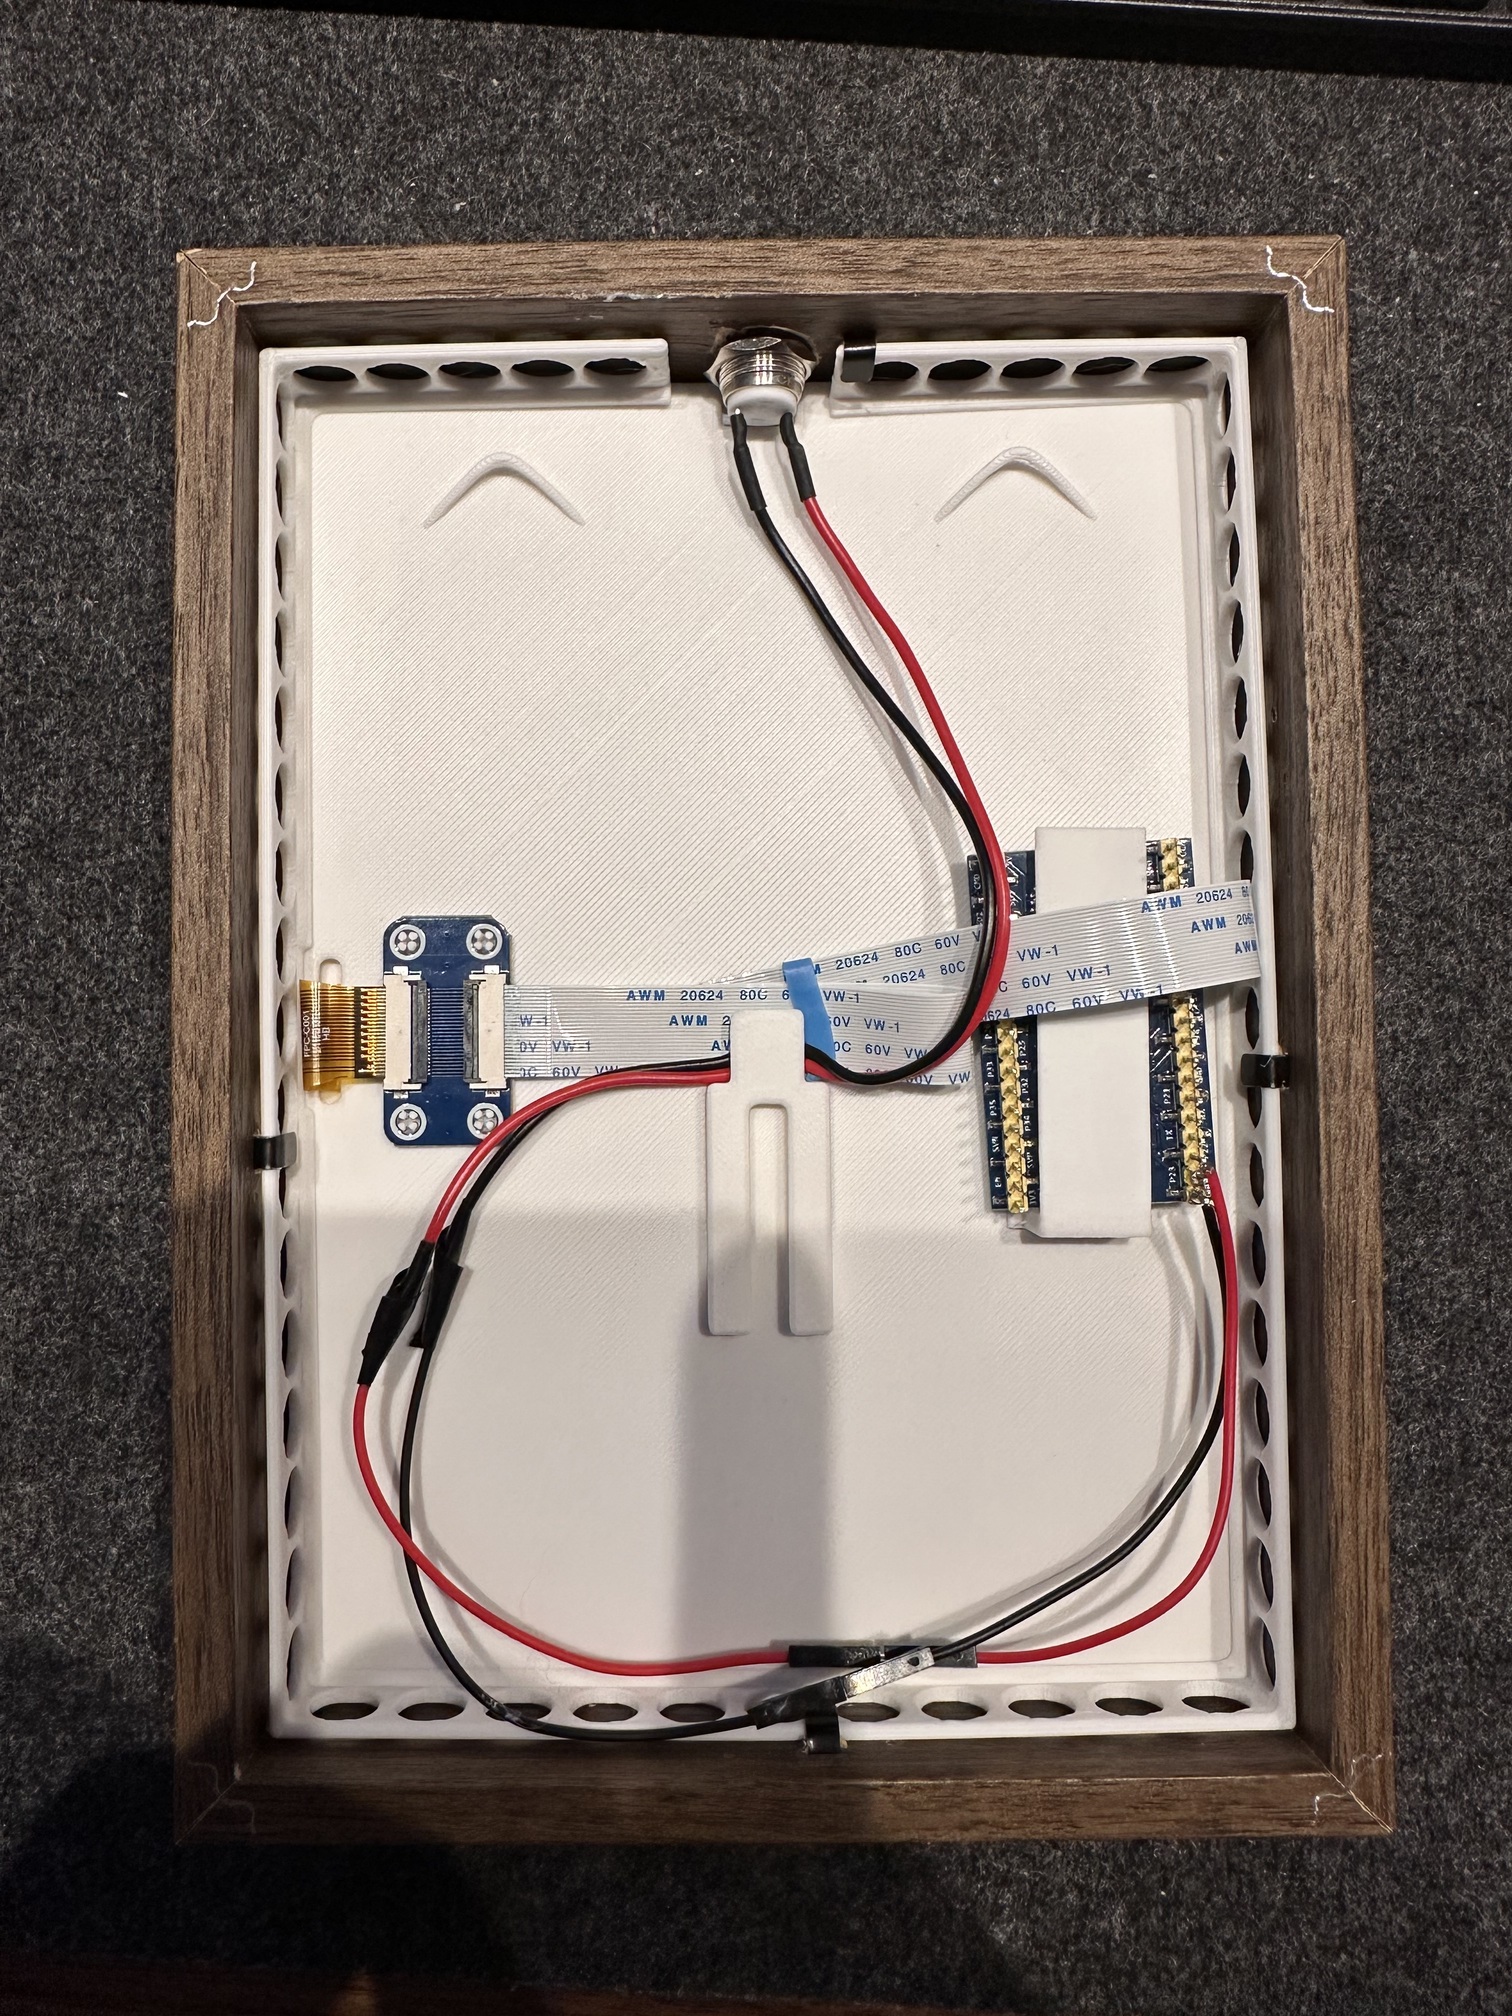
I 3D printed a mount to fit the display and all components in the IKEA frame neatly. You can find the design here
5 Likes
Hello everybody,
I’m pleased to share my project with e-paper, after your projects great inspiration.
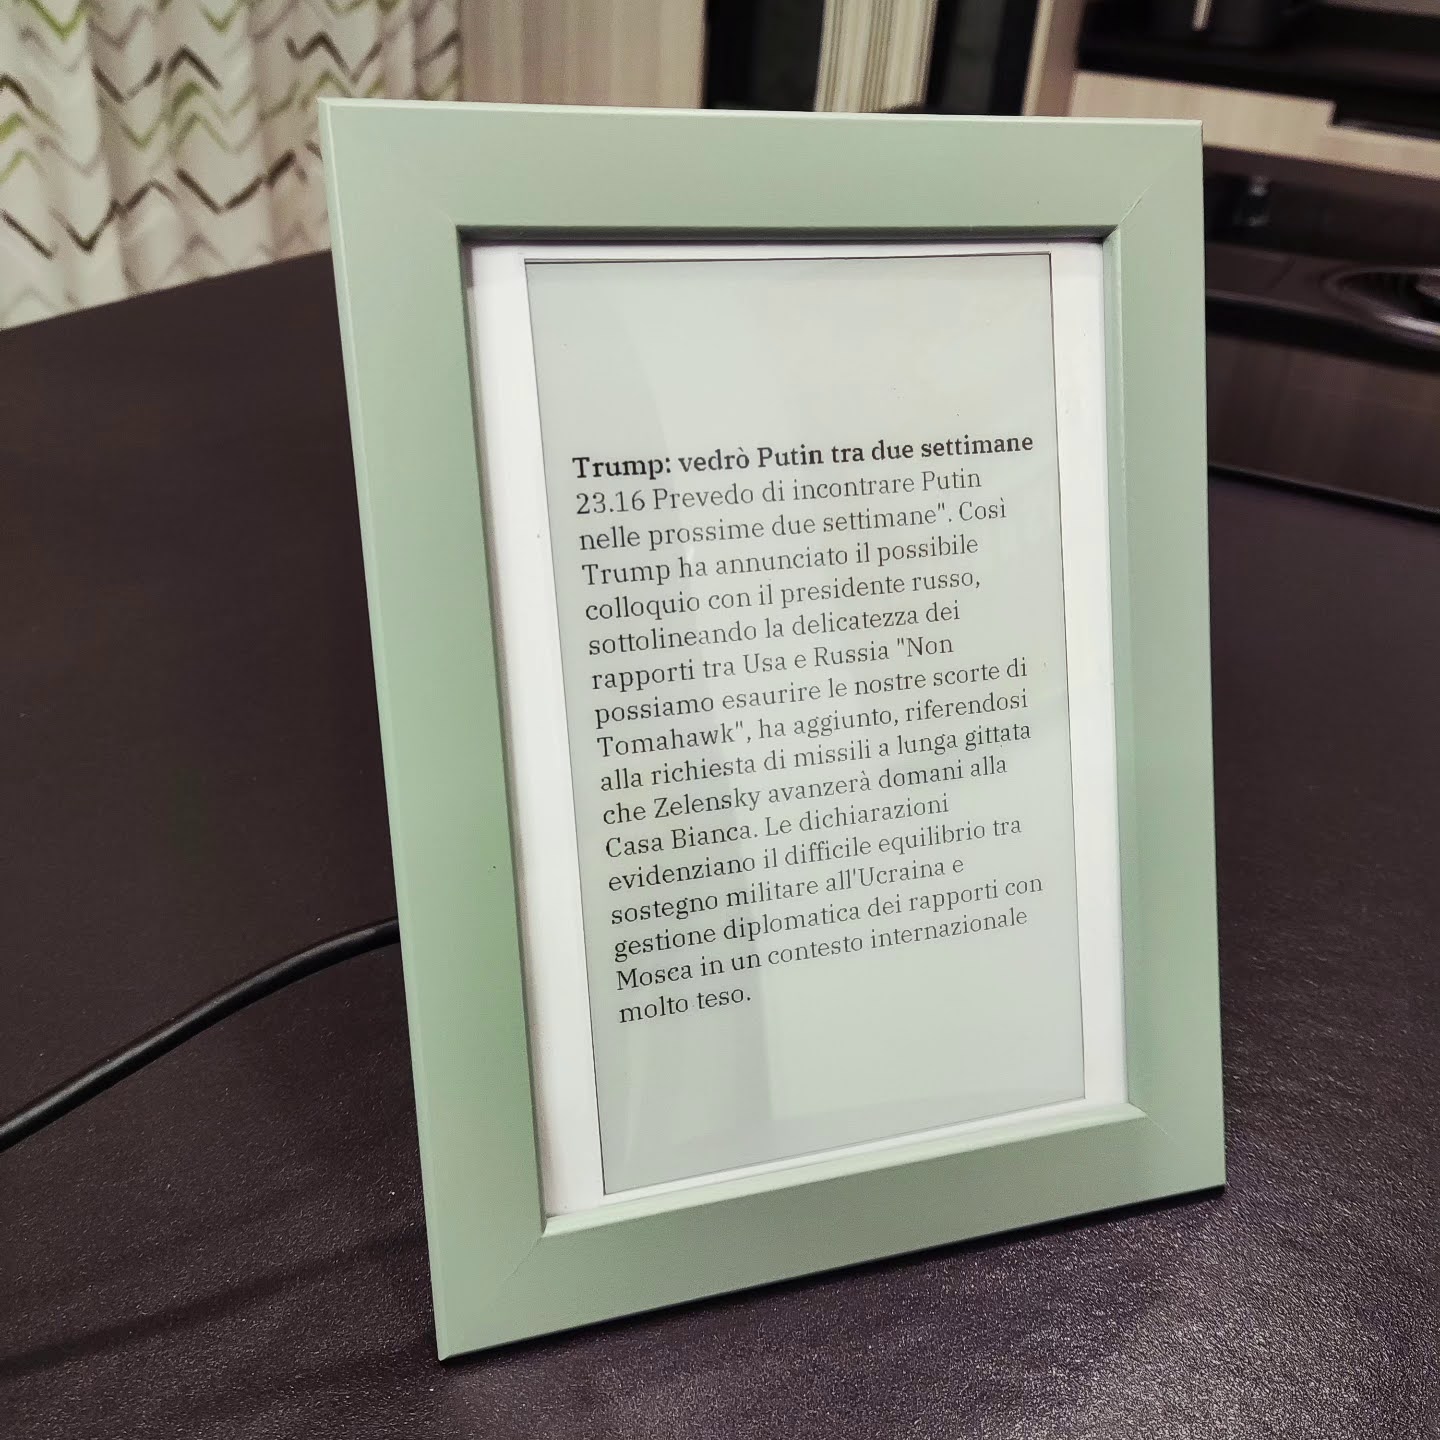
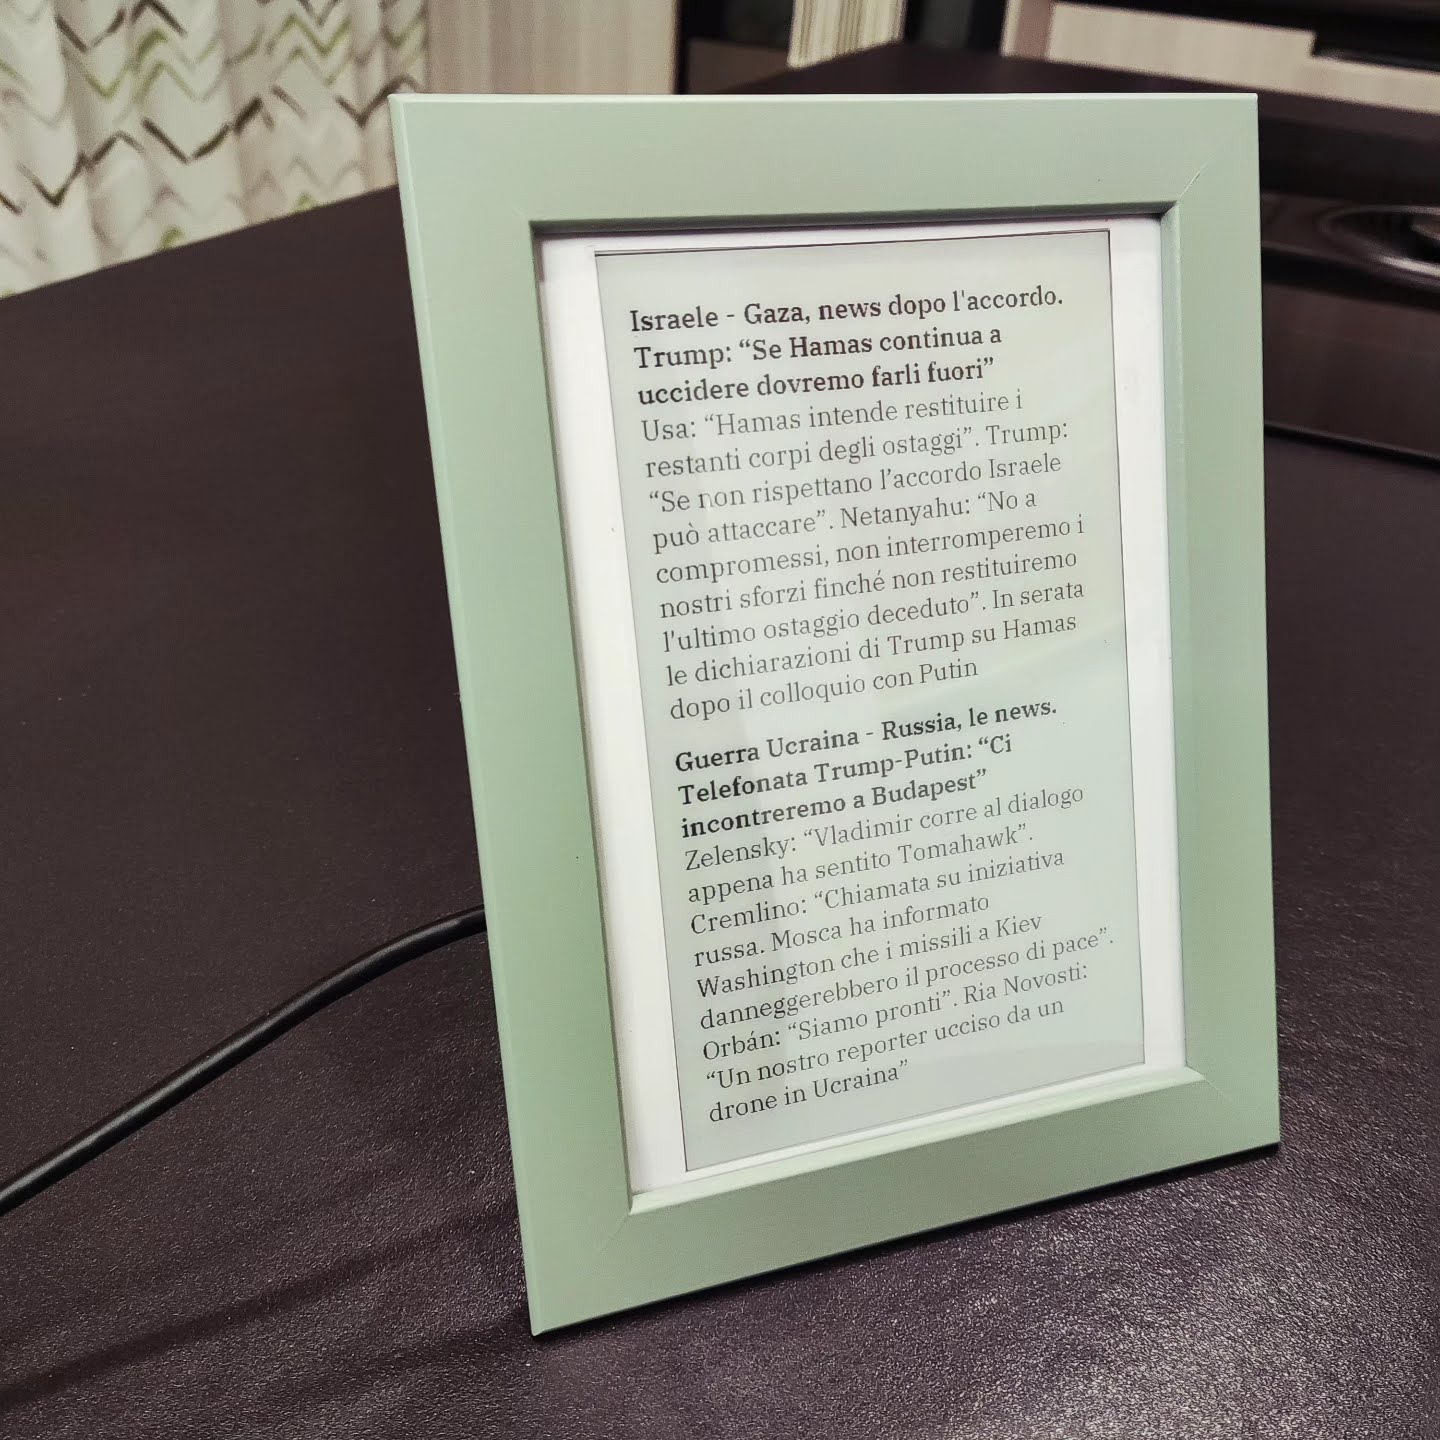

This is an RSS feed reader that collects breaking news headlines from several sources, sorts them, and publishes as many as possible.
I solved the issue of multiple text lines and dynamic paging as well.
I also used an IKEA frame — not a thick one — since e-paper is thin enough to fit like a regular picture.
After desoldering the ESP32 pins, the board became thin enough to be attached behind the frame without any problem.
Thank you.
2 Likes
Hi @PharkieB this is amazing well done. Just wondering how long does the battery last? abd how often do your sensors get updated?
I have the same problem as another user in this thread. I am not able to display text from homeassitant entities. The text ist just not renderend. Any ideas? Here is my code.
esphome:
  name: reterminal
  friendly_name: Reterminal

esp32:
  board: esp32-s3-devkitc-1
  framework:
    type: esp-idf

# Enable logging
logger:

# Enable Home Assistant API
api:
  encryption:
    key: "="

ota:
  - platform: esphome
    password: ""

wifi:
  ssid: !secret wifi_ssid
  password: !secret wifi_password

  # Enable fallback hotspot (captive portal) in case wifi connection fails
  ap:
    ssid: "Reterminal Fallback Hotspot"
    password: ""

  domain: ".fritz.box"

captive_portal:

external_components:
  - source:
      type: git
      url: https://github.com/lublak/esphome
      ref: dev
    components: [ waveshare_epaper ]
  - source: github://lublak/esphome@pull/1/head
    components: [waveshare_epaper]
    refresh: 1h

# define font to display words
font:
  - file: "gfonts://Inter@700"
    id: myFont
    size: 24

# Get info from HA, as string format
text_sensor:
  - platform: homeassistant
    id: ai_test
    entity_id: ai_task.openai_ai_task
    attribute: friendly_name

time:
  - platform: homeassistant
    id: homeassistant_time


# define SPI interface
spi:
  clk_pin: GPIO7
  mosi_pin: GPIO9

display:
  - platform: epaper_spi
    id: epaper_display
    model: 7.3in-spectra-e6
    cs_pin: GPIO10
    dc_pin: GPIO11
    reset_pin:
      number: GPIO12
      inverted: false
    busy_pin:
      number: GPIO13
      inverted: true
    update_interval: 300s
    lambda: |-
      const auto BLACK   = Color(0,   0,   0,   0);
      const auto RED     = Color(255, 0,   0,   0);
      const auto GREEN   = Color(0,   255, 0,   0);
      const auto BLUE    = Color(0,   0,   255, 0);
      const auto YELLOW  = Color(255, 255, 0,   0);

      it.printf(300, 158, id(myFont), RED, "%s", id(ai_test).state.c_str());
      it.printf(100, 100, id(myFont), BLACK, "%s", id(ai_test));
      it.printf(600, 300, id(myFont), GREEN, "%s", id(ai_test).state);
I think the issue is with how printf is called. Two of your lines aren’t passing a C-string, so nothing gets rendered.
Always use id(<text_sensor>).state.c_str() when printing text from a text_sensor.
Try replacing your three lines with these:
// Correct — passes a C-string
it.printf(300, 158, id(myFont), Color::RED, "%s", id(ai_test).state.c_str());
// Wrong in your code — was passing the whole object
it.printf(100, 100, id(myFont), Color::BLACK, "%s", id(ai_test).state.c_str());
// Wrong in your code — was passing std::string
it.printf(600, 300, id(myFont), Color::GREEN, "%s", id(ai_test).state.c_str());
To be safe, you can also add a quick check:
if (id(ai_test).has_state()) {
  it.printf(300, 158, id(myFont), Color::BLACK, "%s", id(ai_test).state.c_str());
} else {
  it.printf(300, 158, id(myFont), Color::BLACK, "No data");
}
Try this first and see if the text renders correctly.
Thanks for your detailed description. I perfomed the test an it display “No data”, so the id(ai_test) has no state. Any idea howto performing further debugging what is wrong during the homeassitant api call?
If you see “No data”, your ESP probably is not receiving state updates from Home Assistant. Two quick checks:
1. API encryption key
Having only
api:
is fine, that means no encryption. If your YAML has
api:
  encryption:
    key: "..."
the same key must be configured when you add the device in Home Assistant. A mismatched key blocks all state updates. Check Home Assistant logs for “Invalid encryption key”.
To simplify debugging, temporarily remove the encryption block from your ESPHome YAML, compile and upload, then restart the device. Home Assistant will connect without a key.
2. Prove the HA ↔ ESP link with a known good entity
Add a temporary test sensor and verbose logging:
logger:
  level: VERBOSE

api:
  on_client_connected:
    - logger.log: "Connected to Home Assistant"
  on_client_disconnected:
    - logger.log: "Disconnected from Home Assistant"

text_sensor:
  - platform: homeassistant
    id: test_time
    entity_id: sensor.time
    on_value:
      then:
        - lambda: |-
            ESP_LOGI("ha", "Got sensor.time: '%s'", x.c_str());
Watch the ESPHome logs. You should see “Connected to Home Assistant” and “Got sensor.time”. If you do, the API path works, then your original entity reference is the next thing to double check. If you do not, fix the API connection first, for example by removing the encryption block or by ensuring the key matches when adding the device in Home Assistant.
Thanks a lot. That solved my problem. I missed the encryption key on esphome integration.
1 Like
Please allow me one more note.
I see the sensor data from HomeAssitant just after the second eink refresh. Is there a way to wait until the sensor data from HomeAssitant is retrieved before performing the eink rendering, that is at present emtpy for the first time?
You can se how I have done it here