Hi Samuel, hope all is well in your part of the world
No problem at all… and again thanks for your kind words
This is perfect , and in reading this I can already see the problem in my head. The good news is if I am correct it is a easy fix . I am just trying to push out a new update for my “Bathroom Exhaust Fan Blueprint” and once done I will fix this.
Thanks for reaching out and providing an easy bug report… legend
Hello everyone and thank you again for this blueprint. However, I faced a small problem. I would like to check that a boolean is in the true state in order to activate the blueprint. How can I do ? Isn't it possible to improve the blueprint with input_boolean choices to turn on. Can anyone help me? THANKS
I admit that I’m a little lost, I want to use a motion sensor to light up the office room, with the light conditions etc. that I find in the blueprint. Now I want the light to turn on only when my input_boolean_geek_mode is true. Where can I type this? I don’t see the possibility either in this second blueprint.
You will have to use the night lights option. You will need to enable night lights and enter in your settings. Then in conditions you will enable the state and enter in your input_boolean_geek_mode as shown below.
I’m new to this blueprint, but have been experimenting. I love the flexibility and capabilities. I am particularly interested in the tracker option, but I think it does the opposite of what I want. My use case:
I want to do some alarm type functions - and they should only trigger if my wife and I are NOT home.
I have about 6 app carrying users on my system. Two of us live in the home and the others may be visitors. I have an outdoor yolink motion sensor. When that motion sensor triggers, I want to turn on a number of lights that would illuminate the backyard, and then turn them off a few minutes after the motion sensor clears. All good so far.
My issue is that, I only want it to trigger when two of the users (myself and my wife) are NOT present. (ie not in the “home” zone). So it could be triggered by one of the other users or by a stranger. I believe your blueprint is designed to do tracker triggering only if certain people ARE present - not if a specific set of people are NOT present.
What is the best way to accomplish this? Should I try and build a template for a bypass switch that is active when the two of us are away - or am I missing a simpler way of doing this?
I have multiple zones, so I cannot just test for the two people being in the “away” zone.
Yes. I have added a new template for you into the FAQ Click Here and look for “REF - TS-8 By-pass Person Sensor”.
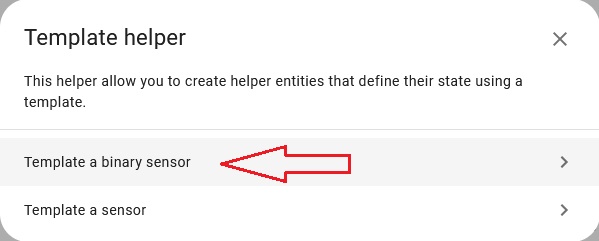
Home assistant have a new template helper now that makes it easy for us to add and edit. So you could do this. Go to settings / devices and services / helpers tab / create helper then follow below.
# The code for the state

#For one phone

{{ is_state('device_tracker.your_phone_here', 'home') }}

# Or for more than one phone

{{ (is_state('device_tracker.your_phone_here', 'home')) or (is_state('device_tracker.your_phone_here', 'home')) }}
Hello, first of all thank you for this great blueprint, it has already brought me very far.
I have recently changed my two lamps in the hallway from normal zigbee bulbs to 30cm large full RGB ceiling lamps (https://www.amazon.de/gp/product/B09H2MHNZM) that provide me with esphome modified 2 entities. A main light and a ambient light.
In my taste optimal for day and night light.
They can also brightness and color temperature but really interesting it is when you can control them with full RGB.
Therefore the question: How high is my chance that you expand your Blueprint in the future with the possibility of RGB control ?
Hi @Blacky. After upgrading to HA 23.10I have experienced a problem with the light level when they are triggered by this automation. They seem to be set to 0% either when they are triggered to go off, or maybe when they turn on again (less likely), which leads to very dim lights, and very unhappy wife
Any thoughts on what to do, apart from downgrading to 2023.9?
I’m laying in bed right now (to much information…) , but thinking through the blueprint. I mentioned higher up about also supporting a manual switch in parallel to the sensor and I think I have cracked it.
Basically it forms 2 key parts, and I config option
Config the ability to add a switch, which in my case would be a toggle. Probably in the same form area as the sensor input.
Part 1: toggle light on
If presence is off, then this will force the light on… presence will keep monitoring in parallel and when presence is detected and this loop will end as the presence sensor will take over
Part 2: toggle light off
If presence is on and you toggle the switch, then is will force the light off… Once presence is off then this loop will end
Another option might be too have this as a separate blueprint that sits between the presence sensor + switch and your blueprint
I am trying to replace an automation that, between two periods of time, a light is set to 30% unless the light or nearby light has been set above that level. In which case the automation sets the light to the higher level. Is that something that can be done with this blueprint?
Hi Peter, Thanks for providing your YAML. With your set up the automation is not controlling your lights brightness at all and it is within your lights that is doing this. If you would like this blueprint to control your light brightness then you will have to enable it and set your brightness. This would be the same if you are using night lights but I can see your not using this option. So you would need to select the “Light Control Options” as shown below.
Hi Brad, If you have a light switch on the wall to turn the light ON and OFF then;
Part 1 = Works. You can force the light ON if presence is OFF and the light will stay ON until presence is detected and then the automation will run.
Part 2 = Works. If presence is ON and stays ON (If you have multiple sensors then you need to group them) and you toggle the light OFF the light will stay OFF until presence goes OFF and back ON again, then the automation will run.
No, the automation will not check any of your nearby lights and mimic them.
Interesting idea though.
You would have to create a template sensor to trigger the automation when your nearby lights go above X and then use scenes to do this. So you could do it but it would be set values and not a floating %. Scene would be 100% (or whatever you like) and your OFF scene would be 30%. If you then would like to turn it OFF between certain times then you would have to also use my Turn Light, Switch or Scene On & Off with Trigger Conditions blueprint with this one.
hi @Blacky
In which version of your incredible blueprint is the “it’s nighttime” helper used to indicate nighttime? It would really add a lot of flexibility.
Cheers
Hi, danke für die Tollen Blueprints. Die haben mir sehr weiter geholfen.
Besteht die Möglichkeit da noch eine weitere By-pass Options hinzufügen.
Ich habe Nachttischlampen die ich über Berührung einschalte, dann soll aber die Lampe die ich mit über denn Bewegungsmelder eingeschaltet habe ausgehen und bleiben. Bis ich die Nachttischlampen wider ausschalte !
Ich kann das An oder Aus der Nachttischlampen aber nur über denn Stromverbrauch feststellen.
Gibt es da eine Möglichkeit das zu machen.
Auch habe ich anscheinend einen Fehler, und zwar schalte ich mit Zwei Automatisierungen mein Flurlicht per Bewegungsmelder ein.
Einmal Sonntags bis Donnerstags von 22,30h bis 8.00h.
Einmal Samstag und Sonntags 0.30h bis 8.00h.
Wenn ich das aber so einstelle geht ab Freitag 0.00h das licht nicht mehr an, obwohl es bis 8.00h gehen müsste.
Hi Michael, thanks for your question. For the english speaking I will translate it.
No problem, your welcome. With your bedside lamps they must communicate with HA so when you turn them ON and OFF, HA knows they are ON or OFF. Once you have this then put the bedside lamps in the by-pass as shown below.
To German Translate
Kein Problem, gern geschehen. Ihre Nachttischlampen müssen mit HA kommunizieren. Wenn Sie sie also ein- und ausschalten, weiß HA, dass sie ein- oder ausgeschaltet sind. Sobald Sie dies haben, stecken Sie die Nachttischlampen wie unten gezeigt in den Bypass.
If using 2 automation then try not select the same day in both of them. Also there is no Friday selected.
Sunday to Thursday from 10.30 p.m. to 8 a.m.
and
Friday to Saturday 12:30 a.m. to 8:00 a.m.
To German Translate
Wenn Sie zwei Automatisierungen verwenden, versuchen Sie, nicht in beiden den gleichen Tag auszuwählen. Außerdem ist kein Freitag ausgewählt.
Sonntag bis Donnerstag ab 22.30 Uhr bis 8 Uhr morgens
Und
Freitag bis Samstag 12:30 bis 8:00 Uhr
It is on the road map ahead. One way we can do this now is to use scenes. You can set all your lights up to any colour you like in a scene and then use the automation to turn your scene ON.


 button in the top post