Hi Hawker,
I was wondering if you could give a little more detail to the way you went about this method?
I have only just started with HA today and have 6 of the Arlec Fans/Lights to deal with and I think your post/method is my best option knowing where I am at with all this stuff. I have HACS installed as well as localtuya and will pair all the fans with Smart Life app tonight (currently paired with Grid Conenct app). I have an android emulator setup and i guess this is the part where I start to need a bit more help. Look forward to hearing from you! Cheers!
EDIT: After watching YouTube vids as you suggested in you basic steps, I think I have it figured out. Haven’t tried yet but will do over this weekend and see how I go. Thanks for posting your method either way!
If you install the tuya local component via HACS and then replace the three files from the link in my previous post then you should get full speed local control of the fan.
Just make sure you get the right tuya local component.
I’ve got the fan (with light) into HA and fan turns on/off. I have to figure out all the settings for it now. Haven’t got light working yet.
EDIT: Light is working. Can turn on & off and adjust brightness or intensity or whatever its called. Cant get fan to work since changing the three files.
EDIT 2: Seems to all be working now. Thanks
EDIT 3: What should the fan settings be now with the three files changed?
Thanks mate. I’ve tried to remove the Fan Oscillating Control dps line but once I submit and go back in its there again. Not sure how to remove it and I cant find it in any config file to delete it manually??
EDIT: OK figured that bit out. Now just need to work out how to set the colour range properly. The config calls for a min and max kelvin but the light doesn’t have that set directly.
It has this when I view in developer tools > states
I haven’t managed to get the colour temp part working either. One day I will have a look at the light python code and make it more flexible but as I don’t ever change the colour I haven’t had it high on my list of things to do.
So based in the post above your fan is working with direction and all 6 speeds?
As I submitted the new fan integration for the I am always looking to hear from those who it worked for. Otherwise I only ever hear from those who it didn’t work for.
I managed to get the temp control working through trial and error of the Min and Max kelvin. Only thing is the slider image is backwards so when it’s cool light the slider shows warm and vise versa. Ended up with Min 2850k and Max 6500k. This got the slider end points correct with that I was seeing in smart things app.
Yep the fan integration seems to work perfectly! I haven’t written any automation or anything with it yet but it seems to work fine using the slider and incrementing the speed that way.
So thanks for that and also your help here getting my fans and lights to work.
Found my way here after searching for Tuya fan dps lists.
I am actually using openhab with tuya-mqtt as the middleman. Now Tuya-mqtt is no longer maintained, so im stuck with the current setup.
I have an arlec grid connect fan same as noted, and everything is working, except for DPS 3. If i change values in the app DPS 3 returns 1-6. But if i set DPS 3 using payloads 1 to 6, it defaults directly to speed 6,
The weird thing is, i have an arlec tower fan, and DPS 3 with payload 1-4 works perfectly fine.
I think this is obviously a tuya-mqtt issue, although im quite interested in converting this fan over to tasmota as i have with many other devices.
Anyone have any idea on the best way i can get this working using openhab and tuya-mqtt.
I know this is a HA page, just thought i would ask.
otherwise ill go the route of converting the chip and flashing tasmota.
I just made myself smaller one (35x19), expect them in Syd in a week and a week later to have something assembled and tested. If I didn’t screw it, I will have a few in surplus.
More than a year after starting this project I’ve moved in and am finally using these fans for myself!
Everything works, but I’ve discovered an annoying quirk with the light. I’m using these fans as the main light in each bedroom and don’t want too much light before sleep. At a neutral colour temperature it’s possible to dim the light extremely low such that you can barely see the individual LEDs glowing with the cover off, but with full cool or warm white “1%” brightness results in light output and power consumption about the same as neutral white at 25%. They’re not doing any gamma correction so 25% power is something like 50% perceived brightness!
The trick to get dim warm white is to keep the brightness at 1% and instead adjust the colour temperature between 50 (practically off) and 100 (equivalent to 25% brightness at neutral colour temp). If you’re a masochist that wants cool white, the same works by adjusting colour temperature between 0 and 50.
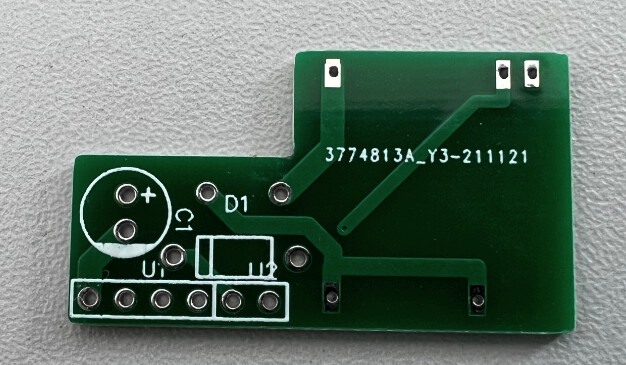
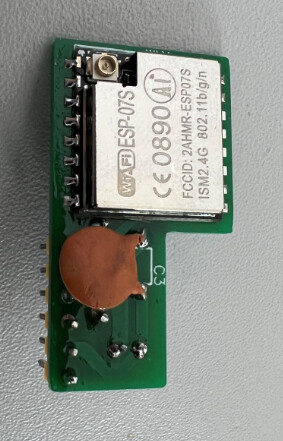
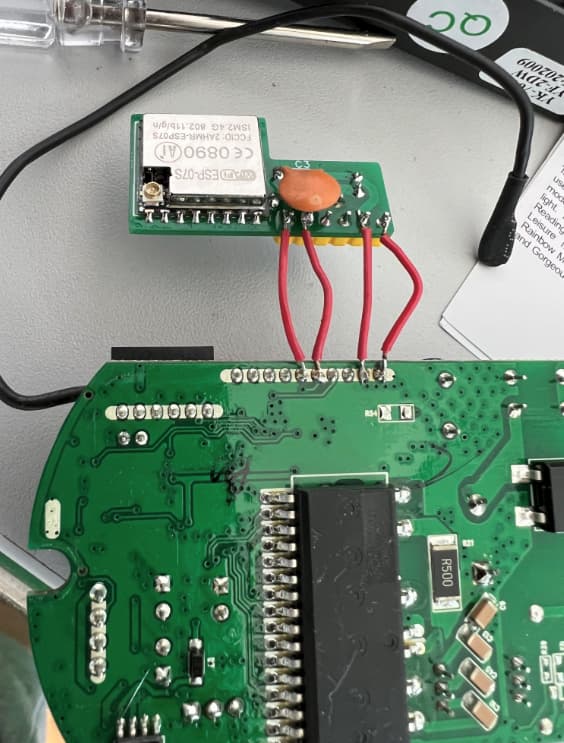
Awesome project!! Would anyone mind sharing the underside of their controller boards where the resistors and capacitors for the tx, rx, and rst pins are, so I can see the R values? Each pin has an inline protection resistor and a pull-up resistor. I am guessing 1k and not sure on the pull-up value. I was going to guess over 30k but I don’t see any others that high anywhere else.
The Vcc pin has two capacitors, probably 1uF and 10uF.
I have a controller board from another brand with an identical layout and mcu, but without this header or related components populated. I want to hook up an esp and try and hope it shares the same firmware.