Auping Connect integration

Dear all,

I have bought a “smart” bed from Auping which I currently only can control with their app or via a remote. I was wondering if someone did already some work regarding this topic ?
I found the following on the web but I don’t have a clue how to progress https://github.com/Supereg/homebridge-http-switch/issues/30

Thank you so much,
Jens Wymeersch

2 Likes

Hi Jens!

I recently bought the same beds and I was wondering too. I know it connects to homey, so there must be some API.
I will try to gather more info on how it works, and will post it here.

If I have a little spare time, maybe I will take a stab at this integration.

Allrighty then… Here we go!

Auping Connect

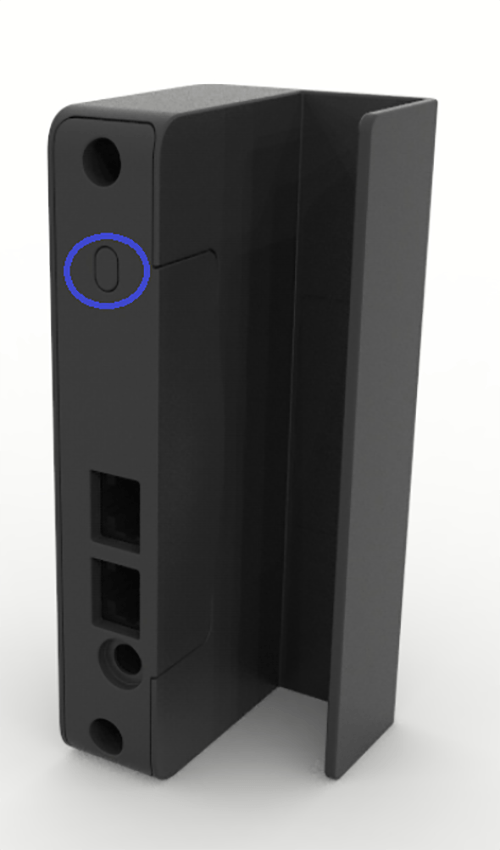
The Auping Connect is a wireless module used to control Auping beds from a smartphone.

The module uses WIFI to communicate with the Auping Connect app, and uses Bluetooth to connect to the beds. If you have an Auping Royal, you would use 2 cables to connect the beds to the module using the 2 RJ45 ports on the device.

From the app you are able to control the motors, set alarms and activate a special anti-snore function, whereby your smartphone listens for snoring sounds, and adjusts the bed to give you a nudge, so you will turn on your side to prevent snoring.

Setup

To setup your Auping Connect, you’ll have to download the Auping Connect App first.

During initial setup, you will be asked to connect your phone to an Ad-Hoc unprotected Wifi hotspot broadcasted from the Auping Connect device itself.
From here, the app pairs with the device, and passes your normal Wifi credentials.

After setup, your phone returns to the normal Wifi ssid again.
The Auping Connect device will connect to that same Wifi ssid and starts normal operation.

Now you can use the app to control your bed from your smartphone.

Network Discovery

The Auping Connect device will broadcast it’s existence periodically using MDNS, advertising it’s services on port 80:

When starting the App, it will first query the device to discover it’s capabilities:

GET /api/config HTTP/1.1
X-Key: aabbccdd
Host: 10.50.1.151
Connection: Keep-Alive
Accept-Encoding: gzip
User-Agent: okhttp/3.14.9

HTTP/1.1 200 OK
Content-Type: application/json
Cache-Control: no-store, no-cache, must-revalidate, post-check=0, pre-check=0
Pragma: no-cache
Connection: Keep-Alive
Transfer-Encoding: chunked

{"name":"Auping Connect C12B","interface":"STA","hostname":"connect","ip":"10.50.xxx.xxx","wifi_configured":"1","stored_ap":"myssid","mac_address":"3C:E1:A1:xx:xx:xx","cbu_type":33,"sync":0,"bed_type":37,"alarm_a_utc":0,"alarm_b_utc":0,"utc":1617391756,"current_system_time":2956688,"time_last_command ":0,"cbu_a_command":0,"cbu_b_command":0,"firmware":"1.05.4"}

The device runs a simple HTTP server on port 80, and uses JSON as payload.

The app sends a not-standard HTTP-header: X-Key: aabbccdd with the request, probably as a pairing key (real value was obfuscated by me for security reasons).
It is assumed that this key is unique for every bed and/or pairing.

The device responds with the stored configuration like the SSID it’s connected to, the type of bed (how many motors, firmware version etc.).

Operating the bed

During operation of the bed, the same protocols are used for communication.

Within the app, you can select which half of the bed you want to control (left side, right side, or both in sync). By pressing and holding the buttons on the screen, the bed is operated just like you would with the normal remote.

Basic protocol breakdown

This operation translates into the following HTTP calls:

On button press:

POST /api/cbu/motor/extended HTTP/1.1
X-Key: pgxhhqsf
Content-Type: application/json
Content-Length: 121
Host: 10.50.1.151
Connection: Keep-Alive
Accept-Encoding: gzip
User-Agent: okhttp/3.14.9

{"CBU":1,"motor_1":{"Action":0,"TimeInMs":0},"motor_2":{"Action":1,"TimeInMs":30000},"motor_3":{"Action":0,"TimeInMs":0}}

HTTP/1.1 200 OK
Content-Type: application/json
Cache-Control: no-store, no-cache, must-revalidate, post-check=0, pre-check=0
Pragma: no-cache
Connection: Keep-Alive
Transfer-Encoding: chunked

{"success":true}

On button release:

POST /api/cbu/motor/extended HTTP/1.1
X-Key: aabbccdd
Content-Type: application/json
Content-Length: 117
Host: 10.50.1.151
Connection: Keep-Alive
Accept-Encoding: gzip
User-Agent: okhttp/3.14.9

{"CBU":1,"motor_1":{"Action":0,"TimeInMs":0},"motor_2":{"Action":0,"TimeInMs":0},"motor_3":{"Action":0,"TimeInMs":0}}

HTTP/1.1 200 OK
Content-Type: application/json
Cache-Control: no-store, no-cache, must-revalidate, post-check=0, pre-check=0
Pragma: no-cache
Connection: Keep-Alive
Transfer-Encoding: chunked

{"success":true}

The protocol looks very simple. On every button press, a JSON payload is posted in the form of:

{
  "CBU": 1, --0=both bedsides in sync, 1=let side, 2=right side
  "motor_1": { "Action": 2, "TimeInMs": 30000 }, --action 0, 1 or 2 (stop, up or down),
  "motor_2": { "Action": 2, "TimeInMs": 30000 }, --time is used to set the time until stop.
  "motor_3": { "Action": 2, "TimeInMs": 30000 }
}

The CBU determines which part of the bed is operated. It can be left side (1) , right side (2) or both in sync (0).

The motor properties sets the action per motor, and the time the motor should be running in ms.
Action 0 = stop, 1 = up and 2 = down.

So the above command would instruct the left side of the bed to go down with all 3 motors, and stop after 30 seconds.

The bed responds with a JSON payload on an HTTP 20 OK indicating success:

{"success":true}

On button release, an immediate STOP is issued, by sending action 0 to all motors:

{
  "CBU": 1,
  "motor_1": { "Action": 0, "TimeInMs": 0 },
  "motor_2": { "Action": 0, "TimeInMs": 0 },
  "motor_3": { "Action": 0, "TimeInMs": 0 }
}

Implementation proposal

My proposal would be to use cover controls (up/down) or separate buttons to control the beds.
Perhaps 1 cover control per motor (and maybe 1 for the sync function?)

Using the info above though, it should already be possible to control the beds using the build-in RESTful Command - Home Assistant (home-assistant.io).

You should be able to fairly easily create a button panel for the bed, or define ‘presets’ for watching TV.
When asking google for ‘good night’ it could lower your bed to sleeping positing, or wake you up in the morning by raising your bed.

No special integration is needed if you sniff the key from your beds and automate it right now using RESTful commands…

My own needs are covered with above investigation, so I will not create a special integration for it right now. Should there still be a high demand for such an integration, please upvote and share your thoughts on how it should work on a functional level.

2 Likes

Hi buddy, thank you for the initial work. What would it take to make a real component and some kind of integration ?

Hi Jens, First we need to determine what functionality you want from that integration. What should it do? How should it look like?

Good Morning,

The ideal integration would be that you could operate each of the 3 motors separately for each of the beds in a visual way and get a view of the state of each of them at all times. The latter, I’m not sure if we can get as within the app doesn’t give this information. What do you think ?

If we achieve the first thing, it will be already a success as I won’t need the app anymore.

Regards,
Jens

It’s certainly possible to operate the motors using separate buttons for each of the beds. No problems there.

But… (here’s the catch):

  1. Home Assistant doesn’t have a user-interface element that looks like a bed. The closest thing is the cover-control (used for garage-doors, shutters, etc). So either we have to use that, or we have to fall back to ‘just a bunch of buttons’. So much ‘a visual way’…

  2. Within the Auping Connect app, as long as you keep a button pressed, the motor turns. As soon as you let go (release the button) it stops. We need to have this same behavior if we want to come close to something user friendly.
    Currently, this is not supported in HA at the moment. There is a PR open at the moment to bring this kind of functionality to HA: Add pressed and released event to allow usage as momentary button by indykoning · Pull Request #360 · custom-cards/button-card (github.com)

  3. The beds don’t have a clue of their current position, neither does the Auping Connect.
    It’s not like servo motors. You can even see this in the App: Create a Favorite position.
    Applying this position twice, almost folds you double, because it doesn’t know it’s starting position.
    The hardware simply isn’t there.

So, as easy as it looks, I am a little bit afraid that we won’t come close to a decent user-experience, compared to the Auping Connect app.
(I myself only uses the dedicated remotes, otherwise I have to grab my phone and open an App…to much of a hassle.)

The only thing that remains is automation from HA, like automatically raise and lower the beds based on a scene of some sort.

And that is precisely what you could already be doing using the RESTful API, without the integration.

You get my point of view?

1 Like

Hi there,

Thank you for your quick reply. I get your point.

Let me quickly reply to your points.
Pt 1 I’m in the process of acquiring a set of icons. Maybe I can ask to get this Auping split into 3 icons which would be then 3 buttons which we could use which should do the trick in view. What do you think ?
Pt2 We’ll need to live with till this get sorted I suppose.
Pt3 Was a nice to have

Well, at this time I didn’t use the app that much neither as I had a lot of trouble with connecting it to my Wi-Fi, but now I cleared it I believe. That said, I’ve built remote control for all TVs and so we use our phones all the time, but I don’t want to shift applications.

Automation sounds okay in a pet free house, else you want to see what’s going on. That said, I could image a few ways how it would be handy but then again you would need to be able to get the bed up to a certain stand which will again be a problem with pt 2.

Regards,
Jens

Well, just try it out, see if you like it.
You can have that desired functionality be running in under 30 mins.

First, alter your configuration.yaml and add a rest_command, like the following section:

rest_command:
  bed:
    url: "http://10.xxx.xxx.xxx/api/cbu/motor/extended"
    method: post
    content_type: "application/json"
    headers:
      X-Key: "xxxxxxxx"
      accept: "application/json"
    payload: '{"CBU":0,"motor_1":{"Action":0,"TimeInMs":0},"motor_2":{"Action":1,"TimeInMs":6000},"motor_3":{"Action":1,"TimeInMs":9000}}'

Replace the IP address in the URL and x-key with your own IP and key from the App.

See the documentation for details: RESTful Command - Home Assistant (home-assistant.io)

The payload is fully templatable, so you could choose to duplicate all of the commands as separate service calls, or template it away with somethjing like this:

rest_command:
  bed:
    url: "http://10.xxx.xxx.xxx/api/cbu/motor/extended"
    method: post
    content_type: "application/json"
    headers:
      X-Key: "xxxxxxxx"
      accept: "application/json"
    payload: '{"CBU":{{ cbu }},"motor_1":{"Action":{{ motor_1_action }},"TimeInMs": {{ motor_1_time }} },"motor_2":{"Action":{{ motor_2_action }},"TimeInMs":{{ motor_2_time }}},"motor_3":{"Action":{{ motor_3_action }},"TimeInMs": {{ motor_3_time }}}}'

Next, create some lovelace cards with buttons, and define all the buttons you want to have in yaml. Like this for example to have a button to raise the neck-support up for 2 seconds for both beds:

type: button
tap_action:
  action: call-service
  service: rest_command.bed
  service_data: 
    cbu: 0
    motor_1_action: 1
    motor_1_time: 2000
    motor_2_action: 0
    motor_2_time: 0
    motor_3_action: 0
    motor_3_time: 0
  target: {}

So, add a button card within the UI, switch to yaml-view, and alter the code to something like the above.

This should give you all the possibilities you want.

1 Like

@Expaso I didn’t have time to test it yet. I’m trying to get the icons prior to starting with the testing and had some troubles to keep the Auping connect stable. It looks like it didn’t like that I had 2 SSIDs on my network…
Did you now create something in Lovelace or not ? If so, maybe you can share this as well ?

Regards,
Jens

I also run multiple SSIS’s.
What I did was put my phone to the SSID I wanted the Auping to be on.
Then did the setup, and afterwards, return to my normal SSID again.

About lovelace: Just add a button card, and configure it like a service:

You can fill in the service-data per example above if you choose to use teaplating syntax in your rest_command.

I am picking this up again tomorrow. Did someone have a look at the following Connect Homey · vappsnl/nl.v-apps.auping@15189cd · GitHub

Yeah, they basically do the same:


The author is someone from Auping itself.

1 Like

Thanks for your quick reply. I’m planning to give it go today !

Haha Nice! Let me know if it worked for you!

I have it automated like this for a while now:

“OK Google, Turn on TV”

  • TV turns on
  • Chromecast is selected
  • Bed is raised, both neck and feet.

“OK Google, goodnight”

  • The house goes into night-mode (all lights go off, roller shutters are lowered).
  • TV turns off
  • Bed is lowered into flat position.

It really feels quite futoristic :wink:

Hello, this is exactly where I want to get to. I have Alexa in the house. “Turn on TV” and “goodnight” are scripts in Google or Home assistant ?

Regards,

Both are scenes in Home Assistant that I linked scripts to upon activation.
I don’t like to expose my roller shutters to google directly, so using a scene, google can close it, but not open it.

1 Like

Hello buddy,

I’m not sure what I did wrong, but somehow I can’t get it to work.

I added the following to configuration.yaml

rest_command:
  bed:
    url: "http://xx.yy.zz.uu/api/cbu/motor/extended"
    method: post
    content_type: "application/json"
    headers:
      X-Key: "mykey"
      accept: "application/json"
    payload: '{"CBU":{{ cbu }},"motor_1":{"Action":{{ motor_1_action }},"TimeInMs": {{ motor_1_time }} },"motor_2":{"Action":{{ motor_2_action }},"TimeInMs":{{ motor_2_time }}},"motor_3":{"Action":{{ motor_3_action }},"TimeInMs": {{ motor_3_time }}}}'

xx.yy.zz.uu being the ip address of the bed
mykey being the 8 character pairing key I find in the app

And added the following to a button card.

            tap_action:
              action: call-service
              service: rest_command.bed
              service_data:
                cbu: 0
                motor_1_action: 1
                motor_1_time: 2000
                motor_2_action: 0
                motor_2_time: 0
                motor_3_action: 0
                motor_3_time: 0
              target: {}

Hi Jens,

Can you try it first ‘au naturel’ without the template:

rest_command:
  beds_tv:
    url: "http://10.xx.xx.xx/api/cbu/motor/extended"
    method: post
    content_type: "application/json"
    headers:
      X-Key: "abcdefg"
      accept: "application/json"
    payload: '{"CBU":0,"motor_1":{"Action":0,"TimeInMs":0},"motor_2":"Action":1,"TimeInMs":6000},"motor_3":{"Action":1,"TimeInMs":9000}}'

  beds_flat:
    url: "http://10.xx.xx.xx/api/cbu/motor/extended"
    method: post
    content_type: "application/json"
    headers:
      X-Key: "abcdefg"
      accept: "application/json"
    payload: '{"CBU":0,"motor_1":{"Action":0,"TimeInMs":0},"motor_2":{"Action":2,"TimeInMs":30000},"motor_3":{"Action":2,"TimeInMs":30000}}'
tap_action:
              action: call-service
              service: rest_command.beds_tv

or

tap_action:
              action: call-service
              service: rest_command.beds_flat

Reply

Hello,

Thank you for your quick reply.

Here you find the error I got

Logger: homeassistant.components.rest_command
Source: components/rest_command/__init__.py:147
Integration: RESTful Command (documentation, issues)
First occurred: 11:09:58 (1 occurrences)
Last logged: 11:09:58

Client error http://XX.YY.ZZ.UU/api/cbu/motor/extended

Just to add the details of the Auping Connect
App version : 2.0.3
Software version: 1.05.4