Custom Jaga DBH controller with ESPHome

Wanted to share my project since i’ve been looking for this quite some time, didn’t find the solution I was looking for and decided to make it myself. Maybe there is someone here looking for the same, or I can inspire some to make this. Sorry for the long post in advanced :stuck_out_tongue:

Some background info:
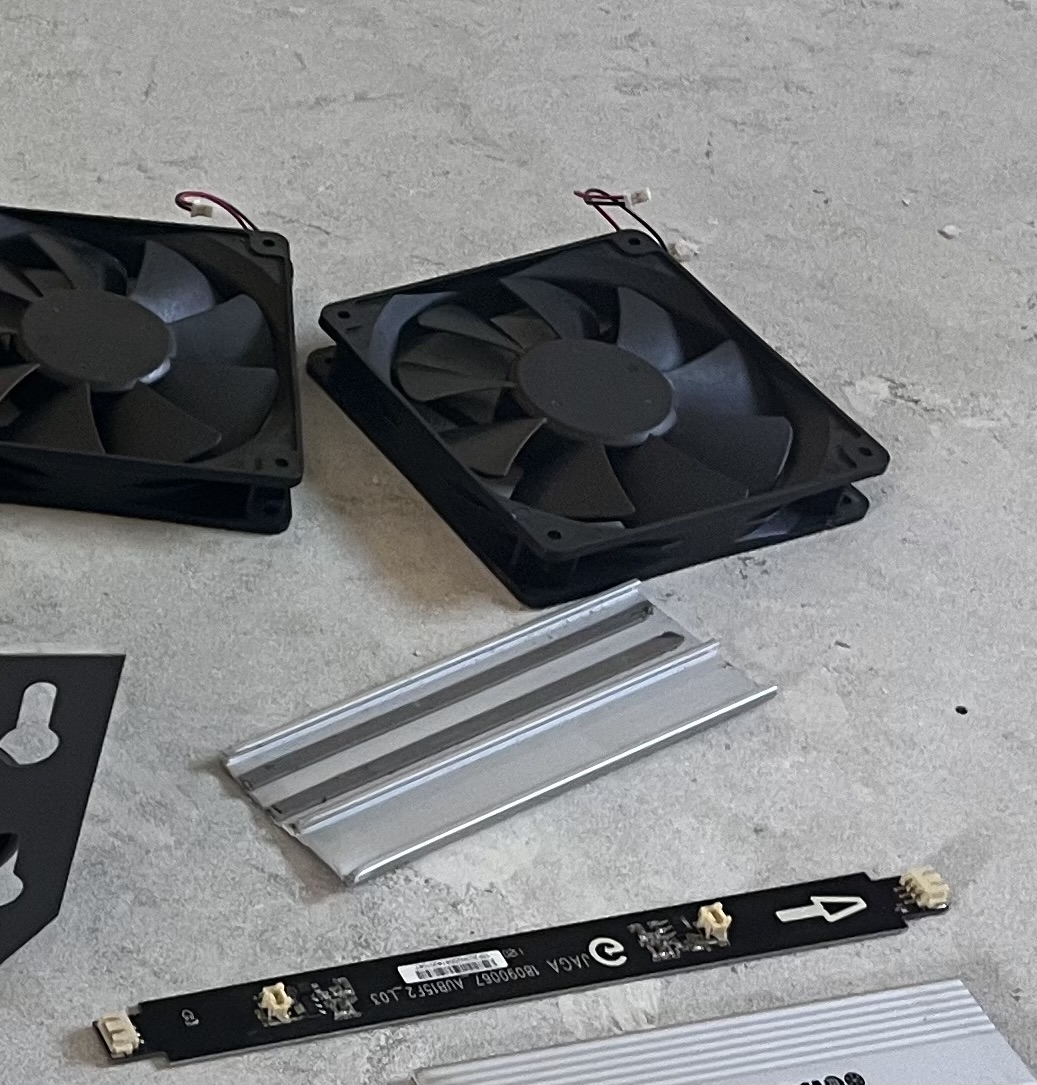
I heat my house with a electric heatpump from Vaillant, this heats the water to around 30/35 degrees. On the groundfloor In have heating in the floor but in the rest of the house its from radiators. When I bought the place I installed the Jaga DBH radiators. These have fans that increase the airflow so the low water temperature isn’t a downside in heatdispersion. These radiators can be controlled with a 0-10v command. I had some Danfoss LC13 valve’s but im no big fan of those, they eat batteries and are sometimes very slow to react on changes. When the batteries go dead the valves opens making the room a private sauna if you’re not carefull. This, with the unstopable urge to connect everything with a powercord, my hunt began.

I had some demands that needed to be in the project:

  • Instant respons on changes
  • Control over the valve
  • Control (in speed) over the fans
  • Temperature measurment
  • Everything had to be hidden (no extra wires or anything)

The DBH module runs on 24Vdc and there is a 230Vac wallsocket behind every radiator, this was a major win because I had already 2 types of power hidden from sight. I have some ESPHome devices running and am very happy with the easyness of setup and the way they operate. This was my starting point.

I made a scrap setup with a stepdown module to get the 24Vdc to 5vdc. I connected a relais and a PWM to 0-10v module, 2 temperature sensors and Frankenstein was born:

The basics was working, but I didn’t get the 0-10v working… In the meantime (I was very inpatient) I designed a PCB on JLCPCB that could fit al the items:

When the PCB’s arived I found out that the PWM module I bought was actualy for 5v PWM, not 3.3V so I had te buy others, but the footprint was different so I needed some adaptation to fix it (didn’t want to redesign the PCB’s).

Finaly is solderd everything and the results are nice:

I had my 3D printer running to make the cases i designed to make it al hidden from sight:

The hardware part was done. I flashed the ESPHome on the ESP8266’s and installed the boxes in the radiators. Don’t forget to change the little dial (don’t now the name) on the Jaga DBH module to position 5.

The software part was quit easy because ESPHome has a dedicated Climate and Thermostat function, really nice.

The code I used for this (although still in tweaking mode) is the following:


dallas:
  - pin: D4
    update_interval: 30s
    
sensor:
  - platform: dallas
    address: 0x643ca10457e41e28
    name: "Input temperatuur"
    id: Temp1
  - platform: dallas
    address: 0x613c5f04574f8828
    name: "Output temperatuur"
    id: Temp2

output:
  - platform: esp8266_pwm
    pin: D2
    frequency: 1000 Hz
    id: ventilatie_output

fan:
  - platform: speed
    output: ventilatie_output
    name: "Ventilatie"
    id: fan_1

switch:
  - platform: gpio
    name: "Klep"
    pin: D6
    id: klep
    inverted: True

climate:
  - platform: thermostat
    name: "Thermostaat"
    sensor: Temp1
    min_cooling_off_time: 300s
    min_cooling_run_time: 300s
    min_fanning_off_time: 300s
    min_fanning_run_time: 300s
    min_heating_off_time: 300s
    min_heating_run_time: 300s
    min_fan_mode_switching_time: 0s
    min_idle_time: 30s
    cool_overrun: 1
    heat_overrun: 1
#Climate actions
    cool_action:
      - switch.turn_on: klep
      - fan.turn_on: fan_1
      - output.set_level:
          id: ventilatie_output
          level: 40%
    heat_action:
      - switch.turn_on: klep
      - delay: 180s
      - fan.turn_on: fan_1
      - output.set_level:
          id: ventilatie_output
          level: 40%
    off_mode:
      - switch.turn_off: klep
      - fan.turn_off: fan_1
    idle_action:
      - switch.turn_off: klep
      - delay: 180s
      - fan.turn_off: fan_1
    fan_only_action:
      - fan.turn_on: fan_1
      - switch.turn_off: klep
      - output.set_level:
          id: ventilatie_output
          level: 50%
#Ventilatie niveau's
    fan_mode_on_action:
      - fan.turn_on: fan_1
      - output.set_level:
          id: ventilatie_output
          level: 40%
    fan_mode_off_action:
      - fan.turn_off: fan_1
    fan_mode_low_action:
      - fan.turn_on: fan_1
      - output.set_level:
          id: ventilatie_output
          level: 20%
    fan_mode_medium_action:
      - fan.turn_on: fan_1
      - output.set_level:
          id: ventilatie_output
          level: 50%  
    fan_mode_high_action:
      - fan.turn_on: fan_1
      - output.set_level:
          id: ventilatie_output
          level: 100%
#Preset levels
    default_preset: Auto
    preset:
      - name: Auto
        default_target_temperature_low: 18 °C
        default_target_temperature_high: 24 °C
        fan_mode: LOW
        mode: HEAT_COOL
      - name: Eco
        default_target_temperature_low: 14 °C
        default_target_temperature_high: 26 °C
        fan_mode: LOW
        mode: HEAT_COOL
      - name: Sleep
        default_target_temperature_low: 13 °C
        default_target_temperature_high: 26 °C
        fan_mode: LOW
        mode: HEAT_COOL
      - name: Comfort
        default_target_temperature_low: 19 °C
        default_target_temperature_high: 24 °C
        fan_mode: MEDIUM
        mode: HEAT_COOL
      - name: Away
        default_target_temperature_low: 10 °C
        default_target_temperature_high: 30 °C
        fan_mode: 'OFF'
        mode: 'OFF'

captive_portal:
    

Now I can control the radiators from HA and have a direct response. It works super nice and I’m very happy with the result. My dashboard card’s are like this:


The top is from the Fibaro Motionsensors I have in the room.

3 Likes

Interesting! Would you be able to show how you connect the module to the Jaga DBH?

Sorry, missed your reply. I hooked it up to the 0-10v IO input on the board. Im my case the right side has all the room so there I put the module. 2 wires (24v and 0-10v) go behind the fans to the radiator controller.

There are multiple options how to control the fans and if you want the water temperature sensor working or not. I choose to do al the ‘thinking’ in home assistant so it’s running on full manual now. Works perfectly the past few weeks.


1 Like

Right, so you still need the original fan controller? I have a dbh controller without a fan control box, so i was hoping to connect it again by using your esphome solution

What do you mean? There is only one module in there. Or you just have the box with the fans?

In the last case you van also use it, sort of. Just switch the PWM to 0-10v module for a regular PWM tot the fans. I believe they are 3 pin fans right?

Hi Seyude

I’m interested by your setup using esp home to control Jaga Strada hybrid radiators.

Please could you share more pointers or details on the PCB and the overall process? I don’t know much about that but, theortically, I should have the skills to do that (computer engineer and did some Arduino stuff in my time) :slight_smile: I’m in Belgium too btw.

I am considering a similar setup for my home renovation with Java Strada Hybrid. An entrepreneur suggested these radiators.
And remote temperature control is mandatory for me. But unfortunately there is no API with Jaga DBH.

To confirm do you have the Strada Hybrid MM version? (Not sure if I should care)

Any feedback on their quality / performance would also be greatly appreciated!

Hi, sure, no problem. What do you wanna know about the PCB? Its a verry simple one, because I used already available pcbs on the one I created. The relay board for example, I desolderd the screw headers from them and connected it with thruhole pins to the board. Its more like a neat wire free sollution than a real PCB.

The radiators I have are the Strada Hybrid DBH. I think the whole Strada family is roughly the same and although there are some different modules from what I could find in the manuals, the concept os the same.

I have been using these radiators as ‘dumb’ standalone radiators with just a zwave valve and this worked ok. Only downside was that you have to manualy switch them from heating to cooling mode, or adjust the fanspeed on the little button interface. This did not match my smarthome standard offcourse. :stuck_out_tongue:

The quality of the radiators is pretty awesome. Solid and stylish. The only minor thing I noticed the sound of the waterflow true them. I have them in our bedrooms and when the are on at night you can hear them, aswell as the fans on the slowest speed. It’s not so much that it’s irritating, but is hearable.

The progres of making the PCB was also new for me, searched for a good and easy way to make and order it and went with EasyEDA, but I think there are other options also easy to learn. I used Tweakers.net for a little guidence.

Ask me anything if your missing something.

Yes that was the question for the PCB. So nothing extravagant. I’ll see then. Thanks!

Quick question, do you know if the fan can be totally stopped during the night to reduce the noise?

Yes, by default this was already possible based on temperature. Now with my module attached its also possible. When giving 0v output the fans turn off. In Home assistant this is a slider 0 to 100% fan speed.

1 Like

Very interesting! Thanks for sharing! I feel a project coming up for my DBH.
I found a Shelly plus dimmer 0-10V with 0-10 V Voltage control type: ‘Sinking’
I am carefull with hardware, my knowledge of electronics is limited, so I drop the question here. Can this dimmer be used to control the 0-10V input of my DHB?

I have successfully connected a Qubino ZMNHVD1 0-10V flush dimmer to the DBH board.

Controlled by Homeassistant, the DBH can be easily managed with the flush dimmer. By using the 0-10V input on the DBH, you will lose any connected DBH temperature sensor (supply water and room temp).

A side note: I spoke with a Jaga representative. He strongly advises against this, but I have heard no reason why he advises against this. The only reaction was that I illegally obtained the documentation about the 0-10V input.

Thats pretty random, because they advertise the option to use a BMS (building management system) or domotica to connect to the module. The documentation for this can be downloaded from there own site. There is also the option to use the default temp sensor alongside the 0-10v input. You need to turn the hardware dial on the board (sry, don’t know the name) to the the right position. Then you can for example set the fanspeed to 50% but only if the water temp is higher then the room, or inverted when set to cooling.

This can also be 1 option were 0-5v is 100-0% cooling speed and 5-10v 0-100% heating speed. Very cool radiators :sweat_smile:

@Seyude You are right, there are configuration modes possible with 0-10V or 0-5/5-10V with water temperature control. My mistake.

1 Like