ESP32 controlling Fan speed (PWM) of networking rack; Turns off when room is in use

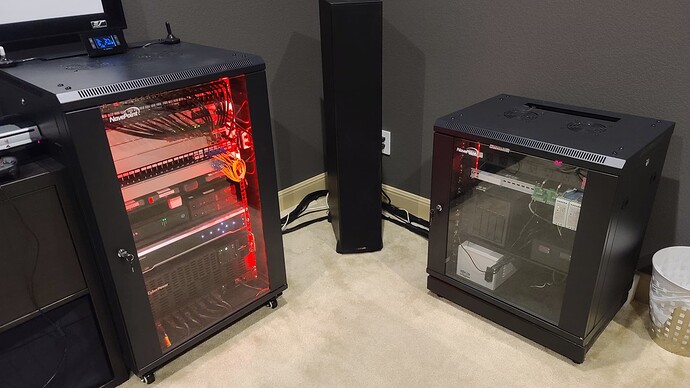
I have a couple networking racks in my Media Room. Each rack has 2 140mm fans that I would like to control. The idea is for the ESP32 to increase the speed of the fans based on the temperature inside the rack and thresholds I set. However, given the fans make noise, I want them to turn off when I am watching something in the Media Room.

esphome:
  name: rack-fan-controller

esp32:
  board: esp-wrover-kit
  #board: nodemcu-32s
  framework:
    type: arduino

# Enable logging
logger:

# Enable Home Assistant API
api:

ota:
  password: "xxxxxxxxx"

wifi:
  ssid: !secret wifi_ssid
  password: !secret wifi_password

  # Enable fallback hotspot (captive portal) in case wifi connection fails
  ap:
    ssid: "Rack-Fan-Controller"
    password: "xxxxxxxxx"

captive_portal:


#Enabling I2C on port 21 / 22 and 32 / 33
i2c:
  - id: bus_a
    sda: 21
    scl: 22
    scan: true
  - id: bus_b
    sda: 32
    scl: 33
    scan: true


sensor:
  - platform: bmp280
    i2c_id: bus_b
    address: 0x77
    temperature:
      name: "Network Rack Temperature"
      oversampling: 16x
    pressure:
      name: "Network Rack Pressure"
    update_interval: 30s
    
output:
  - platform: ledc
    pin: GPIO14
    frequency: 20000 Hz
    id: network_rack_exhaust_fan_pwm

fan:
  - platform: speed
    output: network_rack_exhaust_fan_pwm
    name: "Network Rack Exhaust Fan Speed"

It would appear that I need a script and lambda (not sure what this is yet).

Can someone help me get started? With the code above I am able to control the fans from within HA so I can already implement what I want with the exception of the ESP32 controlling the speed autonomously.

Current system controlling the fans. Works perfectly but it cannot be controlled by HA. I could just power it down when needed but that would be too simple and eliminate a reason to try ESPHome out!

EDIT: Don’t mind the pressure sensor. I just had a BMP280 at hand. I might replace the sensor with an 18D20 or something else. Suggestions welcome.

To trigger the fans from the temperature sensor you’d need to add an automation after the sensor entry

sensor:
  - platform: bmp280
    i2c_id: bus_b
    address: 0x77
    temperature:
      name: "Network Rack Temperature"
      oversampling: 16x
    on_value_range:
      above: 5
      below: 10
      then:
        - switch.turn_on: relay_1 ## or set speed of fan

    pressure:
      name: "Network Rack Pressure"
    update_interval: 30s

To note I believe 25khz is optimal for computer pwm fans. You’ll also need a logic level shifter to go from a 3.3v to 5v pwm or you wont get full speed from the fans.

1 Like

@Mikefila - Thank you for helping! I was planning on using 5V or 12V 140mm fans controlled via a Mosfet so I have more choice, but if I find a computer fan with the right specifications, then I can simplify the control unit quite a bit.

I have a few 4 wire fans and they require 12V so that means I will have to include a circuit to reduce the 12V from the power supply to 5V for the ESP32. However, I will not need to use the MOSFET power module, and just connect the PWM GPIO pin to the PWM input of the fans. Do you think I can load that pin with 2 fans?

As for the code, I was hoping to have the speed vary somewhat linearly with the temperature. The hotter the faster, but I can also do it in steps which I assume I can achieve by adding multiple “above: then:” sections.

Anyhow, right now I am just trying to figure out how to set the speed, but I keep getting the same error stating that mapping values are not allowed (it points to where I am trying to set the speed).

Below is one of the dozens of permutations I’ve tried…

It’s a bit annoying that I have to try to install each time for it to spit out an error. A Verify button would be so nice.

output:
  - platform: ledc
    pin: GPIO14
    frequency: 25000 Hz
    id: network_rack_exhaust_fan_pwm

fan:
  - platform: speed
    output: network_rack_exhaust_fan_pwm
    name: "Network Rack Exhaust Fan Speed"


sensor:
  - platform: bmp280
    i2c_id: bus_b
    address: 0x77
    temperature:
      name: "Network Rack Temperature"
      oversampling: 16x
    on_value_range:
    above: 26
      then:
      - output.turn_on: network_rack_exhaust_fan_pwm
      - output.set_level:
          id: network_rack_exhaust_fan_pwm
          level: '5'
    
    pressure:
      name: "Network Rack Pressure"
    update_interval: 30s

Even though the esp can be powered with 5v, it’s stepped down to 3.3v. The max out from the pin is ~3.3v, You will still need a logic level shifter and 1 will work for 2 fans.

There are speed_count settings, default is 1-100. To use multiple temps and different fan speeds on board you will need to use a lambda. This isn’t exact but something like this under the temp sensor

on_value:
  then:
    lambda: |-
      if ((id(my_temp).state >= 50) and (id((my_temp).state <= 60)) {
        auto call = id(my_fan).turn_on();
        call.set_speed(50);
        call.perform();}
      else if ((id(my_temp).state >= 61) and (id((my_temp).state <= 70)) {
        auto call = id(my_fan).turn_on();
        call.set_speed(100);
        call.perform();}
      else {
        logger.log: "temp out of range!";}

I used this and this to put this together.

1 Like

I have to go back and look at what I did but I believe I used a 74HCT14 Schmitt trigger chip for a PWM related application using an Arduino. Anyhow, the level shifting won’t be an issue but thank you for reminding me.

Thank you for the code. I am still unable to load it on the ESP32 because the code is complaining I am not giving it a temperature but rather a pointer. I have lots of learning to do…

I’ll post back when I make progress!

@Mikefila I believe the example you had kindly provided is meant to control a fan controlled by Home Assistant, right? In my project the fan is meant to be controlled primarily by the ESP32. I think I cobbled together code that works but I am unsure on how ideal it is…

I tried using 4 wire PWM fans but then remembered that those fans do not turn off at very low duty cycles, they actually speed up probably as a safety measure. The result would be that my fan would always run even when not needed, and that I would have to change the duty cycle between 30% and 100% to vary the speed.

I moved back to a MOSFET powering regular 12V fans and can now easily go from 0% to 100%. Or at least I think it is 100%… the signal going to the mosfet is not level shifted. I eliminated the level shifter as I was having issues (both incredible noise on the signal and it going on/off recursively). Turns out that the noise it the fan’s fault (if I power the fan down the noise on the PWM square wave goes away) and the on/off was caused by me always turning on the PWM output before setting the duty cycle. The documentation says you need to turn it on but I removed it completely and it still works so something else must be taking care of that…

Based on LEDC docs it would appear that I need to lower my PWM frequency in order to be able to vary the PWM down to 5% steps. This may be unnecessary but I don’t want the changes to be distinguishable audibly so on the low end I start slow 0%, 5%, 10% and may need to tweak it further once I pick the fans and test it in the cabinet.

If 100 is 100 steps (8 bits good enough), and 100.X is 1000 steps (12 bits good enaough), then 100.XX is 10,000 steps which would require me to lower the PWM to 4882Hz to get 14 bits (16384 steps). Is that how I calculate it?

esphome:
  name: rack-fan-controller

esp32:
  board: esp-wrover-kit
  #board: nodemcu-32s
  framework:
    type: arduino

# Enable logging
logger:

# Enable Home Assistant API
api:

ota:
  password: "xxxxx"

wifi:
  ssid: !secret wifi_ssid
  password: !secret wifi_password

  # Enable fallback hotspot (captive portal) in case wifi connection fails
  ap:
    ssid: "Rack-Fan-Controller"
    password: "xxxxx"

captive_portal:


#AMR: Enabling I2C on port 21 (I2C SDA) and 22 (I2C SCL)
i2c:
  - id: bus_b
    sda: 32
    scl: 33
    scan: true


output:
  - platform: ledc
    pin: GPIO14
    frequency: 25000 Hz
    id: fan_pwm

fan:
  - platform: speed
    output: fan_pwm
    name: "Network Rack Exhaust Fan Speed"


sensor:
  - platform: bmp280
    i2c_id: bus_b
    address: 0x77
    temperature:
      name: "Network Rack Temperature"
      id: rack_temp
      oversampling: 16x
      on_value:
        then:
          lambda: |-
            if (id(rack_temp).state < 23.0) {
                id(fan_pwm).set_level(0.00);
                ESP_LOGD("PWM", "PWM: 0%");
            }
            else if ((id(rack_temp).state >= 23.0) and (id(rack_temp).state <= 24.0)) {
                id(fan_pwm).set_level(0.05);
                ESP_LOGD("PWM", "PWM: 5%");
            }
            else if ((id(rack_temp).state > 24.0) and (id(rack_temp).state <= 25.0)) {
                id(fan_pwm).set_level(0.1);
                ESP_LOGD("PWM", "PWM: 10%");
            }
            else if ((id(rack_temp).state > 25.0) and (id(rack_temp).state <= 26.0)) {
                id(fan_pwm).set_level(0.2);
                ESP_LOGD("PWM", "PWM: 20%");
            }
            else if ((id(rack_temp).state > 26.0) and (id(rack_temp).state <= 27.0)) {
                id(fan_pwm).set_level(0.3);
                ESP_LOGD("PWM", "PWM: 30%");
            }
            else if ((id(rack_temp).state > 27.0) and (id(rack_temp).state <= 28.0)) {
                id(fan_pwm).set_level(0.4);
                ESP_LOGD("PWM", "PWM: 40%");
            }
            else if ((id(rack_temp).state > 28.0) and (id(rack_temp).state <= 29.0)) {
                id(fan_pwm).set_level(0.5);
                ESP_LOGD("PWM", "PWM: 50%");
            }
            else if ((id(rack_temp).state > 29.0) and (id(rack_temp).state <= 30.0)) {
                id(fan_pwm).set_level(0.6);
                ESP_LOGD("PWM", "PWM: 60%");
            }
            else if ((id(rack_temp).state > 30.0) and (id(rack_temp).state <= 32.0)) {
                id(fan_pwm).set_level(0.7);
                ESP_LOGD("PWM", "PWM: 70%");
            }
            else if ((id(rack_temp).state > 32.0) and (id(rack_temp).state <= 35.0)) {
                id(fan_pwm).set_level(0.8);
                ESP_LOGD("PWM", "PWM: 80%");
            }
            else {
                id(fan_pwm).set_level(1.0);
                ESP_LOGD("ALERT", "OVER 35C! Setting fan to 100%");
            }
            
    update_interval: 2s

Next steps:

  1. how do I pass the fan speed (PWM) back to Home Assistant only when it changes to reduce the frequency (not every 2s)?
  2. How do I disable the fan from Home Assistant so that I can turn it off when the media room is in use?

Not asking you to do the work for me :slight_smile: Just a mental note of my next steps. …and who knows, this may help others.

EDIT: The debugging log entry I make has a hardcoded PWM percentage as when I tried to pass the fan_pwm value using id(fan_pwm).state or without the id function it either did not work or all I got was a fixed 1.6xxxx value. It would make more sense for me to have that log entry somewhere else in the loop and without hardcoding the % so I can simply have 1 call to ESP_LOGD.

EDIT2: Nevermind… the lowest I could go was 19531 for the PWM frequency otherwise I get a terrible whine from the fans.
The fan component will give you a fan entity in HA called “Network Rack Exhaust Fan Speed” if you select the entity in lovelace you will see a slider that allows you to adjust the speed. Since you use the api: it only updates on state change.

The code was something I cobbled together, it was meant for on board the esp. I just wanted to give you an idea of the if structure. I think that the pwm output is tied now to the fan. The code from the fan page is the way to call speed.

// Turn the fan on and set the speed, oscillating, and direction
auto call = id(my_fan).turn_on();
call.set_speed(2);
call.set_oscillating(true);
call.set_direction(FanDirection::FAN_DIRECTION_REVERSE);
call.perform();

1-100 is just the default that divides the pwm signal, how it handles how many steps each percentage, idk :man_shrugging: You can set it to 4 and it will split the signal level into quarters.

I run several noctua’s and their behavior is as follows. They are supposed to shut off at zero volts, they don’t for me. There is a setting under output zero_means_zero even with it enabled it still runs, slowly. However the absence of anything attached to the pwm input, runs it full speed.

The turn on/off from ha will require a condition be added the esp automation. Something like this I use for a loop

globals: ##to set default reboot behavior
## loop on/off    
  - id: enable_loop
    type: bool
    restore_value: no
    initial_value: "true"
binary sensor: #pull in HA value
## loop on/off    
  - platform: homeassistant
    id: loop_bool
    internal: true
    entity_id: input_boolean.enable_loop
    on_state:
      - globals.set:
          id: enable_loop
          value: !lambda 'return id(loop_bool).state;'
 
##binary sensor for condition
  - platform: template
    name: "Loop template"
    id: loop_template
    lambda: |-
      if (id(enable_loop)) {
        return true;
      } else {
        return false;
      }

Add right before fan lambda call

      - while:
          condition:
            binary_sensor.is_on: loop_template

Finally the fan on/off. I have the 12v power run through relay for the on and off. In the fan I add the turn on/off action

fan:
  - platform: speed # or any other platform
    # ...
    on_turn_on:
    - switch.turn_on: relay
    on_turn_off:
    - switch.turn_off: relay

If you are using a PWM fan then the fact it doesn’t stop at 0% duty cycle is likely per design based on what I found researching PWM fans for a previous project. The fans I tested with the ESP32 still spun at 0% and up to about 20-30% the speed did not change. After 20-30% and up to 100% it acted normally. I looked up a random Noctua PWM fan and it said min speed was 450 RPM at 20% PWM. It did not say whether it stayed at 450 rpm with duty cycles from 0 to 20 but I would not be surprised if it did.

Thanks for sharing all that code. I have some work to do to figure it out and implement it in my project. As for the switch and slider, I already have it as is, but the ESP 32 overrides the speed I set in HA, and when it does, it does not update the slider in HA (as I believe you stated above). I’ll try your code to see if I can figure it out. Thanks!

Here I show the system installed:

1 Like