Earlier, I raised the question of how to create my own custom model and I finally figured it out. And since there is no normal and simple instruction, I decided to do it. How do I create my own custom model for recognizing something? This can be recognition of what a person is doing, laughing, riding a bike, lying down, running, a courier has arrived, and so on.
Photos taken from here
What do people do?
Fighting

Running

Eating

Brief video tutorial on creating your own recognition model. It will not be easy to understand it right away, so I will do it step by step and in the screenshots
For a visual understanding, I will show by my example how I have set up a custom DeepStack model in Synology

The path to the custom model is specified by your docker/Deepstack/custom models/ /modelstore/detection


Add 4 lines and set True
VISION-FACE - face recognition
VISION-DETECTION - object recognition
VISION-SCENE - scene recognition
MODELSTORE-DETECTION - recognition of user models

Let’s check if there is a modelstore folder and a detection subfolder, if there are none, then you need to create one. Open the terminal of our DeepStack_Server container, click on “Create”, then the “bash” button will appear and enter the command in the console. That’s why I use MC and installed MC with the apt install mc command. You can simply create folders with the command
$ mkdir /modelstore/detection

This is how the modelstore folder and the detection subfolder should look like, where our custom models for recognition will be located

This is how access from samba will look like

The log should display our custom models uploaded to the folder. You need to load it when the container is turned off

This completes the configuration of the DeepStack server container.
Putting the integration HASS Deepstack object and in the config we add the line custom_model
image_processing:
  - platform: deepstack_object
    ip_address: #we specify the IP address of the deepstack server
    port: #specifying the port of the deep stack server
    custom_model: courier  #here we specify the name of our custom model
    confidence: 60
    save_file_folder: /config/www/deepstack/snapshots/
    save_timestamped_file: True
    always_save_latest_file: True
    source:
      - entity_id: camera.eufy_camera
        name: detect_object_eufy_camera
    targets:
      - target: person
        confidence: 60
      - target: animal
        confidence: 50
      - target: other
        confidence: 50
This is how user model recognition looks like


Creating our own custom model
-
Download the labeling program from here. The labeling program instructions can be read here
-
We create two folders test and train, they can be anywhere, it is important that they are in one place

-
Open the program and select the train folder with the images that we will work with. Next, we select the objects we need and assign them names.


Before moving on to the next image, you need to save it, and then move on to the next picture

-
After each save, text files with exactly the same name as the graphic file will be created
-
After you have processed the image and everything is saved in the train folder, copy all the contents to the test folder. We will have the same files in two folders
-
We make an archive file of two folders and call it whatever you like, for example mask-dataset.zip

-
Now we need to run this whole thing either in Training on Google Colab with Free GPUS, or raise your server according to this instructions. I collected through Training on Google Colab with Free GPUS
-
Click on the “Folder” icon
-
Let’s upload our archive file mask-dataset.zip

-
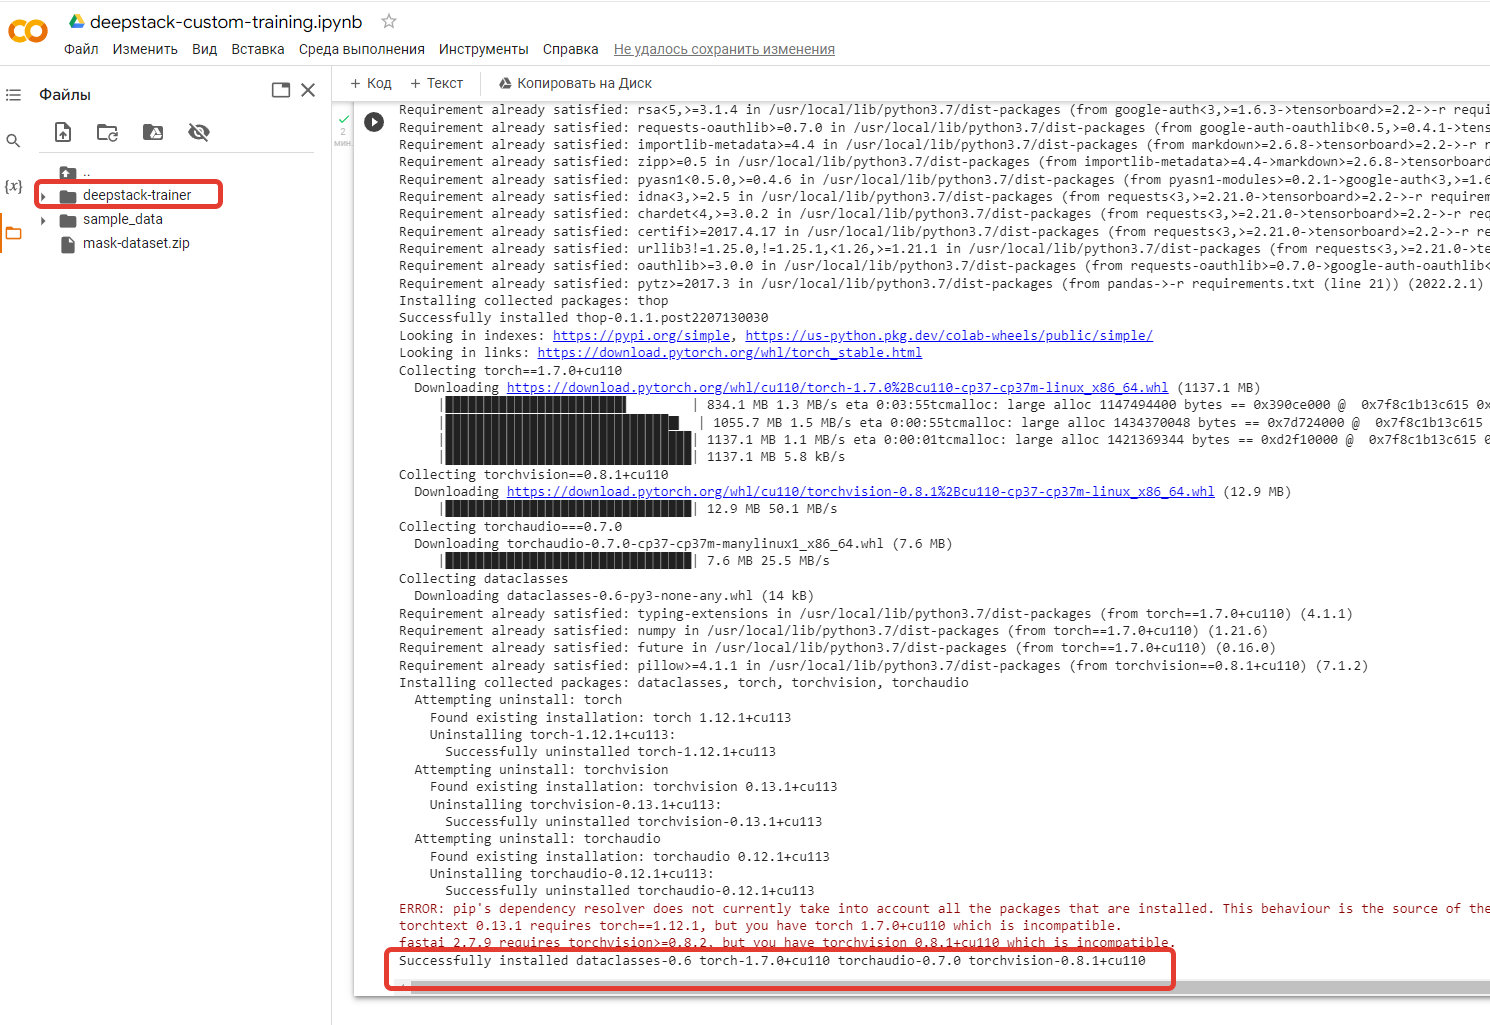
Let’s start the installation of DeepStack Trainer by clicking on the button, then click on “Run” and wait for the installation of DeepStack Trainer to end
-
After successful installation of DeepStack Trainer, the deepstack-trainer folder will appear
-
Unzip our mask-dataset file.zip to the /content folder with the command
!unzip /content/mask-dataset.zip -d /content/mask-dataset
-
We start the training and wait for the full completion of the process, it may take a long time to wait
!python3 train.py --dataset-path "/content/mask-dataset"


The process was successful, we are waiting further until Epoch 299/299

This is how the completed process looks like, after which we download the finished file to ourselves and name it as you like. I called him courier.pt . After that, we stop the DeepStack container and throw this file courier.pt to the /modelstore/detection folder


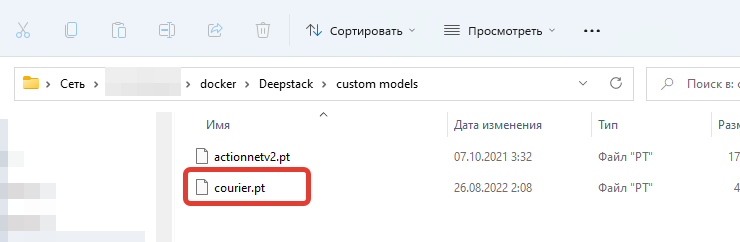
We launch the container and a custom recognition model starts working for us. That’s it.
Текст на русском (Text in Russian)
Ранее поднимался мною вопрос как создать свою пользовательскую модель и я наконец-то разобрался в этом. А так как нет нормальной и простой инструкции, то я решил это сделать. Как создать свою пользовательскую модель для распознавания чего либо? Это может быть распознавание что делает человек, смеется, едет на велосипеде, лежит, бежит, пришел курьер и так далее.
Фото взяты от сюда
https://github.com/OlafenwaMoses/Action-Net
Что делают люди?
Дерутся
Бегают
Едят
Краткая видеоинструкция по созданию своей модели распознавания. Ее понять сразу будет не просто, поэтому я сделаю пошагово и на скриншотах
Для наглядного понимания я покажу на своем примере, как у меня настроена пользовательская модель DeepStack в Synology
Путь к пользовательской модели указан свой docker/Deepstack/custom models/ /modelstore/detection
Добавляем 4 строки и ставим True
VISION-FACE - распознавание лиц
VISION-DETECTION - распознавание объектов
VISION-SCENE - распознавание сцен
MODELSTORE-DETECTION - распознавание пользовательских моделей
Проверим есть ли папка modelstore и подпапка detection, если их нет, то нужно создать. Открываем терминал нашего контейнера DeepStack_Server, нажимаем на “Создать”, далее появится кнопка “bash” и в консоли вводим команду. Я использую MC поэтому и установил MC командой apt install mc. Можете просто создать папки командой
$ mkdir /modelstore/detection
Вот так должна выглядеть папка modelstore и подпапка detection, где будут лежать наши пользовательские модели для распознавания
Так будет выглядеть доступ с samba
В журнале должны отобразиться загруженные в папку наши пользовательские модели. Загружать нужно при выключенном контейнере
На этом настройка контейнера DeepStack server закончена.
Ставим интеграцию HASS Deepstack object и в конфиге добавляем строчку custom_model
image_processing:
  - platform: deepstack_object
    ip_address: #указываем IP адрес сервера deepstack
    port: #указываем порт сервера deepstack
    custom_model: courier  #тут указываем название своей пользовательской модели
    confidence: 60
    save_file_folder: /config/www/deepstack/snapshots/
    save_timestamped_file: True
    always_save_latest_file: True
    source:
      - entity_id: camera.eufy_camera
        name: detect_object_eufy_camera
    targets:
      - target: person
        confidence: 60
      - target: animal
        confidence: 50
      - target: other
        confidence: 50
Так выглядит распознавание пользовательской модели
Создаем свою пользовательскую модель
-
Скачиваем программу labelImg отсюда. Инструкцию по программе labelImg можно прочитать здесь
-
Создаем две папки test и train, они могут находиться где угодно, важно, чтобы они были в одном месте
-
Открываем программу и выбираем папку train с изображениями, с которыми будем работать. Далее выделяем нужные нам объекты и присваиваем им названия.
Перед тем, как перейти к следующему изображению, нужно сохранить, а после переходим к следующей картинке
-
После каждого сохранения будут создаваться текстовые файлики с точно таким же именем как и графический файл
-
После того, как вы обработали изображение и все сохранилось в папке train, скопируем все содержимое в папку test. У нас будут одинаковые файлы в двух папках
-
Делаем архивный файл двух папок и называем как угодно, например mask-dataset.zip
-
Теперь нам нужно все это дело прогнать либо в Training on Google Colab with Free GPUS, либо поднимаете свой сервер по этой инструкции. Я собирал через Training on Google Colab with Free GPUS
-
Нажимаем на иконку “Папка”
-
Загрузим наш архивный файл mask-dataset.zip
-
Запустим установку DeepStack Trainer, кликнув на кнопку, далее нажимаем на “Выполнить” и ждем когда закончится установка DeepStack Trainer
-
После успешной установки DeepStack Trainer появится папка deepstack-trainer
-
Разархивируем наш файлик mask-dataset.zip в папку /content командой
!unzip /content/mask-dataset.zip -d /content/mask-dataset
-
Запускаем обучение и ждем полного окончания процесса, ждать может придется долго
!python3 train.py --dataset-path "/content/mask-dataset"
Процесс пошел успешно, ждем дальше пока не будет Epoch 299/299
Вот так выглядит завершенный процесс, после чего скачиваем готовый файлик к себе и именуем как угодно. Я назвал его courier.pt. После чего останавливаем контейнер DeepStack и закидываем этот файлик courier.pt в папку /modelstore/detection
Запускаем контейнер и у нас начинает работать пользовательская модель распознавания. На этом все.