What file needs to be edited for add this?
this automation on save say

what’s the problem?
New feature in v4.6 which may improve accuracy if you are using a ROI:
1 Like
Please help, about 3 out of my 5 camera entities work fine, but when trying to add the other two when setting up automation (frigate motion - image recognition service call) I can’t select the other two entities, they aren’t in the little target entity drop down box, when I manually type them out, nothing happens…
they’re all set up in the configuration file etc.
I keep getting this when trying to manually enter the entity…
Unable to find referenced entities image_processing.deepstack_object_garage or it is/they are currently not available
EDIT:
Fixed it, it seems if you don’t append the entity_id: entries direction under source: the UI will start freaking out on you eventually.
 save_file_folder: /config/snapshots/
    save_file_format: png
    save_timestamped_file: True
    always_save_latest_file: True
    scale: 0.75
    # roi_x_min: 0.35
    roi_x_max: 0.8
    #roi_y_min: 0.4
    roi_y_max: 0.8
    crop_to_roi: True
    targets:
      - target: person
        confidence: 60
    source:
      - entity_id: camera.garage
      - entity_id: camera.deck
      - entity_id: camera.porch
      - entity_id: camera.woonsteleen
      - entity_id: camera.woonsteltwee
Earlier, I raised the question of how to create my own custom model and I finally figured it out. And since there is no normal and simple instruction, I decided to do it. How do I create my own custom model for recognizing something? This can be recognition of what a person is doing, laughing, riding a bike, lying down, running, a courier has arrived, and so on.
Photos taken from here
What do people do?
Fighting

Running

Eating

Brief video tutorial on creating your own recognition model. It will not be easy to understand it right away, so I will do it step by step and in the screenshots
For a visual understanding, I will show by my example how I have set up a custom DeepStack model in Synology

The path to the custom model is specified by your docker/Deepstack/custom models/ /modelstore/detection


Add 4 lines and set True
VISION-FACE - face recognition
VISION-DETECTION - object recognition
VISION-SCENE - scene recognition
MODELSTORE-DETECTION - recognition of user models

Let’s check if there is a modelstore folder and a detection subfolder, if there are none, then you need to create one. Open the terminal of our DeepStack_Server container, click on “Create”, then the “bash” button will appear and enter the command in the console. That’s why I use MC and installed MC with the apt install mc command. You can simply create folders with the command
$ mkdir /modelstore/detection

This is how the modelstore folder and the detection subfolder should look like, where our custom models for recognition will be located

This is how access from samba will look like

The log should display our custom models uploaded to the folder. You need to load it when the container is turned off

This completes the configuration of the DeepStack server container.
Putting the integration HASS Deepstack object and in the config we add the line custom_model
image_processing:
  - platform: deepstack_object
    ip_address: #we specify the IP address of the deepstack server
    port: #specifying the port of the deep stack server
    custom_model: courier  #here we specify the name of our custom model
    confidence: 60
    save_file_folder: /config/www/deepstack/snapshots/
    save_timestamped_file: True
    always_save_latest_file: True
    source:
      - entity_id: camera.eufy_camera
        name: detect_object_eufy_camera
    targets:
      - target: person
        confidence: 60
      - target: animal
        confidence: 50
      - target: other
        confidence: 50
This is how user model recognition looks like


Creating our own custom model
-
Download the labeling program from here. The labeling program instructions can be read here
-
We create two folders test and train, they can be anywhere, it is important that they are in one place

-
Open the program and select the train folder with the images that we will work with. Next, we select the objects we need and assign them names.


Before moving on to the next image, you need to save it, and then move on to the next picture

-
After each save, text files with exactly the same name as the graphic file will be created
-
After you have processed the image and everything is saved in the train folder, copy all the contents to the test folder. We will have the same files in two folders
-
We make an archive file of two folders and call it whatever you like, for example mask-dataset.zip

-
Now we need to run this whole thing either in Training on Google Colab with Free GPUS, or raise your server according to this instructions. I collected through Training on Google Colab with Free GPUS
-
Click on the “Folder” icon
-
Let’s upload our archive file mask-dataset.zip

-
Let’s start the installation of DeepStack Trainer by clicking on the button, then click on “Run” and wait for the installation of DeepStack Trainer to end
-
After successful installation of DeepStack Trainer, the deepstack-trainer folder will appear
-
Unzip our mask-dataset file.zip to the /content folder with the command
!unzip /content/mask-dataset.zip -d /content/mask-dataset
-
We start the training and wait for the full completion of the process, it may take a long time to wait
!python3 train.py --dataset-path "/content/mask-dataset"


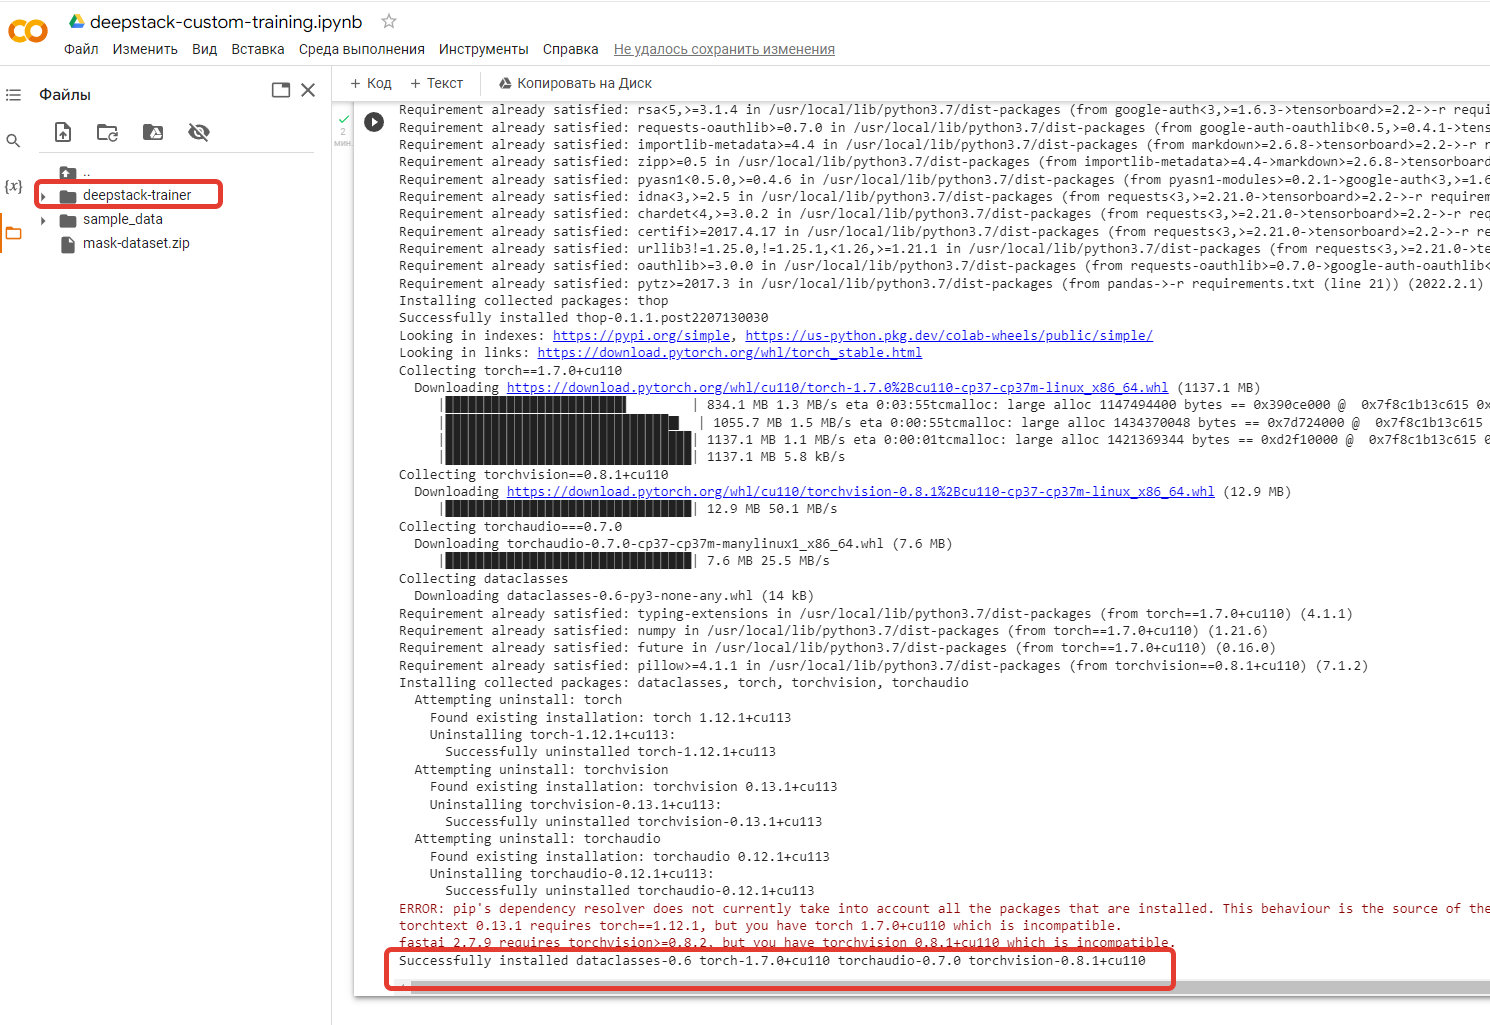


The process was successful, we are waiting further until Epoch 299/299

This is how the completed process looks like, after which we download the finished file to ourselves and name it as you like. I called him courier.pt . After that, we stop the DeepStack container and throw this file courier.pt to the /modelstore/detection folder


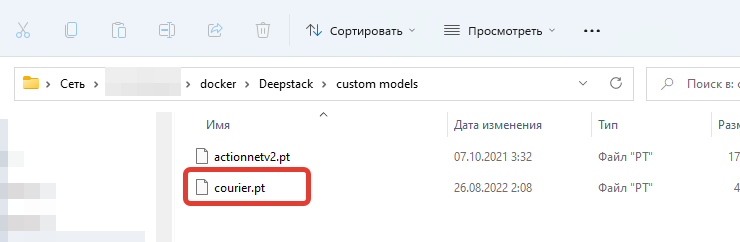
We launch the container and a custom recognition model starts working for us. That’s it.
Текст на русском (Text in Russian)
Ранее поднимался мною вопрос как создать свою пользовательскую модель и я наконец-то разобрался в этом. А так как нет нормальной и простой инструкции, то я решил это сделать. Как создать свою пользовательскую модель для распознавания чего либо? Это может быть распознавание что делает человек, смеется, едет на велосипеде, лежит, бежит, пришел курьер и так далее.
Фото взяты от сюда
https://github.com/OlafenwaMoses/Action-Net
Что делают люди?
Дерутся
Бегают
Едят
Краткая видеоинструкция по созданию своей модели распознавания. Ее понять сразу будет не просто, поэтому я сделаю пошагово и на скриншотах
Для наглядного понимания я покажу на своем примере, как у меня настроена пользовательская модель DeepStack в Synology
Путь к пользовательской модели указан свой docker/Deepstack/custom models/ /modelstore/detection
Добавляем 4 строки и ставим True
VISION-FACE - распознавание лиц
VISION-DETECTION - распознавание объектов
VISION-SCENE - распознавание сцен
MODELSTORE-DETECTION - распознавание пользовательских моделей
Проверим есть ли папка modelstore и подпапка detection, если их нет, то нужно создать. Открываем терминал нашего контейнера DeepStack_Server, нажимаем на “Создать”, далее появится кнопка “bash” и в консоли вводим команду. Я использую MC поэтому и установил MC командой apt install mc. Можете просто создать папки командой
$ mkdir /modelstore/detection
Вот так должна выглядеть папка modelstore и подпапка detection, где будут лежать наши пользовательские модели для распознавания
Так будет выглядеть доступ с samba
В журнале должны отобразиться загруженные в папку наши пользовательские модели. Загружать нужно при выключенном контейнере
На этом настройка контейнера DeepStack server закончена.
Ставим интеграцию HASS Deepstack object и в конфиге добавляем строчку custom_model
image_processing:
  - platform: deepstack_object
    ip_address: #указываем IP адрес сервера deepstack
    port: #указываем порт сервера deepstack
    custom_model: courier  #тут указываем название своей пользовательской модели
    confidence: 60
    save_file_folder: /config/www/deepstack/snapshots/
    save_timestamped_file: True
    always_save_latest_file: True
    source:
      - entity_id: camera.eufy_camera
        name: detect_object_eufy_camera
    targets:
      - target: person
        confidence: 60
      - target: animal
        confidence: 50
      - target: other
        confidence: 50
Так выглядит распознавание пользовательской модели
Создаем свою пользовательскую модель
-
Скачиваем программу labelImg отсюда. Инструкцию по программе labelImg можно прочитать здесь
-
Создаем две папки test и train, они могут находиться где угодно, важно, чтобы они были в одном месте
-
Открываем программу и выбираем папку train с изображениями, с которыми будем работать. Далее выделяем нужные нам объекты и присваиваем им названия.
Перед тем, как перейти к следующему изображению, нужно сохранить, а после переходим к следующей картинке
-
После каждого сохранения будут создаваться текстовые файлики с точно таким же именем как и графический файл
-
После того, как вы обработали изображение и все сохранилось в папке train, скопируем все содержимое в папку test. У нас будут одинаковые файлы в двух папках
-
Делаем архивный файл двух папок и называем как угодно, например mask-dataset.zip
-
Теперь нам нужно все это дело прогнать либо в Training on Google Colab with Free GPUS, либо поднимаете свой сервер по этой инструкции. Я собирал через Training on Google Colab with Free GPUS
-
Нажимаем на иконку “Папка”
-
Загрузим наш архивный файл mask-dataset.zip
-
Запустим установку DeepStack Trainer, кликнув на кнопку, далее нажимаем на “Выполнить” и ждем когда закончится установка DeepStack Trainer
-
После успешной установки DeepStack Trainer появится папка deepstack-trainer
-
Разархивируем наш файлик mask-dataset.zip в папку /content командой
!unzip /content/mask-dataset.zip -d /content/mask-dataset
-
Запускаем обучение и ждем полного окончания процесса, ждать может придется долго
!python3 train.py --dataset-path "/content/mask-dataset"
Процесс пошел успешно, ждем дальше пока не будет Epoch 299/299
Вот так выглядит завершенный процесс, после чего скачиваем готовый файлик к себе и именуем как угодно. Я назвал его courier.pt. После чего останавливаем контейнер DeepStack и закидываем этот файлик courier.pt в папку /modelstore/detection
Запускаем контейнер и у нас начинает работать пользовательская модель распознавания. На этом все.
3 Likes
This needs to be added to your config.yaml file
Please tell me how to set it up so that the drawdown is only if the accuracy of the determination is around 80%. And so that it does not work if below.
@gekagal I assume you mean recognition confidence? If I understood you correctly, then I implemented it like this. If the confidence is higher than I indicated, then the name is displayed in the sensor
I created an auxiliary element input_number.deepstack_confidence_face for confidence and can change the confidence level directly in the GUI without making edits in the code
A sensor that displays the name based on the set value for confidence and has more attributes. If the identified name is below the specified confidence, it will be unknown, if higher, it will show the name. This sensor can be used in automation
sensor:
  - platform: template
    sensors:
      persons_names_hall:
        friendly_name: 'Names of identified persons'
        icon_template: mdi:face-recognition
        value_template: >
          {% set detect_face = state_attr('image_processing.detect_face_eufy_camera','faces') | selectattr('faces','!=','name')| map(attribute='name') | join(', ') %} #specify your sensor
          {% set confidence_face = state_attr('image_processing.detect_face_eufy_camera','faces') | selectattr('faces','!=','confidence')| map(attribute='confidence') | join(', ') %} #specify your sensor
          {% set set_confidence = states('input_number.deepstack_confidence_face')%} #specifying our auxiliary element input_number
          {% if detect_face and confidence_face >= set_confidence %}
          {{ state_attr('image_processing.detect_face_eufy_camera','faces') | selectattr('faces','!=','name')| map(attribute='name') | join(', ') }} #specify your sensor
          {% elif detect_face and confidence_face <= set_confidence %} unknown
          {% endif %}
        attribute_templates:
          faces: "{{ state_attr('image_processing.detect_face_eufy_camera','faces') }}" #specify your sensor
          total_faces: "{{ state_attr('image_processing.detect_face_eufy_camera','total_faces') }}" #specify your sensor
          total_matched_faces: "{{ state_attr('image_processing.detect_face_eufy_camera','total_matched_faces') }}" #specify your sensor
          matched_faces: "{{ state_attr('image_processing.detect_face_eufy_camera','matched_faces') }}" #specify your sensor
          last_detection: "{{ state_attr('image_processing.detect_face_eufy_camera','last_detection') }}" #specify your sensor
          friendly_name: "{{ state_attr('image_processing.detect_face_eufy_camera','friendly_name') }}" #specify your sensor
          device_class: "{{ state_attr('image_processing.detect_face_eufy_camera','device_class') }}" #specify your sensor
And also made a sensor that shows your own or someone else’s. In the whitelist list, we specify the names of our household members and if there are only our own names in the list when determining, it will be determined as our own, and if there is unknown among the identified names in the list, then there will be someone else’s. For example, there are 3 people in front of the camera, if the sensor showed the names: Angela, Peter, Boris, then these are their own, and if there is Angela, Peter, unknown, then it will show that there is someone else
  - platform: template
    sensors:
      identified_person_owner_of_the_house_hall:
        friendly_name: 'Is the identified person the owner of the house?'
        icon_template: mdi:face-recognition
        value_template: >
            {% set persons = "sensor.persons_names_hall" %} #specify your sensor
            {% set detect_face = states("image_processing.detect_face_eufy_camera") %} #specify your sensor
            {% set whitelist = ["Angela", "Peter", "Boris"]|join('|') %} #we indicate the names of our household
            {% set blacklist = ['unknown']|join('|') %} #leave it as it is
            {% set authorized_persons = states("sensor.persons_names_hall")|string is search(find=whitelist, ignorecase=True) %} #specify your sensor
            {% set unauthorized_persons = states("sensor.persons_names_hall")|string is search(find=blacklist, ignorecase=True) %} #specify your sensor
            {% if detect_face != "unknown" and authorized_persons == True and unauthorized_persons == False %} All your own
            {% elif detect_face != "unknown" and authorized_persons == True and unauthorized_persons == True %} There is someone else's face
            {% elif detect_face == "unknown" %} off
            {% endif %}
Текст на русском (Text in Russian)
Предполагаю, что вы имеете ввиду уверенность распознавания? Если я верно вас понял, то я реализовал вот так. Если уверенность выше, чем я указал, то в сенсоре отображается имя
Я создал вспомогательный элемент input_number.deepstack_confidence_face для уверенности и могу изменить уровень уверенности прямо в GUI не внося правки в коде
Сенсор, который отображает имя исходя выставленному значению для уверенности и имеет еще атрибуты. Если опознанное имя будет ниже указанной уверенности, то будет неизвестно, если выше, то покажет имя. Этот сенсор можно использовать в автоматизации
sensor:
  - platform: template
    sensors:
      persons_names_hall:
        friendly_name: 'Коридор: Имена идентифицированных лиц'
        icon_template: mdi:face-recognition
        value_template: >
          {% set detect_face = state_attr('image_processing.detect_face_eufy_camera','faces') | selectattr('faces','!=','name')| map(attribute='name') | join(', ') %} #указываем свой сенсор
          {% set confidence_face = state_attr('image_processing.detect_face_eufy_camera','faces') | selectattr('faces','!=','confidence')| map(attribute='confidence') | join(', ') %} #указываем свой сенсор
          {% set set_confidence = states('input_number.deepstack_confidence_face')%} #указываем свой вспомогательный элемент input_number
          {% if detect_face and confidence_face >= set_confidence %}
          {{ state_attr('image_processing.detect_face_eufy_camera','faces') | selectattr('faces','!=','name')| map(attribute='name') | join(', ') }}#указываем свой сенсор
          {% elif detect_face and confidence_face <= set_confidence %} unknown
          {% endif %}
        attribute_templates:
          faces: "{{ state_attr('image_processing.detect_face_eufy_camera','faces') }}" #указываем свой сенсор
          total_faces: "{{ state_attr('image_processing.detect_face_eufy_camera','total_faces') }}"#указываем свой сенсор
          total_matched_faces: "{{ state_attr('image_processing.detect_face_eufy_camera','total_matched_faces') }}" #указываем свой сенсор
          matched_faces: "{{ state_attr('image_processing.detect_face_eufy_camera','matched_faces') }}" #указываем свой сенсор
          last_detection: "{{ state_attr('image_processing.detect_face_eufy_camera','last_detection') }}" #указываем свой сенсор
          friendly_name: "{{ state_attr('image_processing.detect_face_eufy_camera','friendly_name') }}" #указываем свой сенсор
          device_class: "{{ state_attr('image_processing.detect_face_eufy_camera','device_class') }}" #указываем свой сенсор
А также сделал сенсор, который показывает свой или чужой. В списке whitelist указываем имена своих домочадцев и если при определении в списке будут только свои имена, то будет определено как свои, а если в списке будет unknown среди опознанных имен, то будет отображать есть чужой. Например перед камерой находятся 3 человека, если сенсор показал имена: Ольга, Петр, Борис, значит это свои, а если будет Ольга, Борис, unknown, значит покажет, что есть чужой
  - platform: template
    sensors:
      identified_person_owner_of_the_house_hall:
        friendly_name: 'Коридор: Опознанное лицо является ли хозяином дома?'
        icon_template: mdi:face-recognition
        value_template: >
            {% set persons = "sensor.persons_names_hall" %} #указываем свой сенсор
            {% set detect_face = states("image_processing.detect_face_eufy_camera") %} #указываем свой сенсор
            {% set whitelist = ["Ольга", "Петр", "Борис", "Маша"]|join('|') %} #указываем имена своих домочадцев
            {% set blacklist = ['unknown']|join('|') %} #оставляем как есть
            {% set authorized_persons = states("sensor.persons_names_hall")|string is search(find=whitelist, ignorecase=True) %} #указываем свой сенсор
            {% set unauthorized_persons = states("sensor.persons_names_hall")|string is search(find=blacklist, ignorecase=True) %} #указываем свой сенсор
            {% if detect_face != "unknown" and authorized_persons == True and unauthorized_persons == False %} Все свои
            {% elif detect_face != "unknown" and authorized_persons == True and unauthorized_persons == True %} Есть чужое лицо
            {% elif detect_face == "unknown" %} off
            {% endif %}
1 Like
Yes, you got it right, thank you very much. I’m really not very good at this yet, but I’m learning) And having your codes, I will try to do something with it.
auxiliary element input_number.deepstack_confidence_face - is this the sensor whose code is below?
And do I understand correctly that what is highlighted in red in your code is what I should replace with my data?
Not everything needs to be changed, which is highlighted in red. Red highlights the site itself, not me. I have now added comments in the code. They are visible in the very edge. Where I wrote #we specify our sensor or #we specify the names of our household or #we specify our auxiliary element input_number, there we change the sensor to our own. For example, we change this
image_processing.detect_face_beauty_camera to our own.
1 Like
Thanks, it’s more clear to me now. But I will also ask you to explain how to create - auxiliary element input_number.deepstack_confidence_face.
There are two options, it’s via GUI or via yaml
-
Via GUI: Setup => Devices and Services => Auxiliary tab => Click on the create Auxiliary element button => Select “Number”
-
Via yaml Input Number - Home Assistant
1 Like
Hi,
I’m not sure this is the right place to ask this question, but maybe some one had such experience.
I use HA on Synology VM (supervised). I added Ring-mqtt integration and setup a generic camera with still image URL like http://192.168.xxx.xxx:8123{{states.camera.front_door_snapshot.attributes.entity_picture}}
and stream source URL like rtsp://03cabcc9-ring-mqtt:8554/9c76137ade0c_live (from info - advanced)
If I switch on Live stream in the device I got from MQTT, I can open a generic camera and see the stream.
If I open the snapshot entity, I can see the snapshot.
I added deepstack face custom integration to HA and image processing integration to config file:
  - platform: deepstack_face
    ip_address: 192.168.xxx.xxx
    port: 5004
    timeout: 5
    detect_only: False
    save_file_folder: /config/deepstack/snapshots/
    save_timestamped_file: True
    save_faces: True
    save_faces_folder: /config/deepstack/faces/
    show_boxes: True
    source:
      - entity_id: camera.front_door_live
        name: front_door_face
I manually switch on Live stream, and then fire service “image_processing.scan”.
The problem is that deepstack uses a current snapshot picture for face recognition instead of the live stream. And the snapshot is different from the live stream of course because snapshots are taken once per hour.
Guys, do you have an idea why the source is a snapshot instead of the live stream?
Guys, I think I found a workaround for the Ring camera stream. I can make a snapshot and recognise the face on it. I looked through the whole thread and I haven’t found a working example of automation with face recognition. There is perfect automation from @DivanX10 with the final action to fire the intruder. However, the part with face recognition is missed in it.
So I’ll much appreciate it if someone can help me with the automation script below in the part of the template with defining person names.
The automation idea is to do an action if one of the persons on the photo is from the predefined list.
alias: Ring Ding
description: "open the door if someone from the family calling"
### someone called doorbell
trigger:
  - platform: state
    entity_id:
      - binary_sensor.front_door_ding
    to: "on"
condition: []
### then make a snapshot from the Ring
action:
  - service: camera.snapshot
    data:
      filename: /config/deepstack/snapshot.jpg
    target:
      device_id: 1db03c2d7ab1758d95f9c753688705ab
### wait for 2 seconds while a face is recognised, but this part could be much better - wait while the entity image_processing.front_door_face changed its status that person detected and face recognised
  - delay:
      hours: 0
      minutes: 0
      seconds: 2
      milliseconds: 0
### if one of the recognised persons on the snapshot belongs to a predefined list of persons
  - if:
      - condition: template
        value_template: >-
          {% for names in
          states.image_processing.front_door_face.attributes.faces %}
            {% if names.name == 'John' %} ...
            {% elif names.name == 'Peter' %} ...
            {% elif names.name == 'Debbie' %} ...
            {% endif %}
          {% endfor %}
    then:
### switch.off some switch, wait for 20 seconds, and switch it on again (electric lock open and close)
      - device_id: ""
        domain: ""
        entity_id: ""
mode: single
Can someone help me to finish this automation?
I refused this option for the reason that this sensor will not work if several faces are looking at the camera and there are several names in the sensor, including an unknown person, and then your automation will not work. I experimentally started using another sensor and it works much better than this one. I wrote about my redesigned sensor here
  - if:
      - condition: template
        value_template: >-
          {% for names in
          states.image_processing.front_door_face.attributes.faces %}
            {% if names.name == 'John' %} ...
            {% elif names.name == 'Peter' %} ...
            {% elif names.name == 'Debbie' %} ...
            {% endif %}
          {% endfor %}
Below I will lay out all my automation and scripts, but it will be too expensive to describe everything in detail, since it is difficult to explain the essence of my automation, it is better when you do it yourself as it should
Automation № 1: Automation is triggered to detect the presence of a person
alias: >-
  Security: Deepstack. Human presence detected
description: >-
  If someone is at home with the alarm turned on, the system will ask you to look into the camera for
  identification. If successful, the guard will be removed. In case of failure, you can remove the guard
  using a code. If not successful in all cases, a notification will be sent to the host
trigger:
  - platform: state
    entity_id:
      - binary_sensor.koridor_datchik_dveri_glavnaia_dver_contact
    id: "Hall: Main door"
    to: "off"
    for:
      hours: 0
      minutes: 0
      seconds: 5
condition:
  - condition: template
    value_template: "{{ is_state('alarm_control_panel.home_alarm', 'armed_away') }}"
  - condition: template
    value_template: >-
      {{ states("switch.security_system_identification_switch") in ["off",
      "unavailable", "unknown"] }}
  - condition: template
    value_template: >-
      {{ is_state("binary_sensor.koridor_datchik_dveri_glavnaia_dver_contact",
      "off") and (now() -
      states.binary_sensor.koridor_datchik_dveri_glavnaia_dver_contact.last_changed).seconds
      < 60 }}
action:
  - service: counter.reset
    target:
      entity_id:
        - counter.security_system_identification_counter
    data: {}
  - service: switch.turn_on
    target:
      entity_id:
        - switch.security_system_identification_switch
    data: {}
  - service: light.turn_on
    target:
      entity_id: light.galaxy_tab_a_2016_screen
    data: {}
  - service: browser_mod.navigate
    data:
      navigation_path: /lovelace-tablet/camera
  - service: media_player.play_media
    data:
      media_content_type: music
      media_content_id: notification human presence detected filipp.mp3
    target:
      entity_id: media_player.mpd_tablet_samsung_a_2016
  - wait_for_trigger:
      - platform: state
        from: playing
        to: "off"
        entity_id: media_player.mpd_tablet_samsung_a_2016
    continue_on_timeout: false
  - service: script.start_face_detection
    data: {}
  - wait_for_trigger:
      - platform: template
        value_template: "{{ is_state('image_processing.detect_face_eufy_camera', 'unknown') }}"
    continue_on_timeout: true
    timeout: "5"
  - service: counter.increment
    target:
      entity_id:
        - counter.security_system_identification_counter
    data: {}
mode: single
max: 10
Automation № 2: If the identity is established, then turn off automation
alias: "Security: Deep stack. The identity is established. Turn off the alarm"
description: >-
  If someone is at home with the alarm turned on, the system will ask you to look into the camera for
  identification. If successful, the guard will be removed. In case of failure, you can remove the guard
  using a code.  If not successful in all cases, a notification will be sent to the host
trigger:
  - platform: state
    entity_id:
      - sensor.persons_names_hall
condition:
  - condition: state
    entity_id: switch.security_system_identification_switch
    state: "on"
  - condition: state
    entity_id: alarm_control_panel.home_alarm
    state: armed_away
action:
  - choose:
      - conditions:
          - condition: template
            value_template: >-
              {{
              is_state('sensor.identified_person_owner_of_the_house_hall','all my') }}
        sequence:
          - service: media_player.play_media
            target:
              entity_id:
                - media_player.mpd_tablet_samsung_a_2016
            data:
              media_content_type: music
              media_content_id: notification the identity is established person filipp.mp3
          - service: script.security_system_identity_is_established
            data: {}
    default: []
mode: single
Automation № 3: If the identity is not established, then we try again
alias: "Security: Deep stack. The identity has not been established. Re-identification"
description: >-
  If someone is at home with the alarm turned on, the system will ask you to look into the camera for
  identification. If successful, the guard will be removed. In case of failure, you can remove the guard
  using a code. If not successful in all cases, a notification will be sent to the host
trigger:
  - platform: state
    entity_id: counter.security_system_identification_counter
    from: "0"
    to: "1"
    id: Number 1
  - platform: state
    entity_id: counter.security_system_identification_counter
    from: "1"
    to: "2"
    id: Number 2
condition:
  - condition: template
    value_template: "{{ states('sensor.persons_names_hall') in ['','unknown'] }}"
  - condition: template
    value_template: "{{ is_state('switch.security_system_identification_switch','on') }}"
action:
  - choose:
      - conditions:
          - condition: trigger
            id: Number 1
        sequence:
          - service: media_player.play_media
            data:
              media_content_type: music
              media_content_id: notification failed to recognize the identity filipp.mp3
            target:
              entity_id: media_player.mpd_tablet_samsung_a_2016
          - wait_for_trigger:
              - platform: state
                entity_id:
                  - media_player.mpd_tablet_samsung_a_2016
                to: "off"
                from: playing
            continue_on_timeout: false
          - service: script.start_face_detection
            data: {}
          - wait_for_trigger:
              - platform: state
                entity_id:
                  - image_processing.detect_face_eufy_camera
            continue_on_timeout: true
            timeout: "5"
          - service: counter.increment
            target:
              entity_id:
                - counter.security_system_identification_counter
            data: {}
      - conditions:
          - condition: trigger
            id: Number 2
        sequence:
          - service: media_player.play_media
            data:
              media_content_type: music
              media_content_id: notification the persons face is not recognized filipp.mp3
            target:
              entity_id:
                - media_player.mpd_tablet_samsung_a_2016
          - wait_for_trigger:
              - platform: state
                to: "off"
                from: playing
                entity_id:
                  - media_player.mpd_tablet_samsung_a_2016
            continue_on_timeout: false
          - service: counter.reset
            target:
              entity_id:
                - counter.security_system_identification_counter
            data: {}
          - service: timer.start
            data:
              duration: "0"
            target:
              entity_id:
                - timer.security_system_identification_timer
    default: []
mode: queued
Automation № 4: If the identity is not re-established, a notification will be sent to the owner
alias: "Security: Deep stack. Time is up"
description: >-
  If someone is at home with the alarm turned on, the system will ask you to look into the camera for
  identification. If successful, the guard will be removed. In case of failure, you can remove the guard
  using a code. If not successful in all cases, a notification will be sent to the host
trigger:
  - platform: state
    entity_id: timer.security_system_identification_timer
    from: active
    to: idle
    id: Time is up
  - platform: state
    entity_id:
      - alarm_control_panel.home_alarm
    to: disarmed
    id: Security is off
condition:
  - condition: state
    entity_id: switch.security_system_identification_switch
    state: "on"
  - condition: state
    entity_id: sensor.persons_names_hall
    state: unknown
action:
  - choose:
      - conditions:
          - condition: trigger
            id: Time is up
          - condition: state
            entity_id: alarm_control_panel.home_alarm
            state: armed_away
        sequence:
          - service: media_player.play_media
            data:
              media_content_type: music
              media_content_id: >-
                notification the time is up please leave the apartment
                filipp.mp3
            target:
              entity_id:
                - media_player.mpd_tablet_samsung_a_2016
          - service: switch.turn_off
            target:
              entity_id:
                - switch.security_system_identification_switch
            data: {}
          - service: script.tablet_sending_picture_to_telegram
            data: {}
      - conditions:
          - condition: trigger
            id: Security is off
        sequence:
          - service: timer.cancel
            target:
              entity_id:
                - timer.security_system_identification_timer
            data: {}
          - service: switch.turn_off
            target:
              entity_id:
                - switch.security_system_identification_switch
            data: {}
          - service: media_player.play_media
            data:
              media_content_type: music
              media_content_id: notification the security system is turned off filipp.mp3
            target:
              entity_id:
                - media_player.mpd_tablet_samsung_a_2016
    default: []
mode: single
Script № 1. This script is run if the identity is established. The script is used in automation № 2
alias: "Security: Identification. Identity is established"
sequence:
  - service: alarm_control_panel.alarm_disarm
    data:
      code: "your password"
    target:
      entity_id: alarm_control_panel.home_alarm
  - service: switch.turn_off
    data: {}
    target:
      entity_id: switch.security_system_identification_switch
  - service: timer.cancel
    target:
      entity_id:
        - timer.security_system_identification_timer
    data: {}
  - delay:
      hours: 0
      minutes: 0
      seconds: 5
      milliseconds: 0
  - service: counter.reset
    target:
      entity_id:
        - counter.security_system_identification_counter
    data: {}
mode: single
icon: mdi:security
Script № 2. This script is run if the time has expired. The script is used in automation № 4
alias: "Camera in the corridor: Sending a picture in a telegram"
sequence:
  - service: notify.telegram
    data:
      message: ""
      data:
        photo:
          file: /config/www/deepstack/snapshots/detect_face_eufy_camera_latest.jpg
          caption: >
            Someone in the hallway 📷

            {% for k, v in
            state_attr("image_processing.detect_face_eufy_camera",
            "matched_faces").items() -%}

            |*{{ k }}: {{ v }}* {% endfor -%}
mode: single
icon: mdi:camera-outline
Текст на русском (Text in Russian)
Я отказался от этого варианта по той причине, что этот сенсор не будет работать, если в камеру будет смотреть несколько лиц и в сенсоре будет несколько имен, в том числе и неизвестное лицо и тогда ваша автоматизация не сработает. Я опытным путем стал использовать другой сенсор и он работает намного лучше, чем этот. Про свой переделанный сенсор писал здесь
  - if:
      - condition: template
        value_template: >-
          {% for names in
          states.image_processing.front_door_face.attributes.faces %}
            {% if names.name == 'John' %} ...
            {% elif names.name == 'Peter' %} ...
            {% elif names.name == 'Debbie' %} ...
            {% endif %}
          {% endfor %}
Ниже я выложу всю свою автоматизацию и скрипты, но расписывать все подробно будет слишком накладно, так как сложно объяснить суть своей автоматизации, лучше, когда сам делаешь так как надо
Автоматизация № 1: Срабатывает автоматизация на обнаружение присутствие человека
alias: >-
  Безопасность: Deepstack. Обнаружено присутствие человека
description: >-
  Если кто-то окажется дома при включенной сигнализации, то система попросит
  посмотреть в камеру для идентификации личности. Если успешно, то охрана будет
  снята. В случае не успеха, снять охрану можно с помощью кода. Если не успех во
  всех случаях, то будет отправлено уведомление хозяину
trigger:
  - platform: state
    entity_id:
      - binary_sensor.koridor_datchik_dveri_glavnaia_dver_contact
    id: "Коридор: Главная дверь"
    to: "off"
    for:
      hours: 0
      minutes: 0
      seconds: 5
condition:
  - condition: template
    value_template: "{{ is_state('alarm_control_panel.home_alarm', 'armed_away') }}"
  - condition: template
    value_template: >-
      {{ states("switch.security_system_identification_switch") in ["off",
      "unavailable", "unknown"] }}
  - condition: template
    value_template: >-
      {{ is_state("binary_sensor.koridor_datchik_dveri_glavnaia_dver_contact",
      "off") and (now() -
      states.binary_sensor.koridor_datchik_dveri_glavnaia_dver_contact.last_changed).seconds
      < 60 }}
action:
  - service: counter.reset
    target:
      entity_id:
        - counter.security_system_identification_counter
    data: {}
  - service: switch.turn_on
    target:
      entity_id:
        - switch.security_system_identification_switch
    data: {}
  - service: light.turn_on
    target:
      entity_id: light.galaxy_tab_a_2016_screen
    data: {}
  - service: browser_mod.navigate
    data:
      navigation_path: /lovelace-tablet/camera
  - service: media_player.play_media
    data:
      media_content_type: music
      media_content_id: notification human presence detected filipp.mp3
    target:
      entity_id: media_player.mpd_tablet_samsung_a_2016
  - wait_for_trigger:
      - platform: state
        from: playing
        to: "off"
        entity_id: media_player.mpd_tablet_samsung_a_2016
    continue_on_timeout: false
  - service: script.start_face_detection
    data: {}
  - wait_for_trigger:
      - platform: template
        value_template: "{{ is_state('image_processing.detect_face_eufy_camera', 'unknown') }}"
    continue_on_timeout: true
    timeout: "5"
  - service: counter.increment
    target:
      entity_id:
        - counter.security_system_identification_counter
    data: {}
mode: single
max: 10
Автоматизация № 2: Если личность установлена, то выключаем автоматизацию
alias: "Безопасность: Deepstack. Личность установлена. Выключаем сигнализацию"
description: >-
  Если кто-то окажется дома при включенной сигнализации, то система
  попросит посмотреть в камеру для идентификации личности. Если успешно, то
  охрана будет снята. В случае не успеха, снять охрану можно с помощью кода.
  Если не успех во всех случаях, то будет отправлено уведомление хозяину
trigger:
  - platform: state
    entity_id:
      - sensor.persons_names_hall
condition:
  - condition: state
    entity_id: switch.security_system_identification_switch
    state: "on"
  - condition: state
    entity_id: alarm_control_panel.home_alarm
    state: armed_away
action:
  - choose:
      - conditions:
          - condition: template
            value_template: >-
              {{
              is_state('sensor.identified_person_owner_of_the_house_hall','Все
              свои') }}
        sequence:
          - service: media_player.play_media
            target:
              entity_id:
                - media_player.mpd_tablet_samsung_a_2016
            data:
              media_content_type: music
              media_content_id: notification the identity is established person filipp.mp3
          - service: script.security_system_identity_is_established
            data: {}
    default: []
mode: single
Автоматизация № 3: Если личность не установлена, то повторяем попытку
alias: "Безопасность: Deepstack. Личность не установлена. Повторная идентификация"
description: >-
  Если кто-то окажется дома при включенной сигнализации, то система
  попросит посмотреть в камеру для идентификации личности. Если успешно, то
  охрана будет снята. В случае не успеха, снять охрану можно с помощью кода.
  Если не успех во всех случаях, то будет отправлено уведомление хозяину
trigger:
  - platform: state
    entity_id: counter.security_system_identification_counter
    from: "0"
    to: "1"
    id: Число 1
  - platform: state
    entity_id: counter.security_system_identification_counter
    from: "1"
    to: "2"
    id: Число 2
condition:
  - condition: template
    value_template: "{{ states('sensor.persons_names_hall') in ['','unknown'] }}"
  - condition: template
    value_template: "{{ is_state('switch.security_system_identification_switch','on') }}"
action:
  - choose:
      - conditions:
          - condition: trigger
            id: Число 1
        sequence:
          - service: media_player.play_media
            data:
              media_content_type: music
              media_content_id: notification failed to recognize the identity filipp.mp3
            target:
              entity_id: media_player.mpd_tablet_samsung_a_2016
          - wait_for_trigger:
              - platform: state
                entity_id:
                  - media_player.mpd_tablet_samsung_a_2016
                to: "off"
                from: playing
            continue_on_timeout: false
          - service: script.start_face_detection
            data: {}
          - wait_for_trigger:
              - platform: state
                entity_id:
                  - image_processing.detect_face_eufy_camera
            continue_on_timeout: true
            timeout: "5"
          - service: counter.increment
            target:
              entity_id:
                - counter.security_system_identification_counter
            data: {}
      - conditions:
          - condition: trigger
            id: Число 2
        sequence:
          - service: media_player.play_media
            data:
              media_content_type: music
              media_content_id: notification the persons face is not recognized filipp.mp3
            target:
              entity_id:
                - media_player.mpd_tablet_samsung_a_2016
          - wait_for_trigger:
              - platform: state
                to: "off"
                from: playing
                entity_id:
                  - media_player.mpd_tablet_samsung_a_2016
            continue_on_timeout: false
          - service: counter.reset
            target:
              entity_id:
                - counter.security_system_identification_counter
            data: {}
          - service: timer.start
            data:
              duration: "0"
            target:
              entity_id:
                - timer.security_system_identification_timer
    default: []
mode: queued
Автоматизация № 4: Если повторно личность не установлена, будет отправлено уведомление хозяину
alias: "Безопасность: Deepstack. Время истекло"
description: >-
  Если кто-то окажется дома при включенной сигнализации, то система попросит
  посмотреть в камеру для идентификации личности. Если успешно, то охрана будет
  снята. В случае не успеха, снять охрану можно с помощью кода. Если не успех во
  всех случаях, то будет отправлено уведомление хозяину
trigger:
  - platform: state
    entity_id: timer.security_system_identification_timer
    from: active
    to: idle
    id: Время истекло
  - platform: state
    entity_id:
      - alarm_control_panel.home_alarm
    to: disarmed
    id: Охрана выключена
condition:
  - condition: state
    entity_id: switch.security_system_identification_switch
    state: "on"
  - condition: state
    entity_id: sensor.persons_names_hall
    state: unknown
action:
  - choose:
      - conditions:
          - condition: trigger
            id: Время истекло
          - condition: state
            entity_id: alarm_control_panel.home_alarm
            state: armed_away
        sequence:
          - service: media_player.play_media
            data:
              media_content_type: music
              media_content_id: >-
                notification the time is up please leave the apartment
                filipp.mp3
            target:
              entity_id:
                - media_player.mpd_tablet_samsung_a_2016
          - service: switch.turn_off
            target:
              entity_id:
                - switch.security_system_identification_switch
            data: {}
          - service: script.tablet_sending_picture_to_telegram
            data: {}
      - conditions:
          - condition: trigger
            id: Охрана выключена
        sequence:
          - service: timer.cancel
            target:
              entity_id:
                - timer.security_system_identification_timer
            data: {}
          - service: switch.turn_off
            target:
              entity_id:
                - switch.security_system_identification_switch
            data: {}
          - service: media_player.play_media
            data:
              media_content_type: music
              media_content_id: notification the security system is turned off filipp.mp3
            target:
              entity_id:
                - media_player.mpd_tablet_samsung_a_2016
    default: []
mode: single
Скрипт № 1. Этот скрипт запускается если личность установлена. Скрипт используется в автоматизации № 2
alias: "Безопасность: Идентификация. Личность установлена"
sequence:
  - service: alarm_control_panel.alarm_disarm
    data:
      code: "свой пароль"
    target:
      entity_id: alarm_control_panel.home_alarm
  - service: switch.turn_off
    data: {}
    target:
      entity_id: switch.security_system_identification_switch
  - service: timer.cancel
    target:
      entity_id:
        - timer.security_system_identification_timer
    data: {}
  - delay:
      hours: 0
      minutes: 0
      seconds: 5
      milliseconds: 0
  - service: counter.reset
    target:
      entity_id:
        - counter.security_system_identification_counter
    data: {}
mode: single
icon: mdi:security
Скрипт № 2. Этот скрипт запускается если время истекло. Скрипт используется в автоматизации № 4
alias: "Камера в коридоре: Отправка снимка в телеграм"
sequence:
  - service: notify.telegram
    data:
      message: ""
      data:
        photo:
          file: /config/www/deepstack/snapshots/detect_face_eufy_camera_latest.jpg
          caption: >
            Кто-то в коридоре 📷

            {% for k, v in
            state_attr("image_processing.detect_face_eufy_camera",
            "matched_faces").items() -%}

            |*{{ k }}: {{ v }}* {% endfor -%}
mode: single
icon: mdi:camera-outline
1 Like
You are awesome. I’ll spend a couple of hours studying that. 
Текст на русском (Text in Russian)
Спасибо!
Hello everyone
I want to run HA and GPU-accelerated face recognition and object detection with DVR on Jetson Nano (4GB RAM version).
Can I accomplish this with deepstack? If so what would be the best way to approach/install/configure it?
Thanks
Friends, please tell me how to clear the data? 1.9 gigabytes of data! It is unclear why he saves them? Everything has been removed from the web interface.
I’ve got a Coral USB stick ordered about 9 months ago to play around with Frigate but when it finally arrived I decided Frigate wasn’t for me so returned to Blue Iris currently using Deepstack running in software on Docker for AI object detection.
I believe a combination of this component and Grinco’s Coral REST API add in should allow me to use the Coral to process AI object detection for Blue Iris, is that correct? If so, can someone kindly explain or point me at a guide on how to knit everything together please because I’m thoroughly confused. 
I’ve got the Coral REST API add-in detecting the stick and contactable via it’s web port so I think that’s good. I’ve installed The HASS Deepstack object via HACS but then I get lost because I’m not sure how to configure this Deepstack component to use the Coral REST API. Also the component configuration is geared around directly talking to a camera and saving snapshots etc into HA so I’m also unsure what I need to do within BI to use this component for AI detection?
thanks
First of all: Big thanks to robmarkcole for great component! Little time I’m playing with it, it seems pretty reliable and not resource hungry.
Guys, I screwed a teaching little bit, so now I would like to understand how teaching process is going on in backend.
Basically, I done this:
service: deepstack_face.teach_face
data:
  name: Uros
  file_path: /config/deepstack-faces/Stefan/stefan01.jpg
and this:
service: deepstack_face.teach_face
data:
  name: Stefan
  file_path: /config/deepstack-faces/Uros/uros01.jpg
You can see that I misplaced photo and person, i.e. I trained the software to recognize one my son with photos of other son and vice versa.
I have no idea how things are going in backend, so I need to ask: Would it be enough just to teach Deepstack again with proper person <=> photo path connection, i.e. will this overwrite my previous mistakes, or something else should be done, e.g. should I delete some stored data (where and what data?)?
Thank you very much!