 This plugin has been removed from TrueNAS CORE
Home Assistant only supports Linux, OSX and Windows using WSL. FreeBSD is not supported. This plugin runs in a FreeBSD jail; therefore it is an unsupported installation method. As Home Assistant continues to grow and add new integrations, installation on FreeBSD no longer "just works" as reliably as it had for many years. With installation issues and sudden breaking changes becoming more frequent on FreeBSD, it was no longer feasible to continue maintaining this plugin.
To install HAOS in a VM (bhyve) on TrueNAS CORE (FreeBSD based) see this post by @Petrica
To install HAOS in a VM (KVM) on TrueNAS SCALE (Linux based) see this post by @troy
This plugin will create an iocage jail for Home Assistant Core
- Home Assistant Core will be installed using a Python Virtualenv
- Updates for Home Assistant are performed using the jail's console
- Also includes options to create separate Python Virtualenvs for the following
- AppDaemon -- includes HADashboard
- Hass Configurator --
 File Editor
- A separate directory for each virtualenv ( service ) will be created under
/usr/local/share - The plugin's provided services run as non-root user
homeassistantwith a UID of8123 - Separate configuration directories for each service are located in
/home/homeassistant
This plugin provides these basic configuration files to help get started
A simple console menu is provided to help with basic tasks

Quick Start for Home Assistant Core on TrueNAS CORE
Installation - Community Plugin
![]() No longer available. This plugin has been removed from TrueNAS CORE. With issues on FreeBSD becoming more frequent, it is no longer feasible to continue maintaining this plugin.
No longer available. This plugin has been removed from TrueNAS CORE. With issues on FreeBSD becoming more frequent, it is no longer feasible to continue maintaining this plugin.
Initial Startup
Initial startup may take 5-10 minutes before the Home Assistant UI is reachable. It takes my TrueNAS about 10 minutes from the time I press install until I can log in for the first time. This time will vary depending on your setup and hardware. After the initial startup is complete, you can reach Home Assistant Core from the Plugins page by pressing MANAGE.
Installing optional services
Click Here
You can install HACS, or the optional services using the jail's console menu. I tried to make this work easily from the browser. In TrueNAS, your Home Assistant Core plugin will show up under both, Plugins and Jails. It is still a jail after all. Enter the console from the Jails page by pressing SHELL.

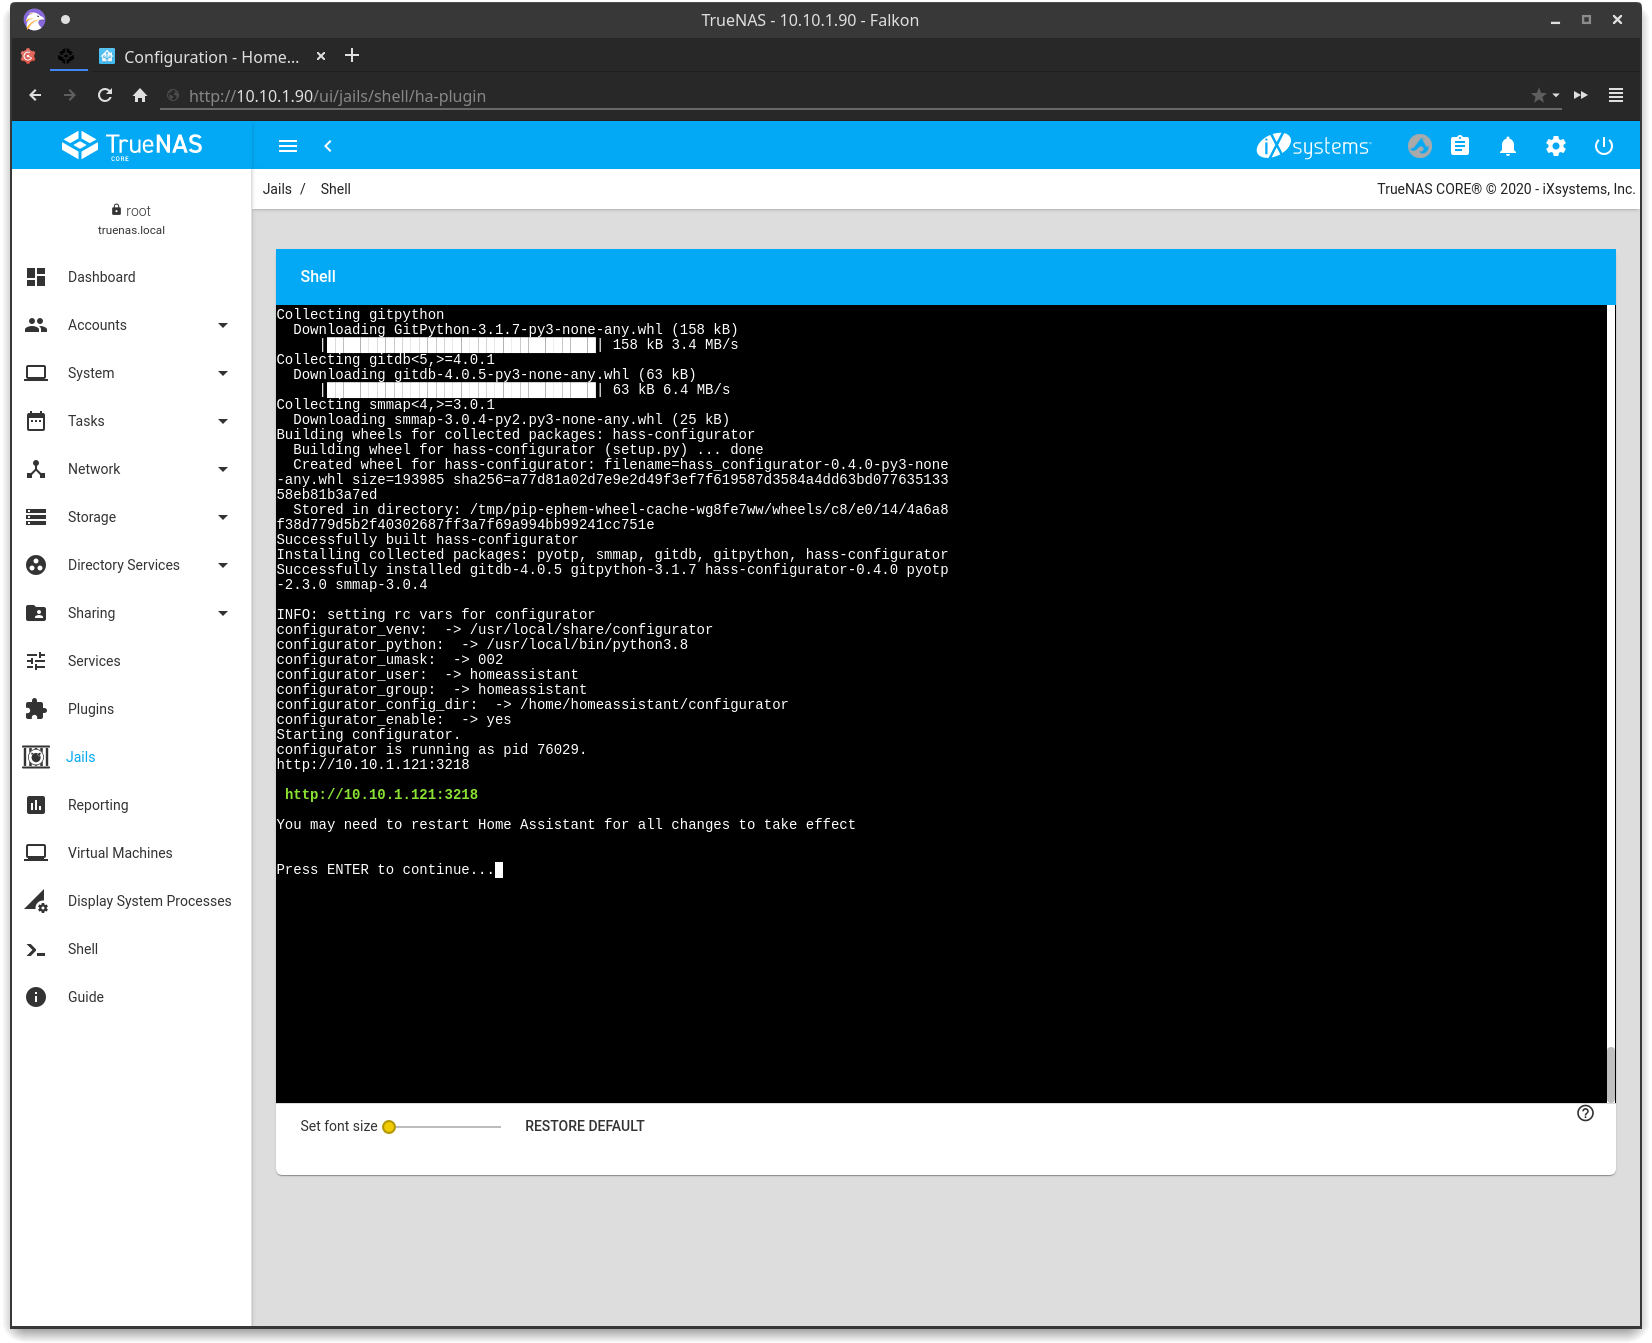
Install the Configurator and AppDaemon
From the main menu, number 2 will be the Configurator. Use option 8 to install.

After the installation has finished, use the given link to open the Configurator in a new browser tab. We're going to use it in the following steps to add the long-lived access token(s) to the configuration file(s). Leave the Configurator open and head back over to the Home Assistant tab in your browser.
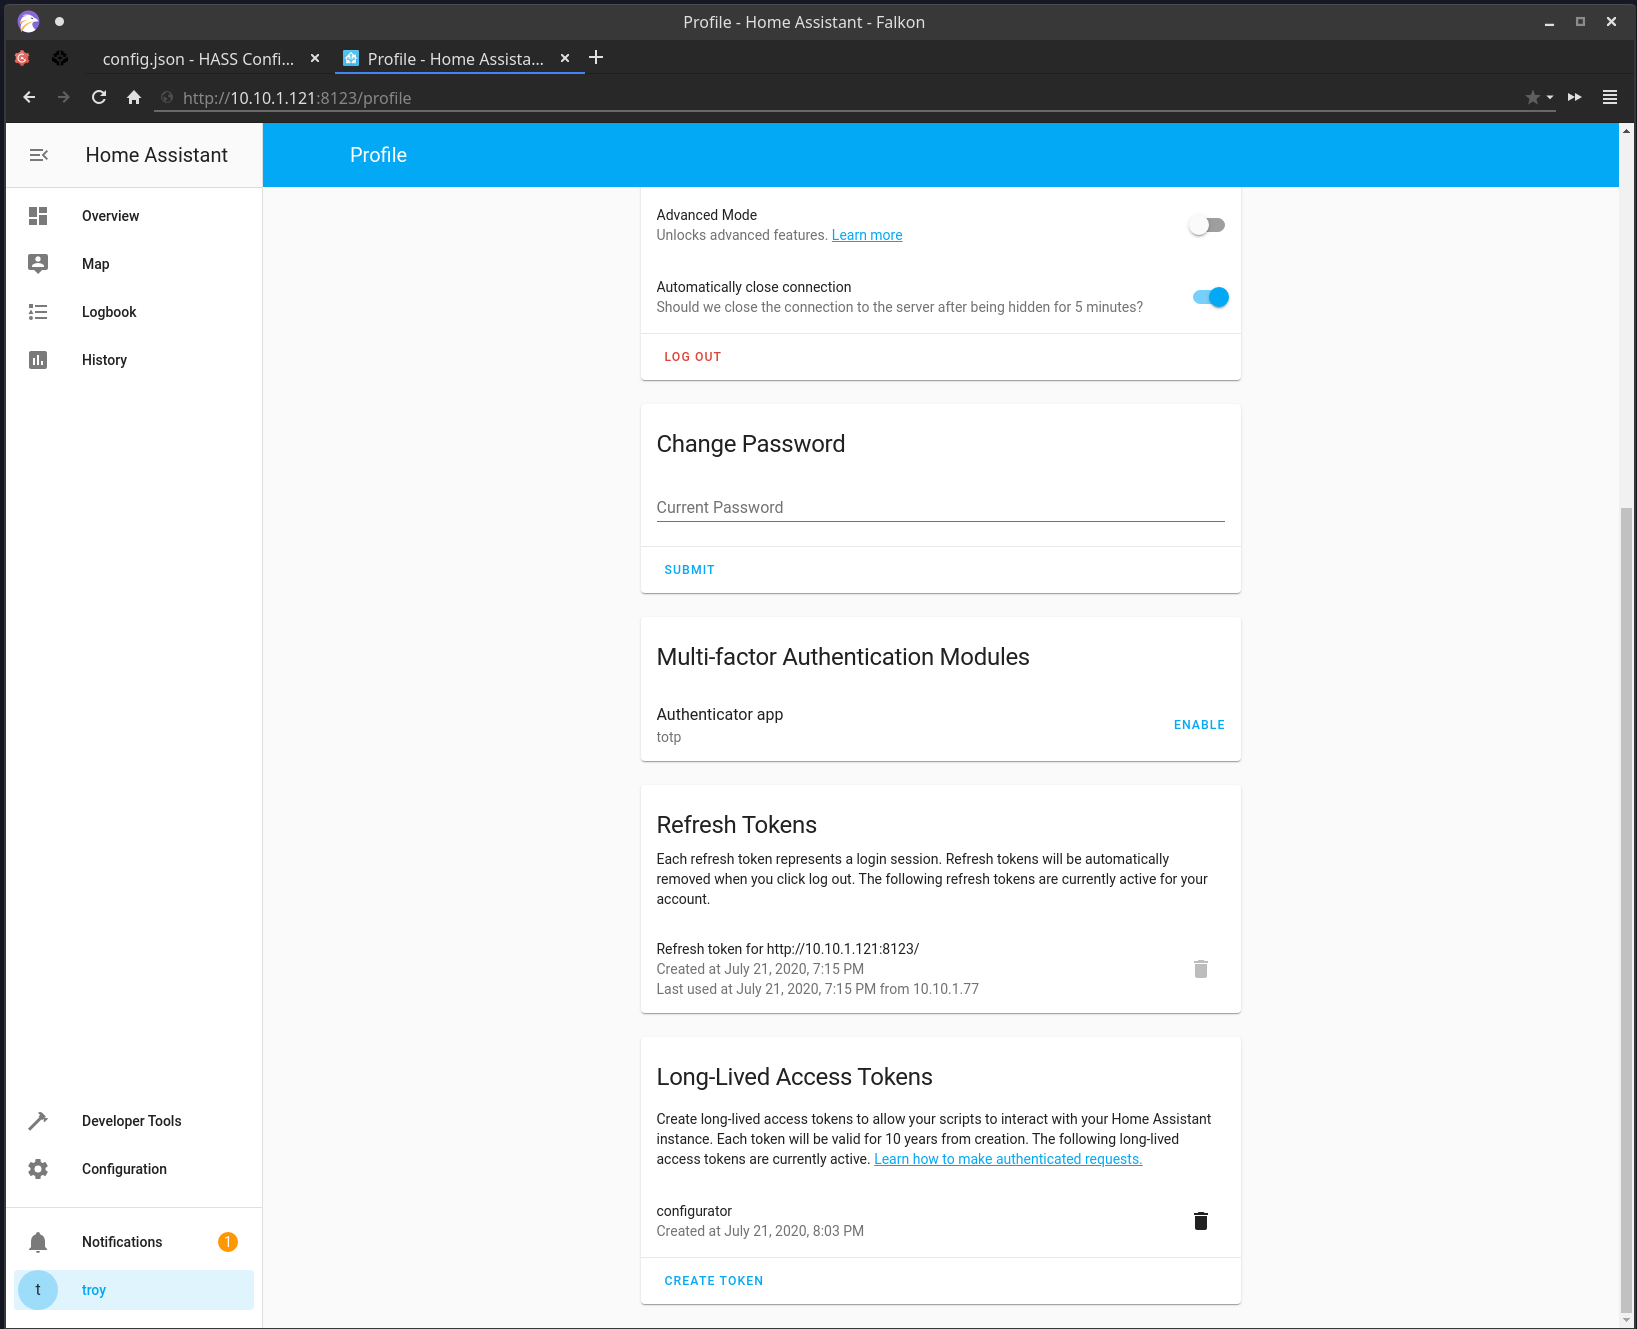
We're gonna create two tokens at this point. One for the Configurator and one AppDaemon. Hopefully, this is where the included configuration starts to make things easy. You can create your long-lived access token from your profile page.
Start by creating an access token for the Configurator and copy it to your clipboard.
Using the Configurator, add the token you just created to configurator/config.json. Paste your access token to the second line where indicated. Be sure to save the file!

Next, if you plan to install AppDaemon, you should also set that up. The example configuration included with AppDaemon is set up to share the Home Assistant secrets file to store its access token and location information. Go back to your Home Assistant profile page and create another long-live access token for AppDaemon. Use the Configurator to add the token to homeassistant/secrets.yaml. While you are there, you should also configure your correct location information as well. Make sure you save your changes!

We are done with the Configurator for now. You can close its browser tab and head back over to FreeNAS. From the Configurator service menu, select 3 to restart the Configurator.

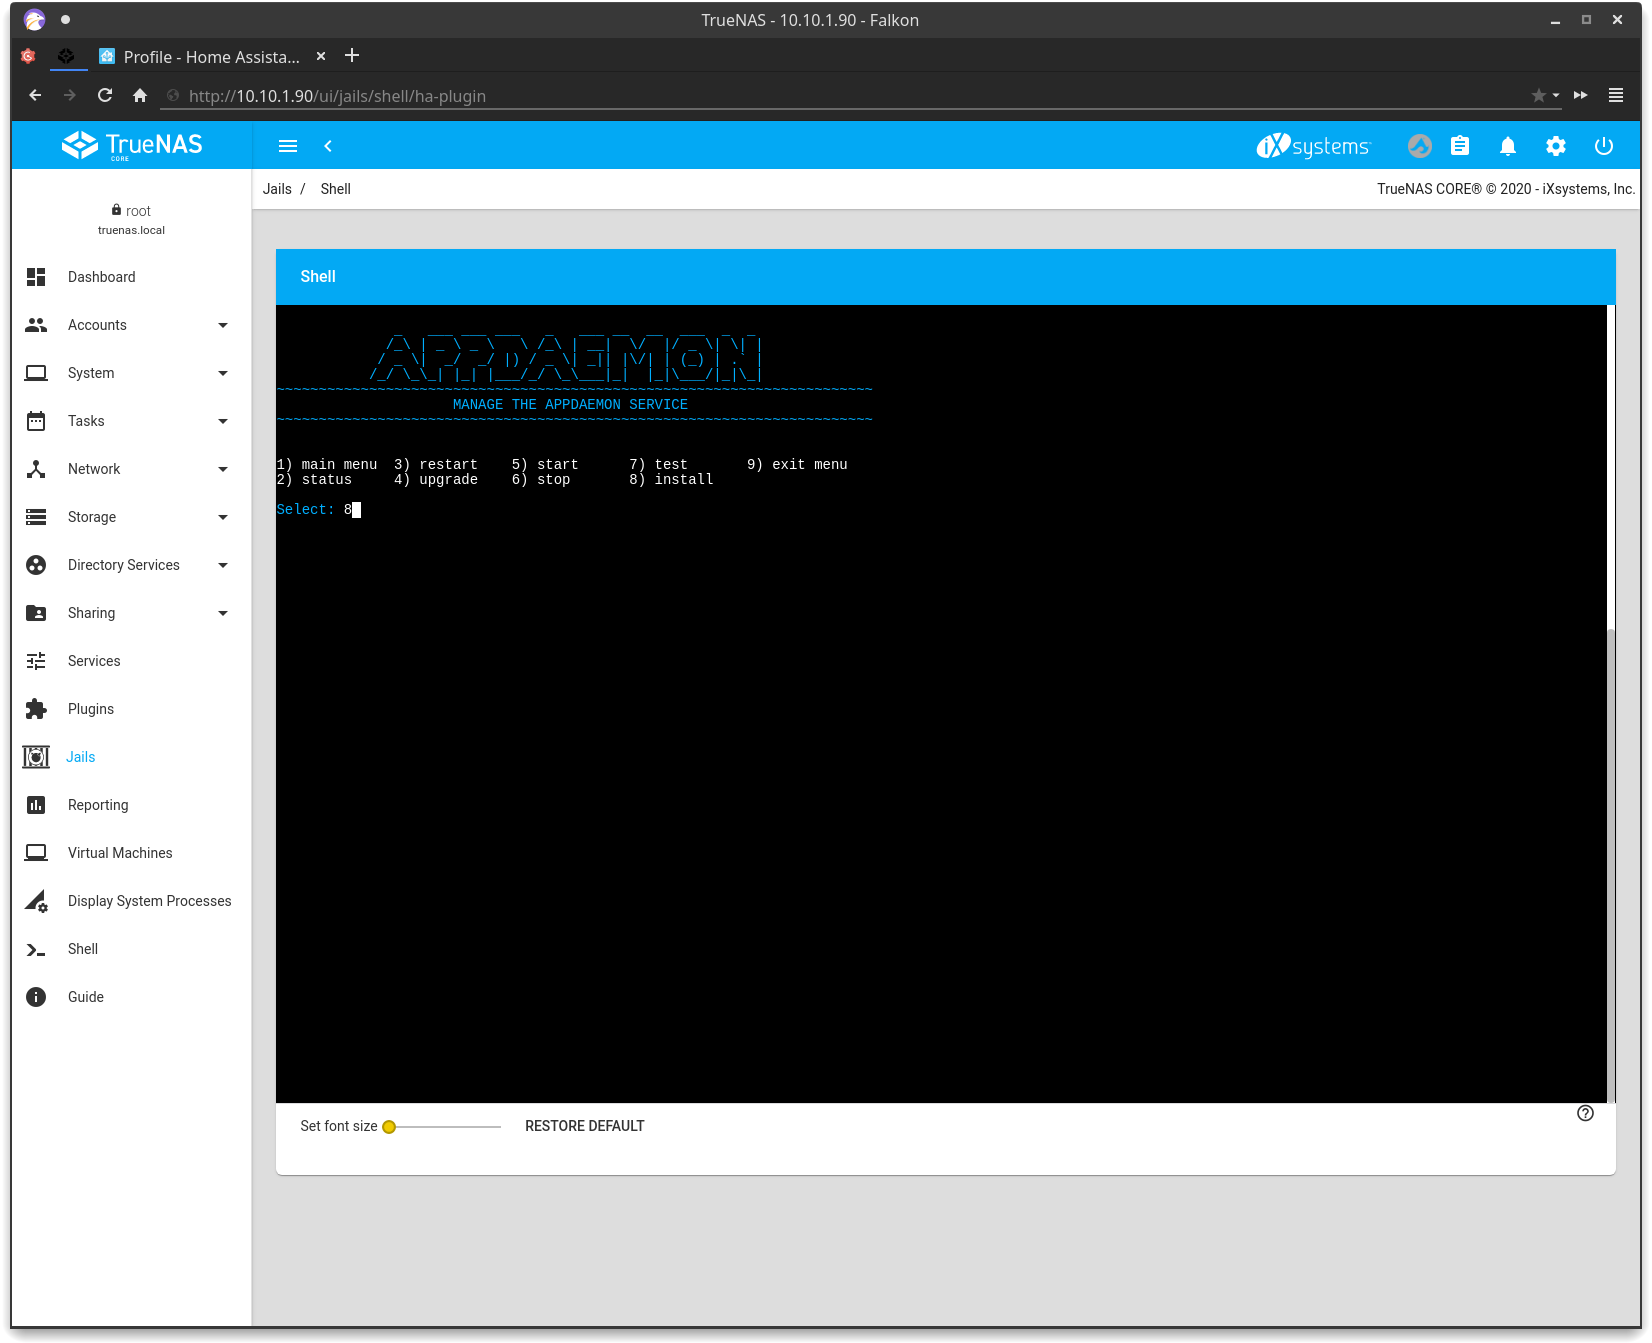
After the Configurator restarts, press 1 to return to the main menu, then press 3 to enter the AppDaemon service menu. Use option 8 to install

Install HACS
There's one more step before you restart Home Assistant. Installing HACS. There's no service menu since HACS is a custom integration. This is just a little shortcut to download the latest HACS release and extract it to homeassistant/custom_components/hacs.
At the main console menu of the jail, type install hacs and press enter.


Now head into the Home Assistant Core service menu and select 3 to restart Home Assistant. Notice here that option 8 is check_config. The service will also check_config automatically before restarting Home Assistant. The first time check_config is used, you may see an additional package or two get installed. This is normal and only happens the first time.

After you restart Home Assistant, you should have links for File Editor and AppDaemon added to the side panel. These are simply iframes that have been enabled in homeassistant/packages/truenas_plugin
Finally, head to the integrations and finish adding HACS.

That's it, Happy Automating!
Have Fun! 
For additional information about using this plugin visit the wiki


 damn you’re the MAN!