Adding upon the great guide from the HA website, “$13 voice remote for Home Assistant”, I thought it might be helpful, to expand that a little and show how to get your new voice assistant the ATOM Echo or any other ESP device, adopted into your ESPHome Add-on for further configuration and future updates. This, unfortunately, isn’t part of the original tutorial, so here it comes.
TL;DR This guide shows you, how to get your ATOM Echo or any other pre-flashed ESP device adopted into the ESPHome software.
To make things easier, here is the original tutorial for you to take a look at:
Expand the original tutorial
“$13 voice remote for Home Assistant”
This tutorial will guide you to turn an ATOM Echo into the world’s most private voice assistant. Pick up the tiny device to talk to your smart home. Issue commands and get responses!
[edit]See here for a Youtube video how it works:
$13 voice remote for Home Assistant - YouTube
[/edit]
Required material
- Home Assistant 2023.5 or later
- Home Assistant Cloud or a manually configured Assist Pipeline
- The password to your 2.4 GHz Wi-Fi network
- Chrome (or a Chromium-based browser like Edge) on desktop (not Android/iOS)
- M5Stack ATOM Echo Development Kit
- USB-C cable to connect the ATOM Echo
Installing the software onto the ATOM Echo
Before you can use this device with Home Assistant, you need to install a bit of software on it.
-
Make sure this page is opened in a Chromium-based browser on a desktop. It does not work on a tablet or phone.
-
Select the Connect button below. If your browser does not support web serial, there is no button but a text.
-
For advanced users: The configuration file is available on GitHub.
-
-
Connect the ATOM Echo to your computer.
- In the popup window, view the available ports.
- Plug the USB-C cable into the ATOM Echo and connect it to your computer.
- In the pop-up window, there should now appear a new entry. Select this USB serial port and select Connect.
- Depending on your computer, the entry might look different.
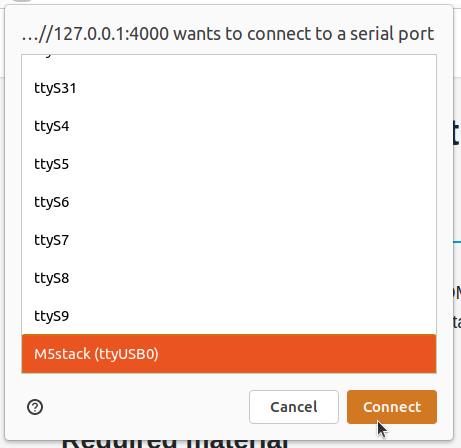
- Depending on your computer, the entry might look different.
- If no new port shows, your system may be missing a driver. Close the pop-up window.
- In the dialog, select the CH342 driver, install it, then Try again.
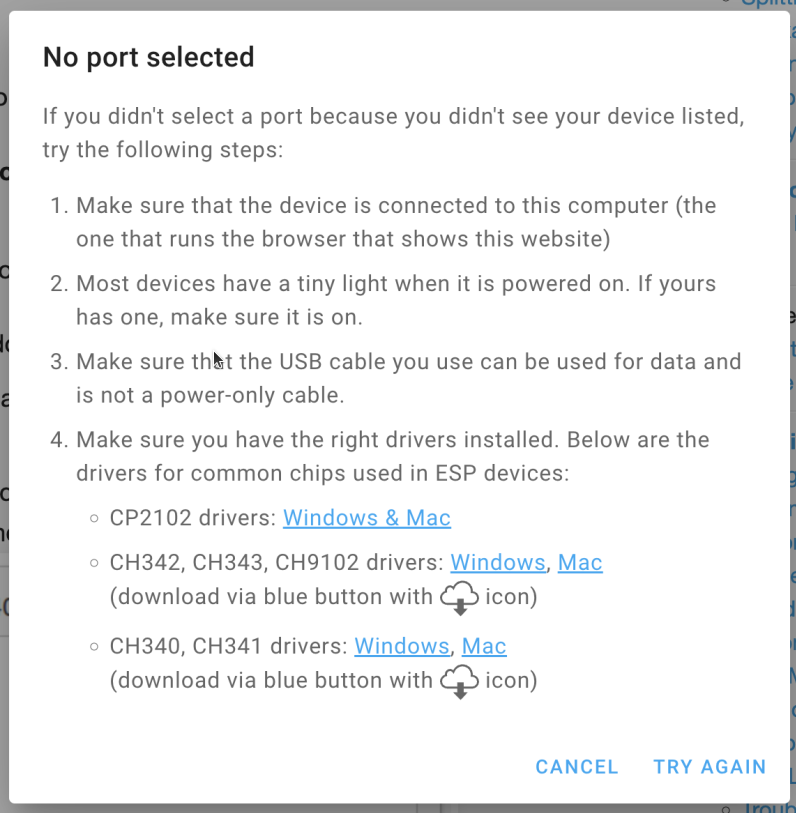
- In the dialog, select the CH342 driver, install it, then Try again.
-
Select Install Voice Assistant, then Install.
- Follow the instructions provided by the installation wizard.
- Add the ATOM Echo to your Wi-Fi:
- When prompted, select your network from the list and enter the credentials to your 2.4 GHz Wi-Fi network.
- Select Connect.
- The ATOM Echo now joined your network. Select Add to Home Assistant.
-
This opens the My link to Home Assistant.
- If you have not used My Home Assistant before, you will need to configure it. If your Home Assistant URL is not accessible on
http://homeassistant.local:8123, replace it with the URL to your Home Assistant instance. - Open the link.
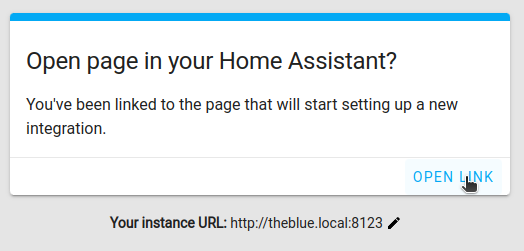
- If you have not used My Home Assistant before, you will need to configure it. If your Home Assistant URL is not accessible on
-
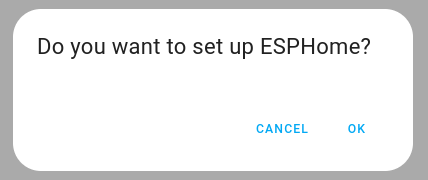
Select OK.
-
To add the newly discovered device, select the ATOM Echo from the list.
- Add your ATOM Echo to a room and select Finish.
-
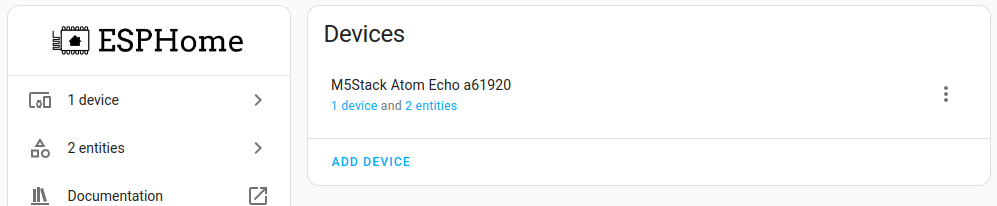
You should now see the ESPHome integration.
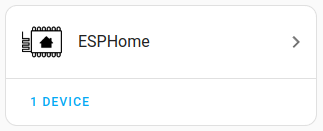
-
Select the ESPHome integration. Under Devices, you should see the M5Stack Atom Echo listed.
- Your ATOM Echo is connected to Home Assistant over Wi-Fi. You can now move it to any place in your home with a USB power supply.
-
Congratulations! You can now voice control Home Assistant using a button with a built-in microphone. Now give some commands.
Controlling Home Assistant over the ATOM Echo
- Press the flat button with rounded shape on your ATOM Echo.
- The rectangular button on the side is the reset button. Do not press that one.
- As soon as you press the button, the LED will light up in blue.
- While you are speaking, the blue LED is pulsing.
- Once the intent has been processed, the LED lights up in green and Home Assistant confirms the action.
- Say a supported voice command. For example, Turn off the light in the kitchen.
- Make sure you’re using the area name exactly as you defined it in Home Assistant.
- You can also ask a question, such as
- Is the front door locked?
- Which lights are on in the living room?
- Your command is not supported? Add your own commands using a sentence trigger.
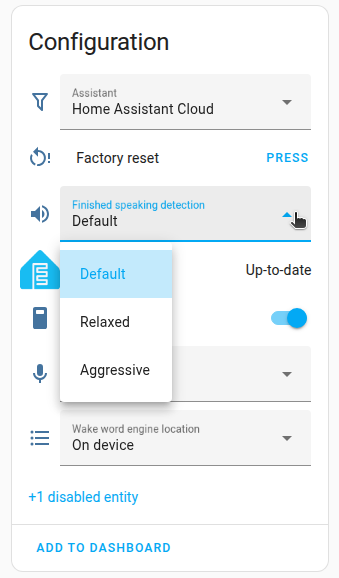
- You find ATOM Echo takes to long to start processing your command?
- Adjust the silence detection settings. This setting defines how much silence is needed for Assist to find you’re done speaking and it can start processing your command.
- Go to {% my integrations title=“Settings > Devices & Services” %} and select the ESPHome integration.
- Under M5Stack ATOM Echo, select 1 device.
Troubleshooting
Are things not working as expected?
- Checkout the general troubleshooting section for Assist.
#################### END OF ORIGINAL GUIDE ####################
Let’s start with some definitions of what we are talking about here.
-
ESPHome Add-on or standalone ESPHome install
The ESPHome Add-on forHome Assistant OSor a standalone installation of ESPHome. This is the ESPHome software, where you configure, generate and flash your ESP device(s). This is, where the firmware for your ESP devices is made. -
ESPHome integration in HA
This is the integration, that ties together your ESP device and your HA installation. It has nothing to do with how your ESP device was configured and flashed, it is “only” the communication basis so HA and your ESP device can talk with each other. Eg. you could buy a pre-flashed device or you have used the original tutorial to flash your ESP device, in this case the ATOM Echo, and for that device to talk to HA and vice versa, it needs this integration.Expand for an example
Take your TV as a real world example. The TV is our device (=ESPdevice). You as user (=HA) can do different things with your TV, turn the volume up or down, switch channels and so on. That is what the integration does, it connects the device (=TV) to you (=HA) to communicate with each other.
But how does the TV know, what it should do, even that it’s a TV? That is, what the firmware does, that is programmed into the TV. This is normally done by the manufacturer like Samsung, Sony, LG or …! In our example this would be the ESPHome Add-on (or standalone install) where you configure the firmware for your ESP device and upload it. I hope that gives a little more insight. -
ESP device
An ESP device is every device with an ESP8266 or ESP32 chip. There are numerous devices for practically every situation, that run on an ESP processor. These devices range from simple Bluetooth proxies to complete weather stations or LED stripe controllers, over to A/C control, and doesn’t end with various sensors to connect to, like rain, temperature or humidity sensors or cameras or …! If you take a look at the ESPHome website, you’ll get overwhelmed by the sheer number of devices and sensors, the possibilities are near endless. In the course of this tutorial we are talking about an ATOM Echo, but in the end, this is a normal ESP device, too. So this guide can be used for everything ESP powered, eg. the Bluetooth Proxy from the ESPHome website.
Let’s go and see what we need to have right now:
- an ATOM Echo, flashed via the original guide (it can be, but it didn’t need to be connected to HA)
- a running Home Assistant install to connect to
- some computer, where you can install the ESPHome Add-on or the standalone version of ESPHome (see the next paragraph on how to decide what you need here)
- a little time to get things running, and a HA install that can be restarted a few times, if necessary (that means, no people depend on HA while you’re working on it)
The first thing we need to do, is to install the ESPHome Add-on or the standalone version.
-
You are running Home Assistant via Home Assistant OS or as a supervised install
In this case, the best way is to install ESPHome as Add-on via the HA store. There is an always up-to-date guide on the ESPHome website, where the installation process is outlined. It will take you just a few minutes to install ESPHome and have it ready to work with. Just stop before you start using the wizard to setup a new device, we’ll do that later or you can come back to that after this guide.
Getting Started with ESPHome and Home Assistant — ESPHome -
You are running any other installation method for Home Assistant, doesn’t matter if “venv”, “core” or as a “(docker) container”
Then you need to do a standalone install of ESPHome. This isn’t very complicated, just take a look at the up-to-date guide on the ESPHome website:
Installing ESPHome Manually — ESPHome
Now that we have ESPHome installed, you should be presented with an empty ESPHome dashboard:
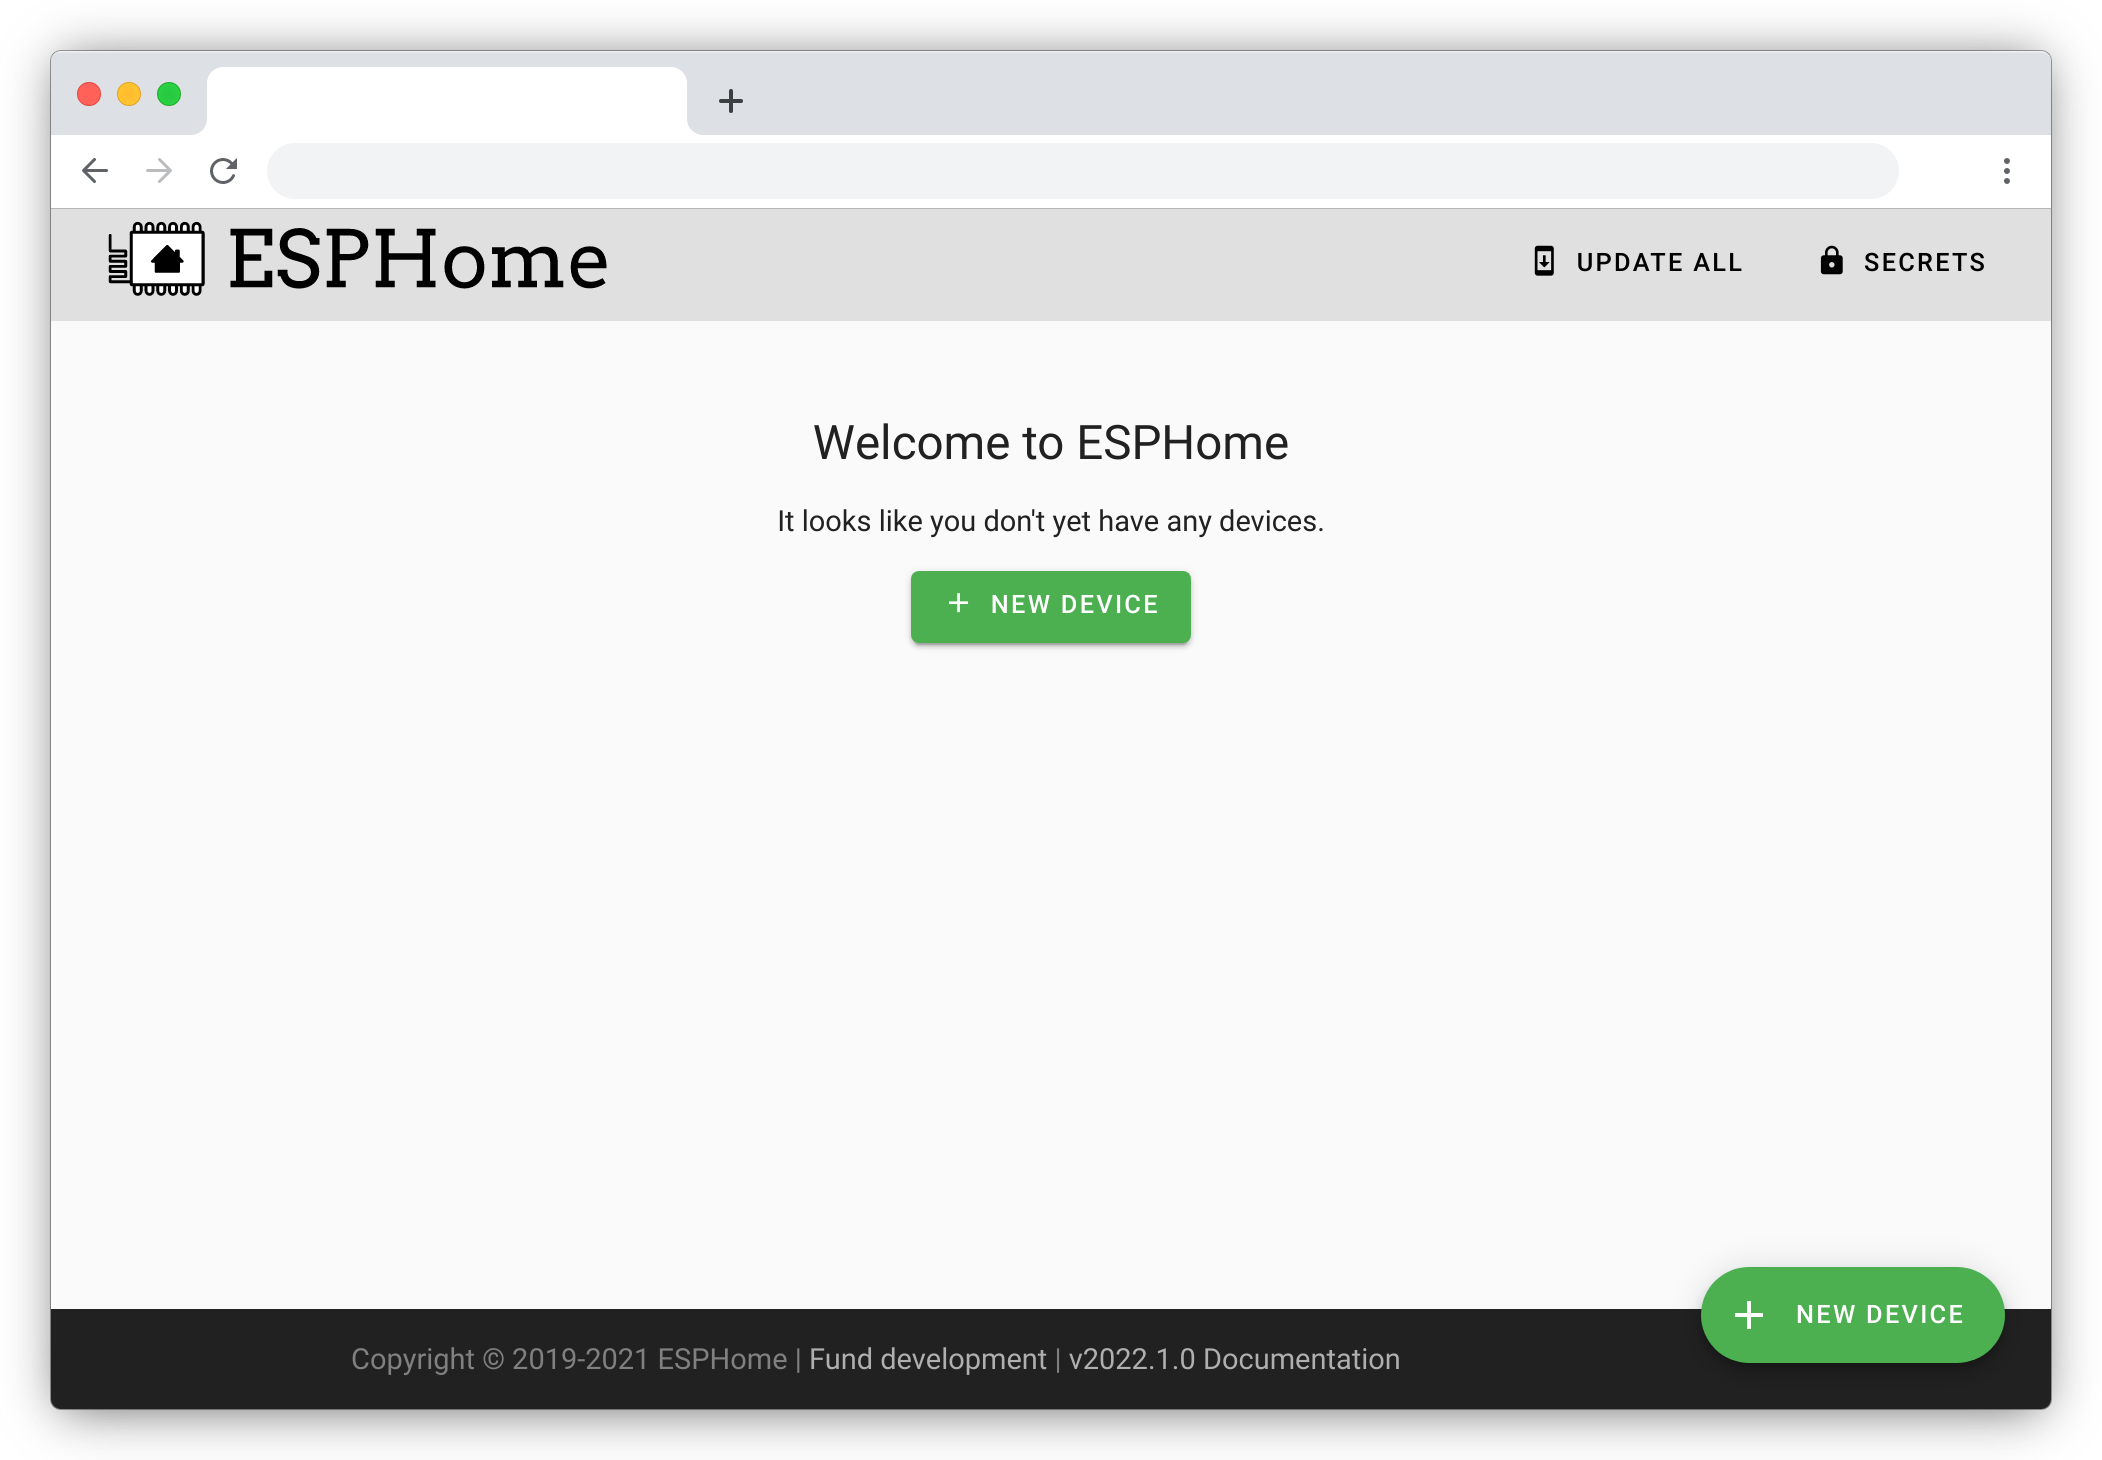
If things worked really well, there already could be a discovered device, eg. the ATOM Echo. If not, don’t worry, we’ll get there!
ESPHome is now automagically searching your local network for any new devices, that could be adopted into the dashboard. This might take a little while, as a general rule between five to ten minutes should be enough. If a device is discovered, it will show up in your ESPHome dashboard. Should look like this, the name might be different than the one in the screenshot, depending on what you’re working on (eg. the ATOM Echo or a BT proxy).

thanks a lot to @aPugLife for kindly providing this screenshot
If you got your device discovered, everything is fine, click “ADOPT” and in the upcoming popup, set the name to something useful (aka something you can remember) and click “ADOPT” again. Congratulations, you have setup your first device in ESPHome and from now on, you can change and/or update your ATOM Echo via the ESPHome dashboard. I suggest to take a look now to all the other components that ESPHome offers to integrate.
But as we all know, sometimes things don’t go as expected and for these cases we now do some troubleshooting.
You have trouble installing the ESPHome Add-on in HA-OS or supervised
Open up a topic in this sub-forum (Installation > Home Assistant OS), ideally providing the logs for the time frame you tried to install the ESPHome Add-on.
The logs you need are:
- Supervisor logs
- HA core logs
- ESPHome Add-on logs
You can find them under Settings > System > Logs. As a default you will be presented with the HA core log, but in the upper right corner you see a button/pull down menu (depending on what log you are presented with), that you can open and choose the log accordingly. After selecting the log (see the list above), go to the bottom of the screen and either download the complete log, or “load full logs”. Copy the full log and paste it into the topic you opened. Please take care of a proper formatting, take a look at this thread how to do that.
ESPHome has trouble discovering your device
If the device is not discovered by ESPHome, it doesn’t show up in your dashboard, even after waiting longer than ten minutes. The topics in the forum from the last weeks show, that in almost every case of not discovering a device, mDNS is some kind of involved. ESPHome needs mDNS to be enabled and working to discover any device! If mDNS isn’t working correctly, ESPHome won’t find your device, and thus won’t let you adopt it.
There are a few places, where mDNS can take the wrong turn. These are (not in any order):
- Your ESPHome device firmware has mDNS disabled
Look for the following setting in your devices YAML in the ESPHome dashboard. If you have this entry, set it to false, if you don’t have this entry, don’t specifically set it, the default is mDNS enabled (disabled: false). See here for the documentation.mdns: disabled: true - Your router
Many routers have an integrated DHCP server, this means your router takes care of the IP addresses assigned to all of your connected devices, from the TV to your company laptop. The default with nearly all users is that your router automatically takes care of this, and so you don’t need to change any settings here. But nonetheless check, if your router does have any settings regarding mDNS and if they have been changed somehow. In doubt, ask Google about your specific router model and mDNS.
If you use your own DHCP server, you should know what you’re doing, so check the manual for your DHCP server for mDNS related settings. - Your firewall, especially if you use different vLANs
MDNS isn’t able by default to jump between different zones or vLANs in your firewall. Make sure, if you use a firewall (like pfSense), that the mDNS packages from ESPHome can reach the ESP device and vice versa, regardless of different vLANs.
Take a look at this post from @aPugLife, where he explains his findings and settings in pfSense: Click here
The device can't be adopted (ie. a greyed out adopt button)
Sometimes the button to adopt the device, especially in the upcoming pop-up, is greyed out so you can’t click it.
- Try to click it
Really, try it! There are sometimes settings in your theme, that change the look, so it seems, the button is greyed out. Honestly, wouldn’t know, if I hadn’t experienced it by myself.
- ESPHome Add-on configuration error
The “ADOPT” button get’s greyed out, if something in your configuration isn’t right. Check eg. if your secrets.yaml file has any duplicates. It must be something in your ESPHome Add-on configuration, because the YAML from that device is pre-flashed, so presumable working, and it is not yet loaded into your ESPHome Add-on or dashboard, so can’t be a source of error. That leaves unfortunately only the config of the Add-on. See the logs from the ESPHome Add-on for any details. You can find them underSettings > System > Logs. As a default you will be presented with the HA core log, but in the upper right corner you see a button/pull down menu (depending on what log you are presented with), that you can open and choose ESPHome.
The last resort...
If all of the above doesn’t work for you, there is still one last resort to get your device “adopted”, as long as you have the ESPHome Add-on running, and that is the “old-school” manual way. You can always setup and configure the device manually, like you would do, if you’d write the code by yourself. You’ll likely do this in the future, as you now have setup ESPHome and the next device will come, rest asure. Don’t be afraid, it’s nothing you can’t do!
At the moment there are only two websites, where you can flash your device with this pre-produced code:
For our guide we take the YAML for the ATOM Echo and set it up in ESPHome.
- Make sure, your ATOM Echo is connected to your local network.
- Go to your router (or own DHCP server) and lookup the IP address of your ATOM Echo.
- Ensure, that your device get’s always the same IP address from your router (or own DHCP server), otherwise you need to set a static IP in the YAML in ESPHome!
- Go to your ESPHome dashboard and have a close look, if your device isn’t already connected or able to adopt.
- Click on the button in the bottom right corner to add a new device
- You will be presented with the wizard to add a new device. First enter a name for the device, should be something you can remember and it should be describing (eg. ATOM-Echo-kitchen).
If you get a pop-up, that tells you, your connection to the ESPHome dashboard isn’t overhttps, just click continue, it doesn’t matter for now. - In the following pop-up choose any type you want, eg. ESP32, it doesn’t matter at the moment, because we’re overwriting the YAML anyway.
- All should be done by now, ESPHome tells you about the finished configuration. Click “SKIP” to go back to the dashboard and look for your newly added device and click on “EDIT”.
- You will be presented with a YAML file editor filled with the generated code for the device. Select all and delete it. Yes, this is where we overwrite the YAML with our “own” code.
- Copy the YAML from the link above or right here (for convenience) and paste it in the YAML file editor in ESPHome (where you just deleted everything).
Expand to see the YAML code for the ATOM Echo
substitutions: name: "m5stack-atom-echo" friendly_name: "M5Stack Atom Echo" esphome: name: "${name}" friendly_name: "${friendly_name}" name_add_mac_suffix: true project: name: m5stack.atom-echo-voice-assistant version: "1.0" min_version: 2023.7.0 esp32: board: m5stack-atom framework: type: esp-idf logger: api: ota: dashboard_import: package_import_url: github://esphome/firmware/voice-assistant/m5stack-atom-echo.yaml@main wifi: ap: improv_serial: i2s_audio: i2s_lrclk_pin: GPIO33 i2s_bclk_pin: GPIO19 microphone: - platform: i2s_audio id: echo_microphone i2s_din_pin: GPIO23 adc_type: external pdm: true speaker: - platform: i2s_audio id: echo_speaker i2s_dout_pin: GPIO22 dac_type: external mode: mono voice_assistant: microphone: echo_microphone speaker: echo_speaker silence_detection: true on_listening: - light.turn_on: id: led blue: 100% red: 0% green: 0% brightness: 50% on_start: - light.turn_on: id: led blue: 100% red: 0% green: 0% brightness: 100% effect: pulse on_tts_start: - light.turn_on: id: led blue: 0% red: 0% green: 100% brightness: 100% effect: none on_tts_end: - light.turn_on: id: led blue: 0% red: 0% green: 100% brightness: 100% effect: pulse on_end: - delay: 100ms - wait_until: not: speaker.is_playing: - light.turn_off: led on_error: - light.turn_on: id: led blue: 0% red: 100% green: 0% brightness: 100% effect: none - delay: 1s - light.turn_off: led binary_sensor: - platform: gpio pin: number: GPIO39 inverted: true name: Button disabled_by_default: true entity_category: diagnostic id: echo_button on_click: - if: condition: voice_assistant.is_running then: - light.turn_off: led - voice_assistant.stop: else: - light.turn_on: id: led blue: 100% red: 0% green: 0% brightness: 50% effect: none - voice_assistant.start: light: - platform: esp32_rmt_led_strip id: led name: None disabled_by_default: true entity_category: config pin: GPIO27 default_transition_length: 0s chipset: SK6812 num_leds: 1 rgb_order: grb rmt_channel: 0 effects: - pulse: transition_length: 250ms update_interval: 250ms - Before we can install the firmware again on the device, we need to make some changes to the YAML.
First, change the substitutions to the name you choose in the wizard for your device.substitutions: name: "atom-echo-kitchen" friendly_name: "ATOM-Echo-kitchen" - Save the YAML (top right corner)
- If you have set a permanent IP address for the device in your router, go right to the next step, otherwise you need to change the following in YAML.
Replace
withwifi: ap:wifi: ssid: <ENTER YOUR WIFI SSID HERE> password: <ENTER YOUR WIFI PASSWORD HERE> manual_ip: static_ip: xxx.xxx.xxx.xxx # Your IP address for this device gateway: xxx.xxx.xxx.xxx # Your gateway IP Address, this is normally the IP of your router subnet: xxx.xxx.xxx.xxx # Your subnet, this you can find in your router ap: - Now you can click install and watch ESPHome compile and upload the firmware top your device. It will get restarted during the process, but after that you will see the actual log from the device, how it is connected, and if any errors occured.
- Congrats, you have mastered te difficult route in adding a device in ESPHome manually! Be proud of your victory and checkout the other cool things you can do with ESPHome powered devices.
That’s it, thank you for reading to the end!  Please feel free to edit this post, as the “Community Guides” sub-forum specifically allows for the edit of the first post for everyone. So if you find any errors, faults, something missing, just go ahead and change it or let me know what to change! It would be nice, if you could make a seperate post informing others about your change, but it is in no way necessary.
If you have any questions or problems, just post either in this topic or open your own topic in the corresponding forum.
Sources
- Pictures are linked from the original guide on the HomeAssistant website, “$13 voice remote for Home Assistant”
- The copy of the guide is taken from, well, the same website: “$13 voice remote for Home Assistant”
- Screenshot is taken with permission from @aPugLife 's post here
Edits
- 07-31-23 Added last resort
- 07-30-23 Initial
