I’m guessing there isn’t much enthusiasm for this device, as no replies. But I thought I’d report back in case anyone buys a LoraTap RR300WST to use the kinetic, battery-less switch. I’ve got it working as wanted, in a roundabout sort of way.
The Problem
I’m in the UK, so no neutral behind the light switches, which makes it awkward to use smart wif-fi switches. So I have smart bulbs in the fittings, which work great from Home Assistant, but I also wanted a physical switch on the wall.
Since this device uses a battery-less switch, it seemed like a great no-maintenance option. My idea was to add this LoraTap RR300WST to Home Assistant, and use Node-Red to toggle the smart bulbs when the relay switches (ie. when the wall switch is pressed). Trouble is, it’s not ESP8862, so I couldn’t flash Tasmota or similar.
It does use the Tuya app, so I could use the Tuya integration to add the LoraTap device to Home Assistant. However, it’s very slow to update the device status, so there’d be a 5-10 second delay between pressing the switch and the smart bulbs turning on. Plus, I want everything inside my network with no cloud apps like Tuya involved.
The Solution
Although the LoraTap RR300WST uses the Tuya app for smartphone controls, the wireless switch works whether or not the relay unit is connected to wi-fi. So effectively, I’m using it as a wireless relay with a remote switch (a remote switch that never needs its battery changing!).
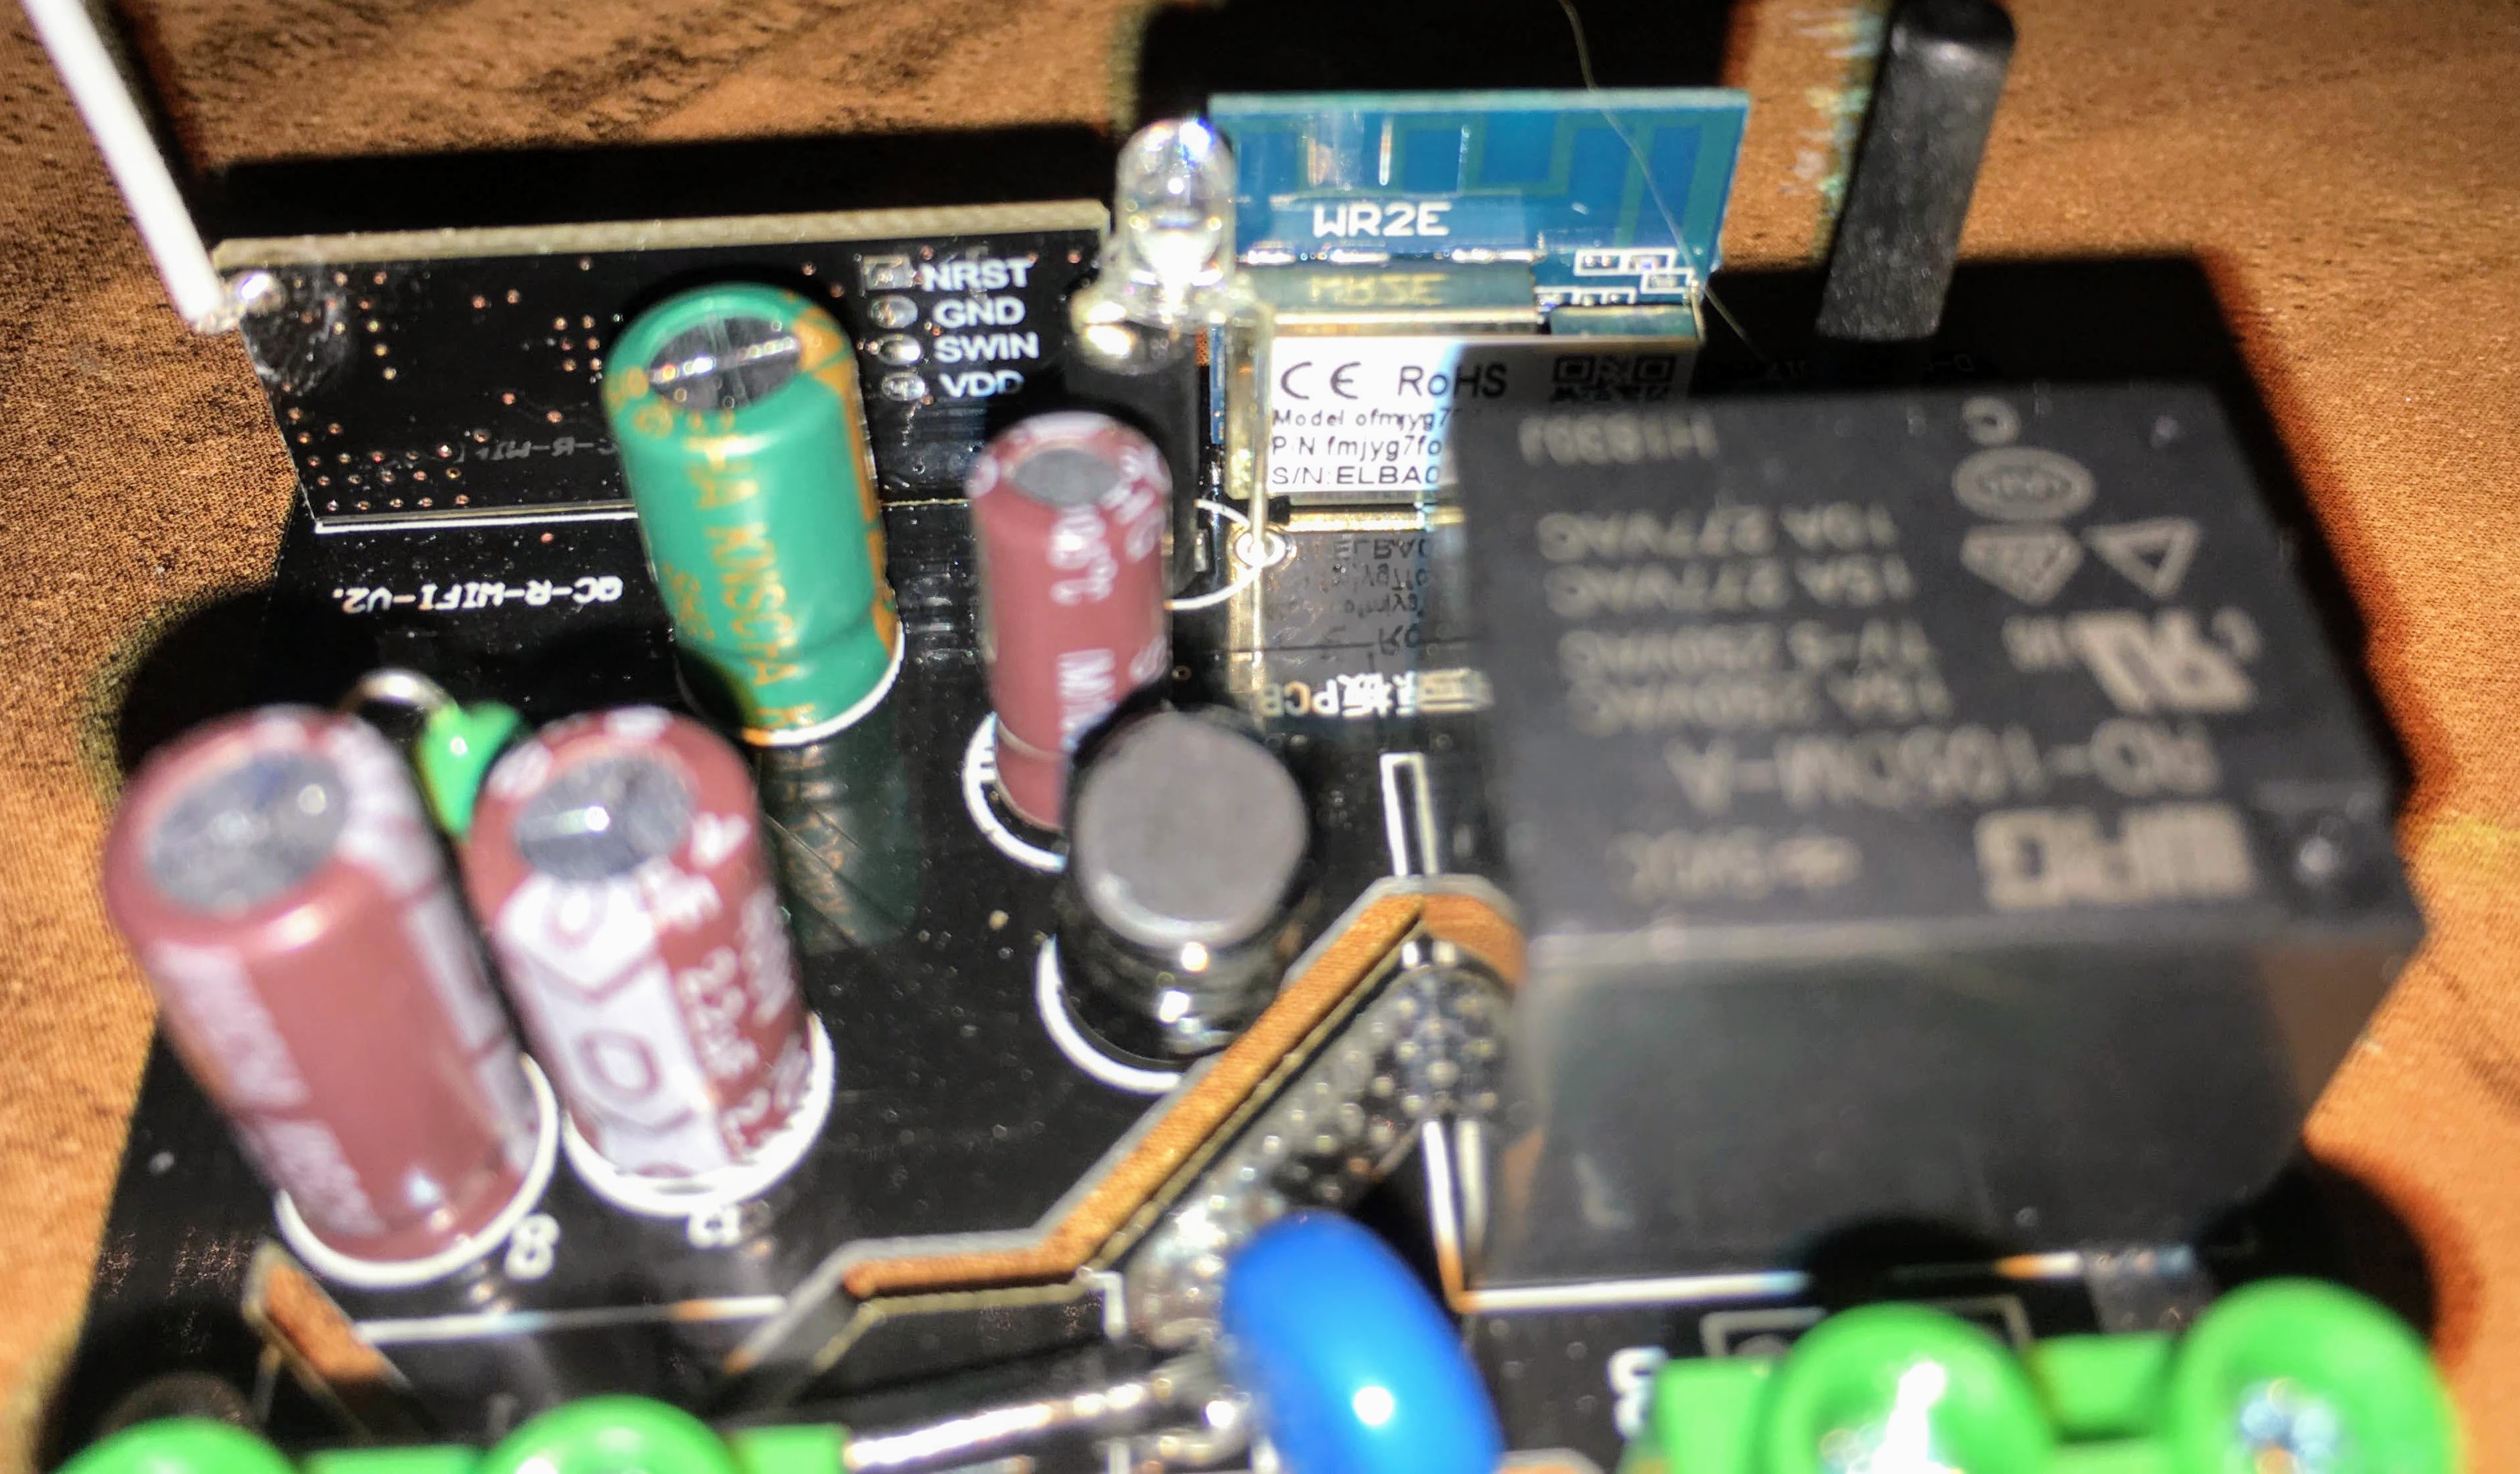
First thing I did was to cut a few tracks inside the LoraTap RR300WST to isolate the relay contacts. By default, it routes the 240V line through the relay, while neutral is directly connected to the output terminal. By cutting the tracks, I now have a pair of clean relay contacts.
Second, I found a 3.3v supply on the board. I had an ESP-01 spare, so I flashed Tasmota to that and powered it using the 3.3v from the LoraTap RR300WST board. The clean relay contacts are being used to ground GPIO2, which is set up in Tasmota as a switch. The small size of the ESP-01 means it fits inside the LoraTap case very neatly, up against the relay.
Currently the whole thing is plugged into the wall, but I might put the unit inside the light fitting so it’s not taking up a socket.
The ESP-01 has been added as a device to Home Assistant, and it’s set up in Node-Red so that the “switch” (GPIO2) toggles the smart bulbs on and off. There’s maybe half a second delay between pressing the wall switch and the bulbs turning on, which is fine. Because the bulbs are being toggled (as opposed to turned on and off), it doesn’t matter what state the relay is in; any change of state toggles the bulbs, which means I can turn them on using the HA app, and off using the wall switch, and everything works as expected.
The live feed in the back of the light switch is now connected directly to the lamp feed, so the bulbs always have power.
So the LoraTap RR300WST relay is simply working like a remote switch to turn the ESP-01 on and off (while powering it, too). While I was at it, I had Node-Red set the brightness to 100% every time the wall switch is used, since there’s no physical dimmer (except after sunset, when it turns them on at 50% brightness instead, since the room will be darker).
Altogether I’m happy with this as a solution. I’d prefer to be able to flash the LoraTap with Tasmota, but there you go. Having a wall switch that doesn’t need batteries, or capacitors across the bulbs (which isn’t a great solution with no-neutral smart switches anyway, in my opinion), is a huge benefit of this device. It also means that you can add extra wireless switches to the LoraTap relay, and put them anywhere you want - they even come with self-adhesive strips so you can just stick the switch to the wall anywhere you want it.
Here are the modifications I made to the PCB, in case it’s any use to anyone.