For several years, I had been running Home Assistant Supervised on a Debian Linux system with Docker, which provides a convenient way to use Home Assistant on top of a regular Linux installation. This setup worked well for a long time, but recently the Home Assistant project has moved away from supporting the Supervised installation method. It now sits in a ‘limited support / not recommended’ state, with multiple warnings in the documentation clearly stating that the Supervised method will no longer be supported after January 2026.
Another important factor was that my Linux host runs several additional services — such as Samba, MiniDLNA, CUPS, and others — which require full control over the operating system and were already installed and working fine. After investigating the available HACS integrations for the same add-ons and plugins, I decided that migrating to a clean Docker-based setup would provide the best long-term flexibility and maintainability.
This article documents my full migration experience.
![]() Preparation
Preparation
Before starting the migration, make sure you meet the following requirements:
![]() Terminal access to your base Linux system
Terminal access to your base Linux system
You should be able to log in via SSH or use a local terminal with sudo/root permissions.
![]() Docker already installed and running
Docker already installed and running
This guide assumes that Docker Engine is installed, configured, and functioning correctly.
![]() An existing Home Assistant Supervised installation
An existing Home Assistant Supervised installation
The migration process requires your current instance to be running so you can export backups, migrate the database, and review your installed add-ons.
![]() Save Mosquitto broker and Zigbee2MQTT credentials
Save Mosquitto broker and Zigbee2MQTT credentials
Before starting the migration, note down the username, password, and hostname used in your existing Mosquitto broker and Zigbee2MQTT Supervised add-on configuration (YAML version). You will need these values later to ensure proper communication between the new containers.
Example reference in configuration:
logins:
  - username: "!secret user"
    password: "!secret pass"
mqtt:
  server: mqtt://core-mosquitto
![]() Cleanup & Simplification
Cleanup & Simplification
I reviewed my existing Home Assistant setup and planned which parts I wanted to simplify.
One of the key decisions during this migration was to move away from MariaDB and return to Home Assistant’s native SQLite database. This choice was influenced by user feedback indicating that SQLite now works reliably and efficiently, and it also simplifies backups and configuration management.
Because of this, I did not simply remove MariaDB — instead, during the migration I first exported and migrated all my data back into SQLite. Using the method described in this guide, I successfully transferred all historical data and configurations. In my case, I needed to use the pipx version of the migration utility:
mysql2sqlite -f /config/home-assistant_v2.db -d <database> -u <username> -h <ip_address> -P 3306 -p -V --use-buffered-cursors
Where:
database – MariaDB name (usually homeassistant)
username – MariaDB user
password – will be prompted
My database was about 2 GB, and the migration took less than half an hour. After completing the process, the new Docker-based instance no longer relied on MariaDB, so I removed the add-on entirely.
I also created a backup using Home Assistant’s native System → Backups feature, which included all snapshots, dashboards, automations, and configurations. Additionally, I store backups in Google Drive weekly for extra security.
![]() Listed integrations and add-ons
Listed integrations and add-ons
I reviewed which services I needed to recreate in Docker — such as MQTT, reverse proxy, and file editing — knowing that MariaDB would not be part of the new setup. I selected the following containers to replace Supervisor add-ons:
File Editor – replaces the Configurator add-on
Duplicati – backups for container configuration directories
Mosquitto – MQTT broker
Zigbee2MQTT – Zigbee gateway
NGINX Proxy Manager – replaces HA SSL proxy + Let’s Encrypt add-ons
SQLite Web – view/manage SQLite database
These containers together recreate the full environment I previously had under Supervisor, while keeping everything modular, transparent, and easy to maintain.
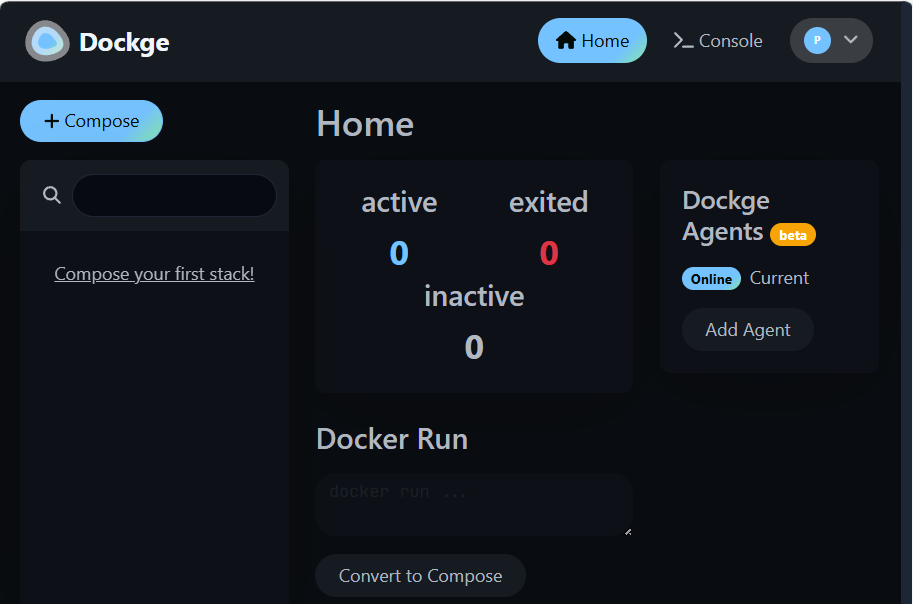
To manage the Docker Compose stacks, I chose Dockge as described in this article — lightweight, clean, easier than Portainer (but Portainer also works if you prefer it).
![]() Stopping and Removing the Supervised Environment
Stopping and Removing the Supervised Environment
Stop the Supervisor environment completely:
sudo ha core stop
sudo systemctl disable --now hassio-supervisor.service hassio-apparmor.service
Stop Remaining Supervised Containers
List all running containers and then stop the remaining Supervisor-related containers:
sudo docker ps
sudo docker stop <ID_or_Name> <ID_or_Name> ...
Installation
![]() Step 1: Create the directory structure
Step 1: Create the directory structure
Run the following command to prepare all required directories for your Docker-based Home Assistant OS setup:
sudo mkdir -p /opt/{dockge,stacks,haoss/{nginx-proxy-manager/{data,letsencrypt},homeassistant/config,mosquitto/{config,data,logs},zigbee2mqtt/data,duplicati/{config,backup},sshterminal}}
You will need to copy your ZigBee2MQTT add-on configuration files
sudo cp -aRv /usr/share/hassio/homeassistant/zigbee2mqtt/* /opt/haoss/zigbee2mqtt/data
![]() Step 2: Create a dedicated Docker network
Step 2: Create a dedicated Docker network
To ensure all containers can communicate securely and consistently, create a custom Docker network:
sudo docker network create haoss_network
![]() Step 3: Installing Dockge
Step 3: Installing Dockge
To manage all Docker Compose stacks conveniently, install Dockge:
sudo nano /opt/dockge/compose.yaml
Paste the following content into compose.yaml:
services:
  dockge:
    image: "louislam/dockge"
    restart: "unless-stopped"
    ports:
      - "5001:5001/tcp"
    volumes:
      - "/var/run/docker.sock:/var/run/docker.sock"
      - "/opt/dockge/data:/app/data"
      - "/opt/stacks:/opt/stacks"
Then start Dockge:
cd /opt/dockge
sudo docker compose up -d
![]() Step 4: Installing Nginx Proxy Manager
Step 4: Installing Nginx Proxy Manager
Create a new stack called “nginx-proxy-manager” in Dockge by pressing +Compose and use the following configuration:
services:
  nginx-proxy-manager:
    image: jc21/nginx-proxy-manager
    container_name: nginx-proxy-manager
    restart: unless-stopped
    ports:
      - 443:443
      - 80:80
      - 81:81
    volumes:
      - /opt/haoss/nginx-proxy-manager/data:/data
      - /opt/haoss/nginx-proxy-manager/letsencrypt:/etc/letsencrypt
    networks:
      - haoss_network
networks:
  haoss_network:
    external: true
    name: haoss_network
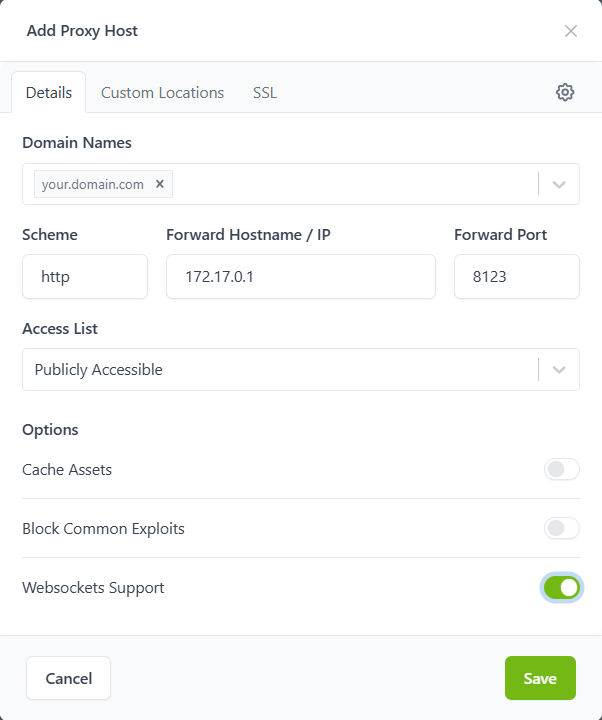
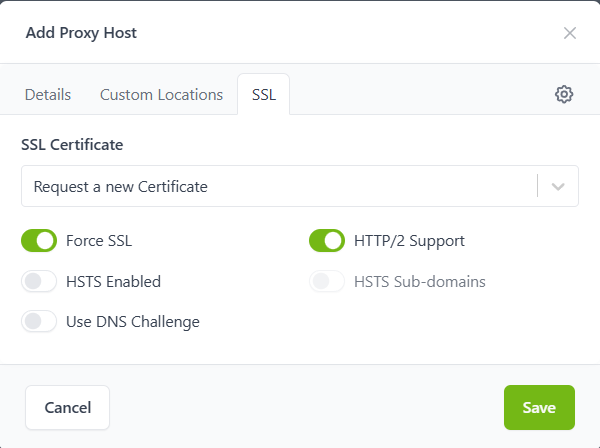
Configuring Nginx Proxy Manager
If you plan to use HTTPS, set up Home Assistant host in Nginx Proxy Manager:
- Open NPM at http://ipaddress:81.
- Log in and add a new proxy host.
- Forward IP: Docker bridge (usually 172.17.0.1)
- Forward Port: 8123
- Scheme: http
- Request a Let’s Encrypt certificate and enable:
- Force SSL
- HTTP/2
- Websocket support
After this, your Home Assistant will be accessible at your domain via HTTPS, with automated certificate renewals.
![]() Step 5: Installing Mosquitto
Step 5: Installing Mosquitto
First, create a Mosquitto configuration file:
sudo nano /opt/haoss/mosquitto/config/mosquitto.conf
Insert the following content:
persistence true
persistence_location /mosquitto/data/
log_dest file /mosquitto/log/mosquitto.log
listener 1883
protocol mqtt
listener 9001
protocol websockets

## Authentication ##
allow_anonymous true
Next, create a new stack called “mosquitto” in Dockge by pressing +Compose and use the following configuration. You can check the hostname & container_name in your Supervised Zigbee2MQTT add-on configuration to ensure it is correct:
services:
  mosquitto:
    image: eclipse-mosquitto
    container_name: core-mosquitto
    hostname: core-mosquitto
    ports:
      - 1883:1883
      - 9001:9001
    restart: unless-stopped
    volumes:
      - /opt/haoss/mosquitto/config:/mosquitto/config
      - /opt/haoss/mosquitto/data:/mosquitto/data
      - /opt/haoss/mosquitto/logs:/mosquitto/log
    networks:
      - haoss_network
networks:
  haoss_network:
    external: true
    name: haoss_network
After the stack is up and running, set a password for MQTT, as decribed in this article.
Make sure to use the same password that was configured in your previous Supervised installation.
sudo docker exec -it core-mosquitto sh
mosquitto_passwd -c /mosquitto/config/password.txt yourusername
exit
Then update the Mosquitto configuration to disable anonymous access and use the password file:
sudo nano /opt/haoss/mosquitto/config/mosquitto.conf
Update the authentication section to:
allow_anonymous false
password_file /mosquitto/config/password.txt
Finally, reboot the system to apply changes:
sudo reboot
Start the stack in Dockge to launch your new Mosquitto broker.
![]() P.S. Recently, I noticed the following warning:
P.S. Recently, I noticed the following warning:
Warning: File /mosquitto/config/password.txt has world readable permissions. Future versions will refuse to load this file.
To fix this, use `chmod 0700 /mosquitto/config/password.txt`.
I resolved it by running:
chmod 0700 /opt/haoss/mosquitto/config/password.txt
After that, the warning disappeared.
![]() Step 6: Installing Zigbee2MQTT Container
Step 6: Installing Zigbee2MQTT Container
List available serial devices to identify your Zigbee USB stick:
ls -l /dev/serial/by-id/
Create a new Zigbee2MQTT configuration file, or simply keep the configuration file you previously copied from your Supervised setup:
sudo nano /opt/haoss/zigbee2mqtt/data/configuration.yaml
Insert the following configuration
(Be sure to adjust the port, channel, pan_id, network_key, and MQTT credentials to match your previous add-on configuration or copy the file from your existing Supervised setup—but pay special attention to the device section.):
homeassistant:
  enabled: true
  legacy_action_sensor: true
mqtt:
  server: mqtt://core-mosquitto:1883
  user: yourusername
  password: yourpassword
serial:
  port: /dev/serial/by-id/serial_name_from_ls_request
  adapter: zstack
  baudrate: 115200
  rtscts: false
frontend:
  enabled: true
  port: 8080
  host: 0.0.0.0
advanced:
  channel: 00
  pan_id: 0000
  network_key:
    - 0
    - 0
      .
      .
      .
    - 0
  last_seen: ISO_8601
  log_level: warning
Next, create a new stack called “zigbee2mqtt” in Dockge by pressing +Compose and use the following configuration:
services:
  zigbee2mqtt:
    image: koenkk/zigbee2mqtt
    container_name: zigbee2mqtt
    hostname: zigbee2mqtt
    restart: unless-stopped
    privileged: true
    volumes:
      - /opt/haoss/zigbee2mqtt/data:/app/data
      - /run/udev:/run/udev:ro
    devices:
      - /dev/ttyUSB0:/dev/ttyACM0
    environment:
      - TZ=Europe/Amsterdam
      - MQTT_SERVER=mqtt://core-mosquitto
    ports:
      - 8080:8080
    networks:
      - haoss_network
networks:
  haoss_network:
    external: true
    name: haoss_network
After saving the configuration, start the Zigbee2MQTT stack in Dockge to ensure it can connect successfully to the running Mosquitto broker.
![]() Step 7: Installing Home Assistant Container
Step 7: Installing Home Assistant Container
We are now ready to install the Home Assistant container.
Rename the Home Assistant container from the Supervised installation:
sudo docker rename homeassistant homeassistant_supervised
Create a new stack called “homeassistant” in Dockge by pressing +Compose and use the following configuration:
services:
  homeassistant:
    image: homeassistant/home-assistant:stable
    container_name: homeassistant
    hostname: homeassistant
    restart: unless-stopped
    network_mode: host
    privileged: true
    environment:
      - TZ=Europe/Amsterdam
    volumes:
      - /opt/haoss/homeassistant/config:/config
      - /run/dbus:/run/dbus:ro
networks:
  haoss_network:
    external: true
    name: haoss_network
Open yourhost:8123 in browser, then you can choose to restore from backup and provide path to your backup file.
You will need to reconfigure the MQTT integration in Home Assistant.
Instead of using the old hostname (e.g., core-mosquitto), update the integration to use the IP address of your new Mosquitto container, along with the correct username and password.
![]() Step 8: Installing File Editor (Configurator)
Step 8: Installing File Editor (Configurator)
Create a new stack called “configurator” in Dockge by pressing +Compose and use the following configuration:
services:
  configurator:
    container_name: configurator
    image: causticlab/hass-configurator-docker
    restart: unless-stopped
    hostname: configurator
    volumes:
      - /opt/haoss/homeassistant:/hass-config
      - /opt/haoss/configurator:/config
    environment:
      - HC_BASEPATH=/hass-config/config
      - HC_IGNORE_SSL=True
      - TZ=Europe/Amsterdam
    ports:
      - 3218:3218
    networks:
      - haoss_network
networks:
  haoss_network:
    external: true
    name: haoss_network
![]() Step 9: Installing SQLite-Web and SSH Terminal, MQTT explorer
Step 9: Installing SQLite-Web and SSH Terminal, MQTT explorer
Create a new stack called “sqlite-web” in Dockge by pressing +Compose and use the following configuration:
services:
  sqlite-web:
    image: ghcr.io/coleifer/sqlite-web
    container_name: sqlite-web
    ports:
      - 8088:8080
    volumes:
      - /opt/haoss/homeassistant/config:/data
    environment:
      - SQLITE_DATABASE=home-assistant_v2.db
    restart: unless-stopped
    networks:
      - haoss_network
networks:
  haoss_network:
    external: true
    name: haoss_network
![]() Note: After stopping the Home Assistant container, you can use the following SQLite query to verify database integrity:
Note: After stopping the Home Assistant container, you can use the following SQLite query to verify database integrity: pragma integrity_check;
You can also install an SSH terminal container if needed, but in my case it didn’t provide any practical benefit.
services:
  ssh-terminal:
    image: linuxserver/openssh-server
    hostname: ssh-server
    restart: unless-stopped
    ports:
      - 2222:2222
    volumes:
      - /opt/haoss/sshterminal:/config
    environment:
      - PUID=1000
      - PGID=1000
      - PASSWORD_ACCESS=true
      - USER_PASSWORD=password
      - USER_NAME=linuxserver.io
    networks:
      - haoss_network
networks:
  haoss_network:
    external: true
    name: haoss_network
You may find useful MQTT explorer container :
sudo mkdir -p /opt/haoss/{mqtt-explorer/{config}}
services:
  mqtt-explorer:
    image: smeagolworms4/mqtt-explorer
    container_name: mqtt-explorer
    hostname: mqtt-explorer
    ports:
      - 4000:4000
    restart: unless-stopped
    volumes:
      - /opt/haoss/mqtt-explorer/config:/mqtt-explorer/config
    environment:
      - HTTP_PORT=4000
      - CONFIG_PATH=/mqtt-explorer/config
      - TZ=Europe/Amsterdam
    networks:
      - haoss_network
networks:
  haoss_network:
    external: true
    name: haoss_network
![]() Step 10: Installing HACS
Step 10: Installing HACS
Install HACS (Home Assistant Community Store) inside the Home Assistant container to enable integrations and add-ons that were previously supported by the Supervisor.
sudo docker exec -it homeassistant bash
cd /config
wget -O - https://install.hacs.xyz | bash
exit
After installation, restart Home Assistant. Then go to Settings → Devices & Services → Add Integration and search for HACS to complete the setup.
![]() Note: This step can potentially be skipped if HACS was already installed in your previous Supervised setup (not tested in this guide).
Note: This step can potentially be skipped if HACS was already installed in your previous Supervised setup (not tested in this guide).
![]() Step 11 — Install Duplicati
Step 11 — Install Duplicati
To enable automated backups of your container configuration files, install Duplicati as a Docker container.
Create a new stack called “duplicati” in Dockge by pressing +Compose and use the following configuration:
services:
  duplicati:
    image: linuxserver/duplicati
    container_name: duplicati
    restart: unless-stopped
    privileged: true
    ports:
      - 8200:8200
    volumes:
      - /opt/haoss/duplicati/config:/config
      - /opt/haoss/duplicati/backup:/backup
      - /:/source:ro
    environment:
      - PUID=0
      - PGID=0
      - TZ=Europe/Amsterdam
      - SETTINGS_ENCRYPTION_KEY=yourEncryptionKey
      - DUPLICATI__WEBSERVICE_PASSWORD=yourPassword
    networks:
      - haoss_network

networks:
  haoss_network:
    external: true
    name: haoss_network
After the container starts, open Duplicati in your browser:http://your-server-ip:8200
Here you can create backup tasks for your container configuration files.
P.S. switched to use PUID=0 PGID=0 to be able get access to all files.
![]() Note:: Consider creating separate backup jobs for each container folder so you can restore or update configurations individually.
Note:: Consider creating separate backup jobs for each container folder so you can restore or update configurations individually.
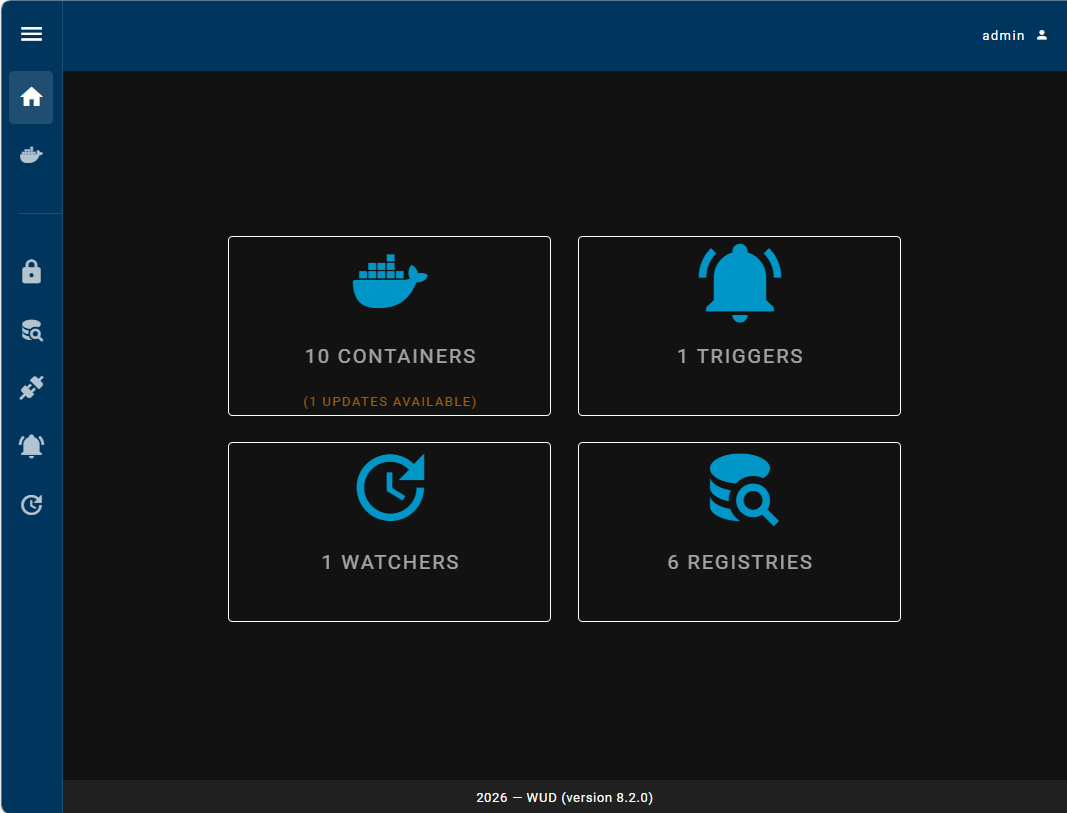
![]() Step 12: Checking for Container Updates
Step 12: Checking for Container Updates
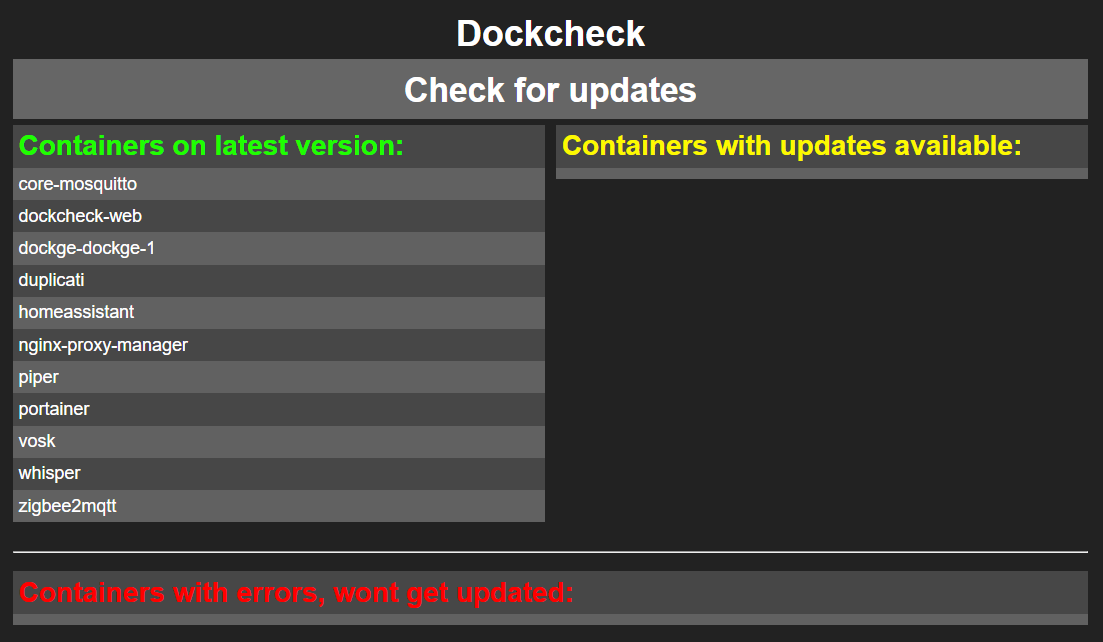
To check for updates for all your Docker containers, as dockcheck-web didn’t worked for me, install the dockcheck script from github project.
curl -L https://raw.githubusercontent.com/mag37/dockcheck/main/dockcheck.sh -o ~/.local/bin/dockcheck.sh
chmod +x ~/.local/bin/dockcheck.sh
After installation, to check available updates for your containers you can run:
dockcheck.sh
![]() Post-Migration
Post-Migration
To access the installed containers — Dockge, Zigbee2MQTT, NGINX Proxy Manager, and File Editor — I created separate dashboards for each in Home Assistant (Dashboards → Webpage) with admin-only access.
Everything worked exactly as before — but faster, cleaner, and without Supervisor.
Lately, you might consider removing the Home Assistant Supervised containers and images from Docker.
sudo docker ps -a
sudo docker rm ID_or_Name ID_or_Name ...
sudo docker image prune -a
sudo docker system prune
Configuring Duplicati for Container Configuration Backup
Create a new backup job in Duplicati and set the source paths to include all relevant configuration directories:
/opt/stacks/
/opt/dockge/
/opt/haoss/configurator/
/opt/haoss/duplicati/
/opt/haoss/mosquitto/
/opt/haoss/nginx-proxy-manager/
/opt/haoss/sshterminal/
/opt/haoss/zigbee2mqtt/
This ensures that all your container configurations, add-ons, and stacks are backed up and can be restored if needed.
![]() Tip: Consider creating separate backup jobs for each container. This approach makes restoring individual containers easier, especially when performing updates, and reduces the risk of accidentally overwriting other container configurations.
Tip: Consider creating separate backup jobs for each container. This approach makes restoring individual containers easier, especially when performing updates, and reduces the risk of accidentally overwriting other container configurations.
Feel free to share any amendments or additions to this article.