FAQ: How to Fix Light Automation Issues with Multiple Trigger Sensors or Binary Sensors
If your light turns ON but then turns OFF and stays OFF, or if the automation isn’t working as expected when using multiple trigger sensors or binary sensors, you may be running into conflicts between the sensors. While the blueprint allows you to add multiple binary sensors as triggers, problems can arise when using more than one motion sensor or binary sensor simultaneously.
With the introduction of new presence sensors, which are excellent at detection and tend to stay ON for long periods, or contact/door sensors, which also stay ON, this issue can become more pronounced.
What Actually Happens?
When the initial trigger, usually a PIR sensor, activates, it turns the light ON. However, presence sensors typically react a bit slower than PIR sensors. This is why using both in combination can create an effective automation—PIR sensors offer a quick response, while presence sensors provide reliable, long-term detection.
The issue arises when the PIR sensor clears (turns OFF), which then turns the light OFF. Since presence sensors remain ON for extended periods after being triggered, the automation does not detect that the presence sensor has been activated because it was focused on the PIR sensor. Presence sensors don’t trigger again until you leave the room, so the automation does not respond to the presence sensor still being ON. As a result, the light turns off, even though the presence sensor is still detecting movement.
Solution: Use a Group Sensor
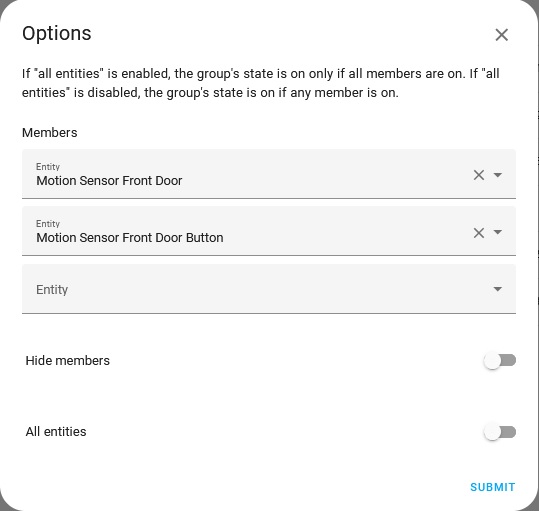
To resolve this issue, you can use a Group Sensor. Group sensors combine multiple sensors into a single entity. As long as any sensor in the group is ON, the group stays ON, preventing the automation from turning the light off prematurely. This helps resolve conflicts between multiple sensors by ensuring that the automation reacts to the group’s overall state rather than focusing on individual sensors. As long as at least one sensor in the group is triggered, the group remains ON, allowing the light to stay on until all sensors are OFF.
Add a Group Helper
- Navigate to Helpers:
-
Go to Settings > Devices & Services > Click on the Helpers tab.
-
Click + CREATE HELPER and select Group.

- Create the Group:
-
Choose Binary Sensor Group.

-
Enter a name for your group (e.g., “Sensor Light - Front Door - Group”).
-
Select the binary sensors or motion sensors you want to include in this group.
-
Ensure the Hide Members and All Entities toggles are turned OFF

- Update the Trigger in Automation:
-
Return to your automation, and in the Trigger Sensor - Binary Sensors section, search for the group name you just created (e.g., “Sensor Light - Front Door - Group”).
-
Select only this group for the trigger.

-
Save the Automation:
After setting the group as your trigger, save the automation.
This should help resolve conflicts between multiple sensors by consolidating them into a single group trigger.
Edit the Group Helper (If Needed)
If you need to make changes to the group (e.g., add or remove sensors), follow these steps:
- Navigate to the Helper:
- Go to Settings > Devices & Services > Click on the Helpers tab.
- Find and select the helper you want to edit (e.g., “Sensor Light - Front Door - Group”).
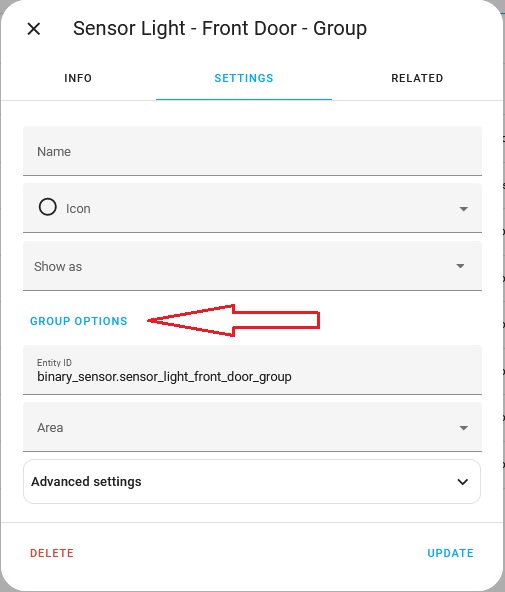
- Edit the Group:
-
Click the cogwheel icon next to the helper name.

-
Select Group Options.
-
Edit the list of entities in the group as needed, adding or removing sensors.
If you’d like to learn more about groups and their use, please click here.
Enjoy
Blacky ![]()
Back to FAQ: Click Here
Back to “The Settings & Best Practice Guidelines” Click Here