I wrote this new post on setting up Home Assistant with remote access on a virtual machine. Starting this new blog to share my musings with Home Assistant. Planning to write on some more interesting topics like event driven automations that I have found to be particularly useful. Would love some feedback.
Here is the full post:
Early this year, I got myself a refurbished HP EliteDesk 705 G3 Mini Desktop for $149 CAD to setup Home Assistant, which now sits in my TV stand as a media server (running Plex media server) and Home Assistant.
")
In this tutorial, I will guide you on how to setup a stable Home Assistant server that is accessible from anywhere.
Thanks for reading Home Assistant on fingertips ! Subscribe for free to receive new posts and support my work.
Initially, I went on different routes trying to install Home Assistant in Python virtual environment running under Windows 10 WSL (Windows Subsystem for Linux) as well as docker. I would suggest to stay away from these methods unless you are really technical and (or) not trying to do this on a Windows machine.
Without further ado, here it goes…
Specs of my mini PC - The HP EliteDesk 705 G3 Mini Desktop
Processor: AMD A10-8770E
RAM: 8GB DDR3
Storage: 128 GB SSD
OS: Windows 10 Pro
Step 1: Prepare your PC for Home Assistant
Enabling virtualization on your machine
By default, these machines are not enabled with hardware virtualization and you will have to do that in order to be able to run Home Assistant in a virtual machine.
Go into your BIOS and enable either SVM CPU Virtualization if you are using an AMD processor or Intel Virtualization Technology (VTx) if you are using Intel. Since my machine is based on AMD, I ended up enabling SVM. Bios settings are machine specific and depend on your OEM so I won’t be able to cover how to do that here.
Enabling virtualization in Windows 10
Once done with previous steps, search for turn windows features on or off in Windows search → open it → scroll down and make sure that Hyper-V is checked → restart your PC.
You are all set for Step 2!
Step 2: Installing Home Assistant on VMware
I have tried both Virtual Box and VMware Workstation 16 Player and I would say Virtual Box left me quite unsatisfied with random crashes, Home Assistant performance issues and freezes, so I finally settled with VMware Worksation 16 Player which has been running excellent so far.
Installing Home Assistant
- Download the VMware image from here. Alternatively, you can also dowload the .ova image for VMware from this link
- Follow this excellent tutorial on installing Home Assistant on VMware
- Make sure you specify 4 processors and 4GB memory for your virtual machine
- Make sure you enable
firmware=”efi”as documented in the linked tutorial - Setup your user and password in Home Assistant and play around a little bit
Step 3: Enabling remote access in Home Assistant
First things first. Let’s setup your Home Assistant to be publicly accessible via the world wide web instead of just your local host.
Note that for stable access, use wired connection for your host machine instead of using WiFi.
Grab your local IP address for your Home Assistant running inside the virtual machine
See the screenshot below.
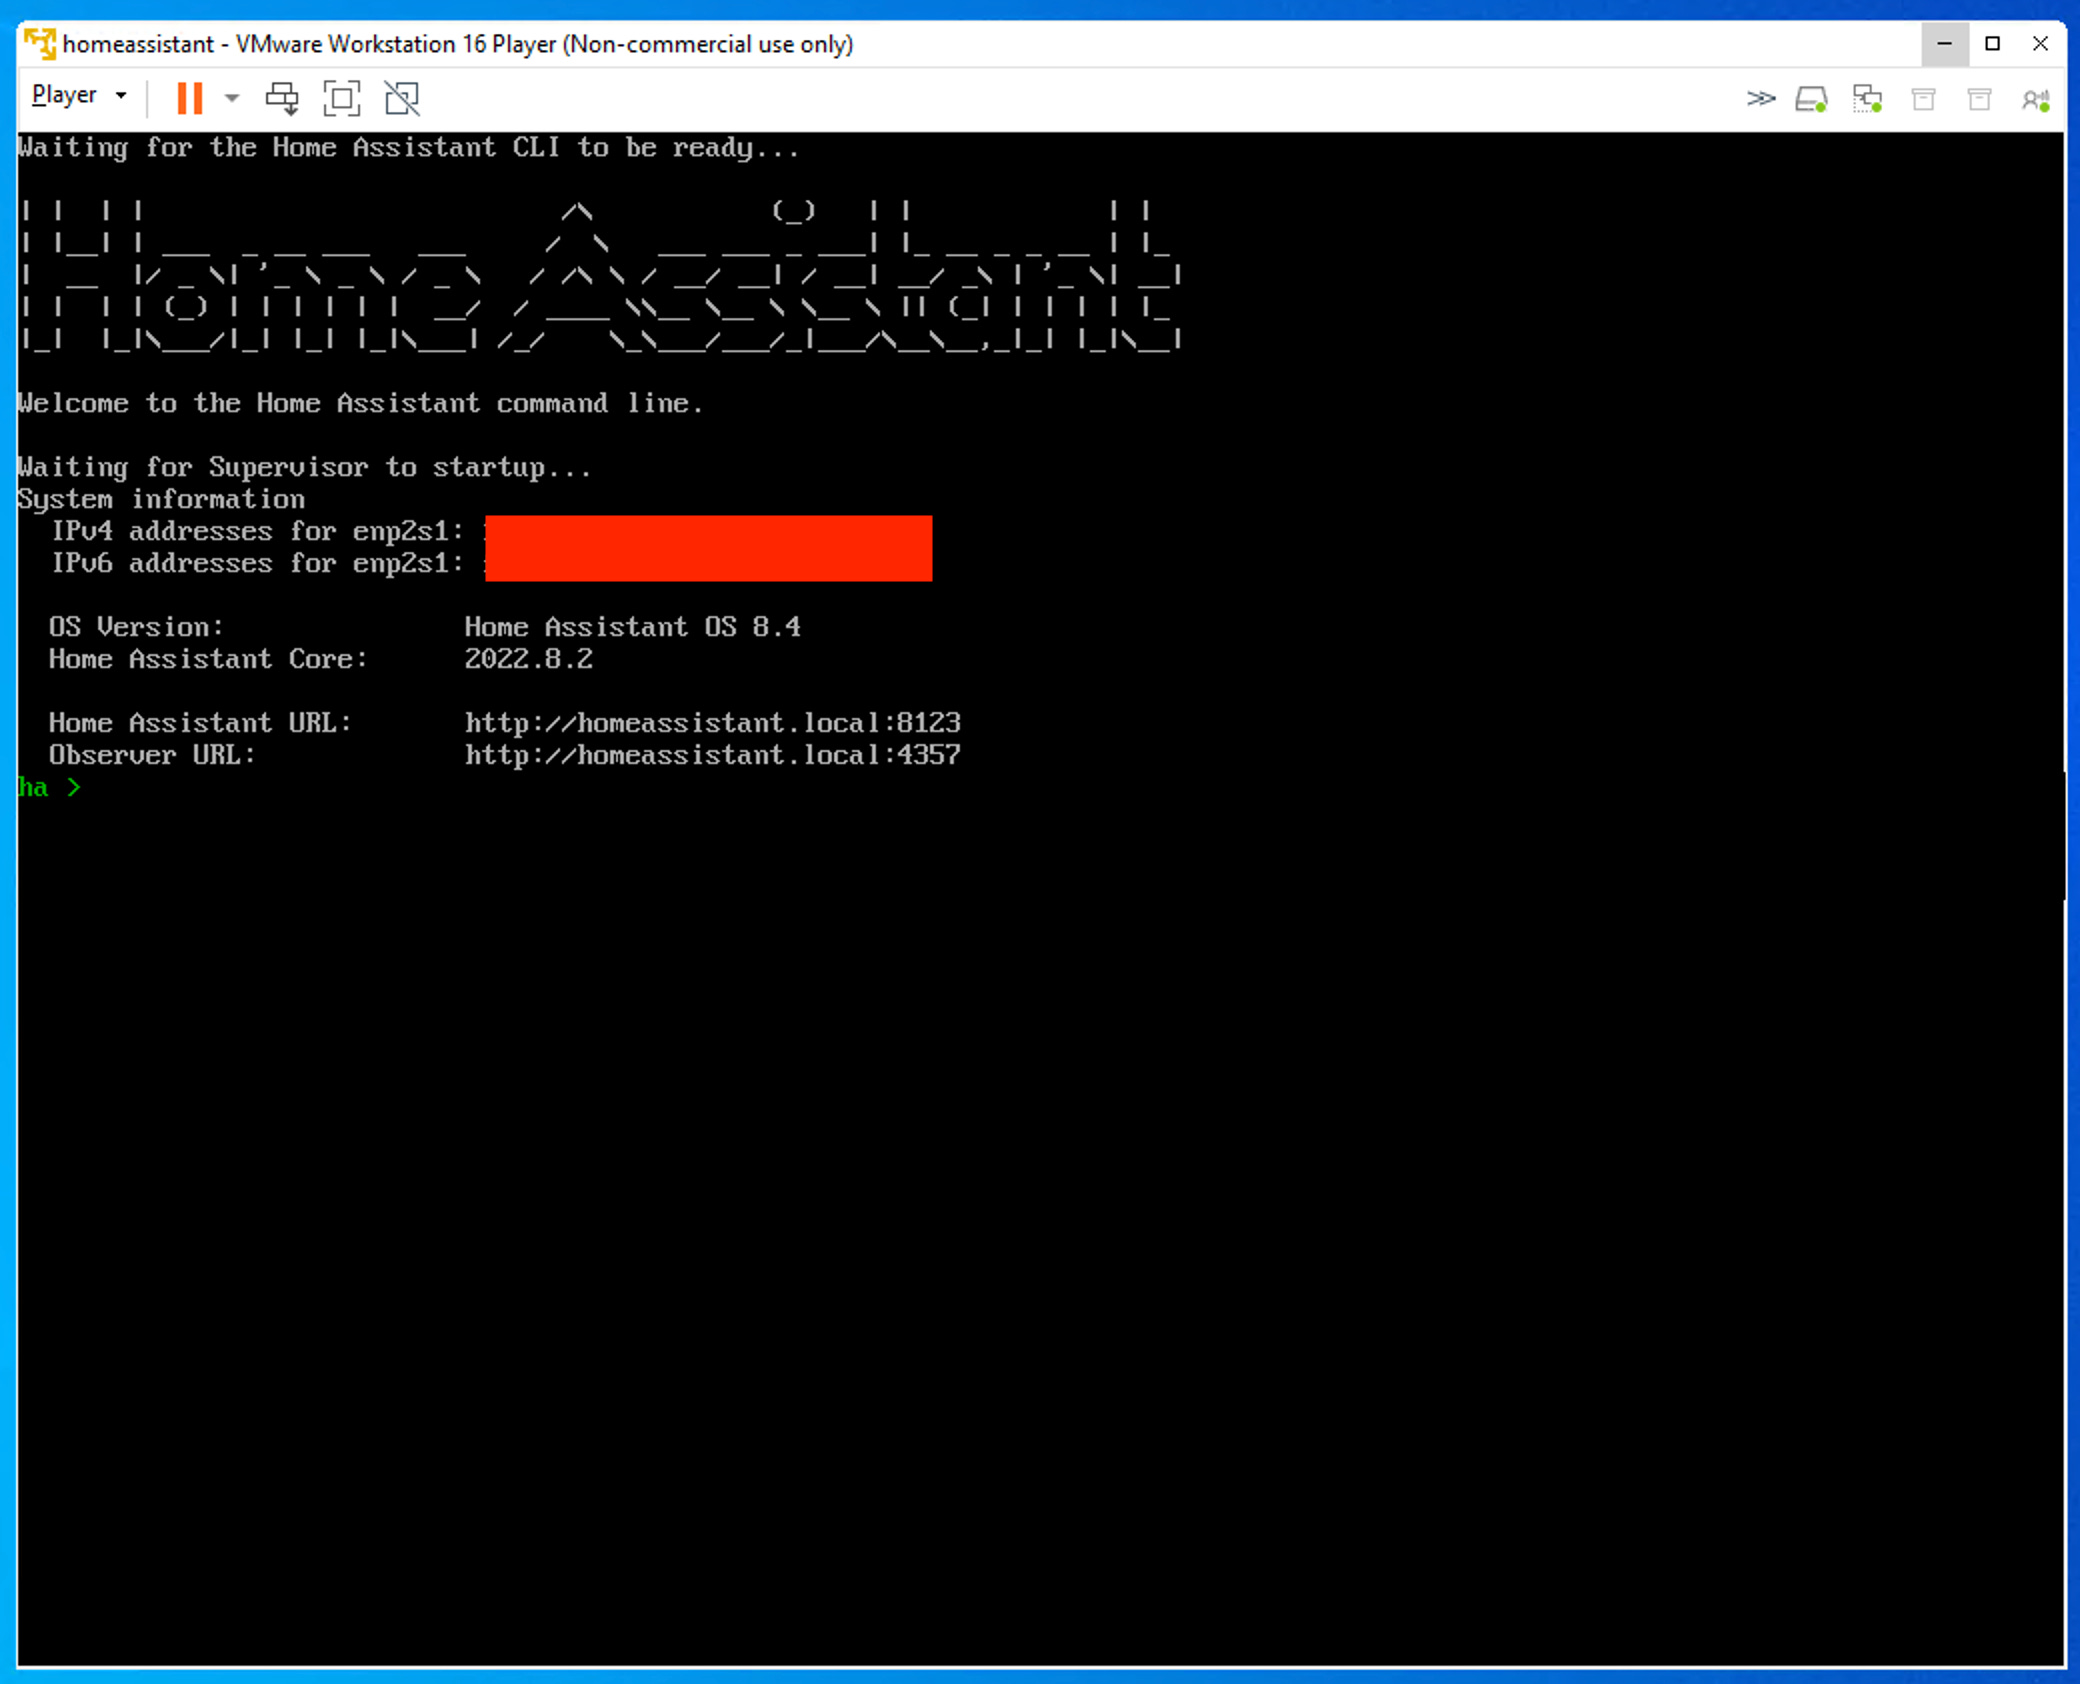
Also, note the IP address of your guest machine.
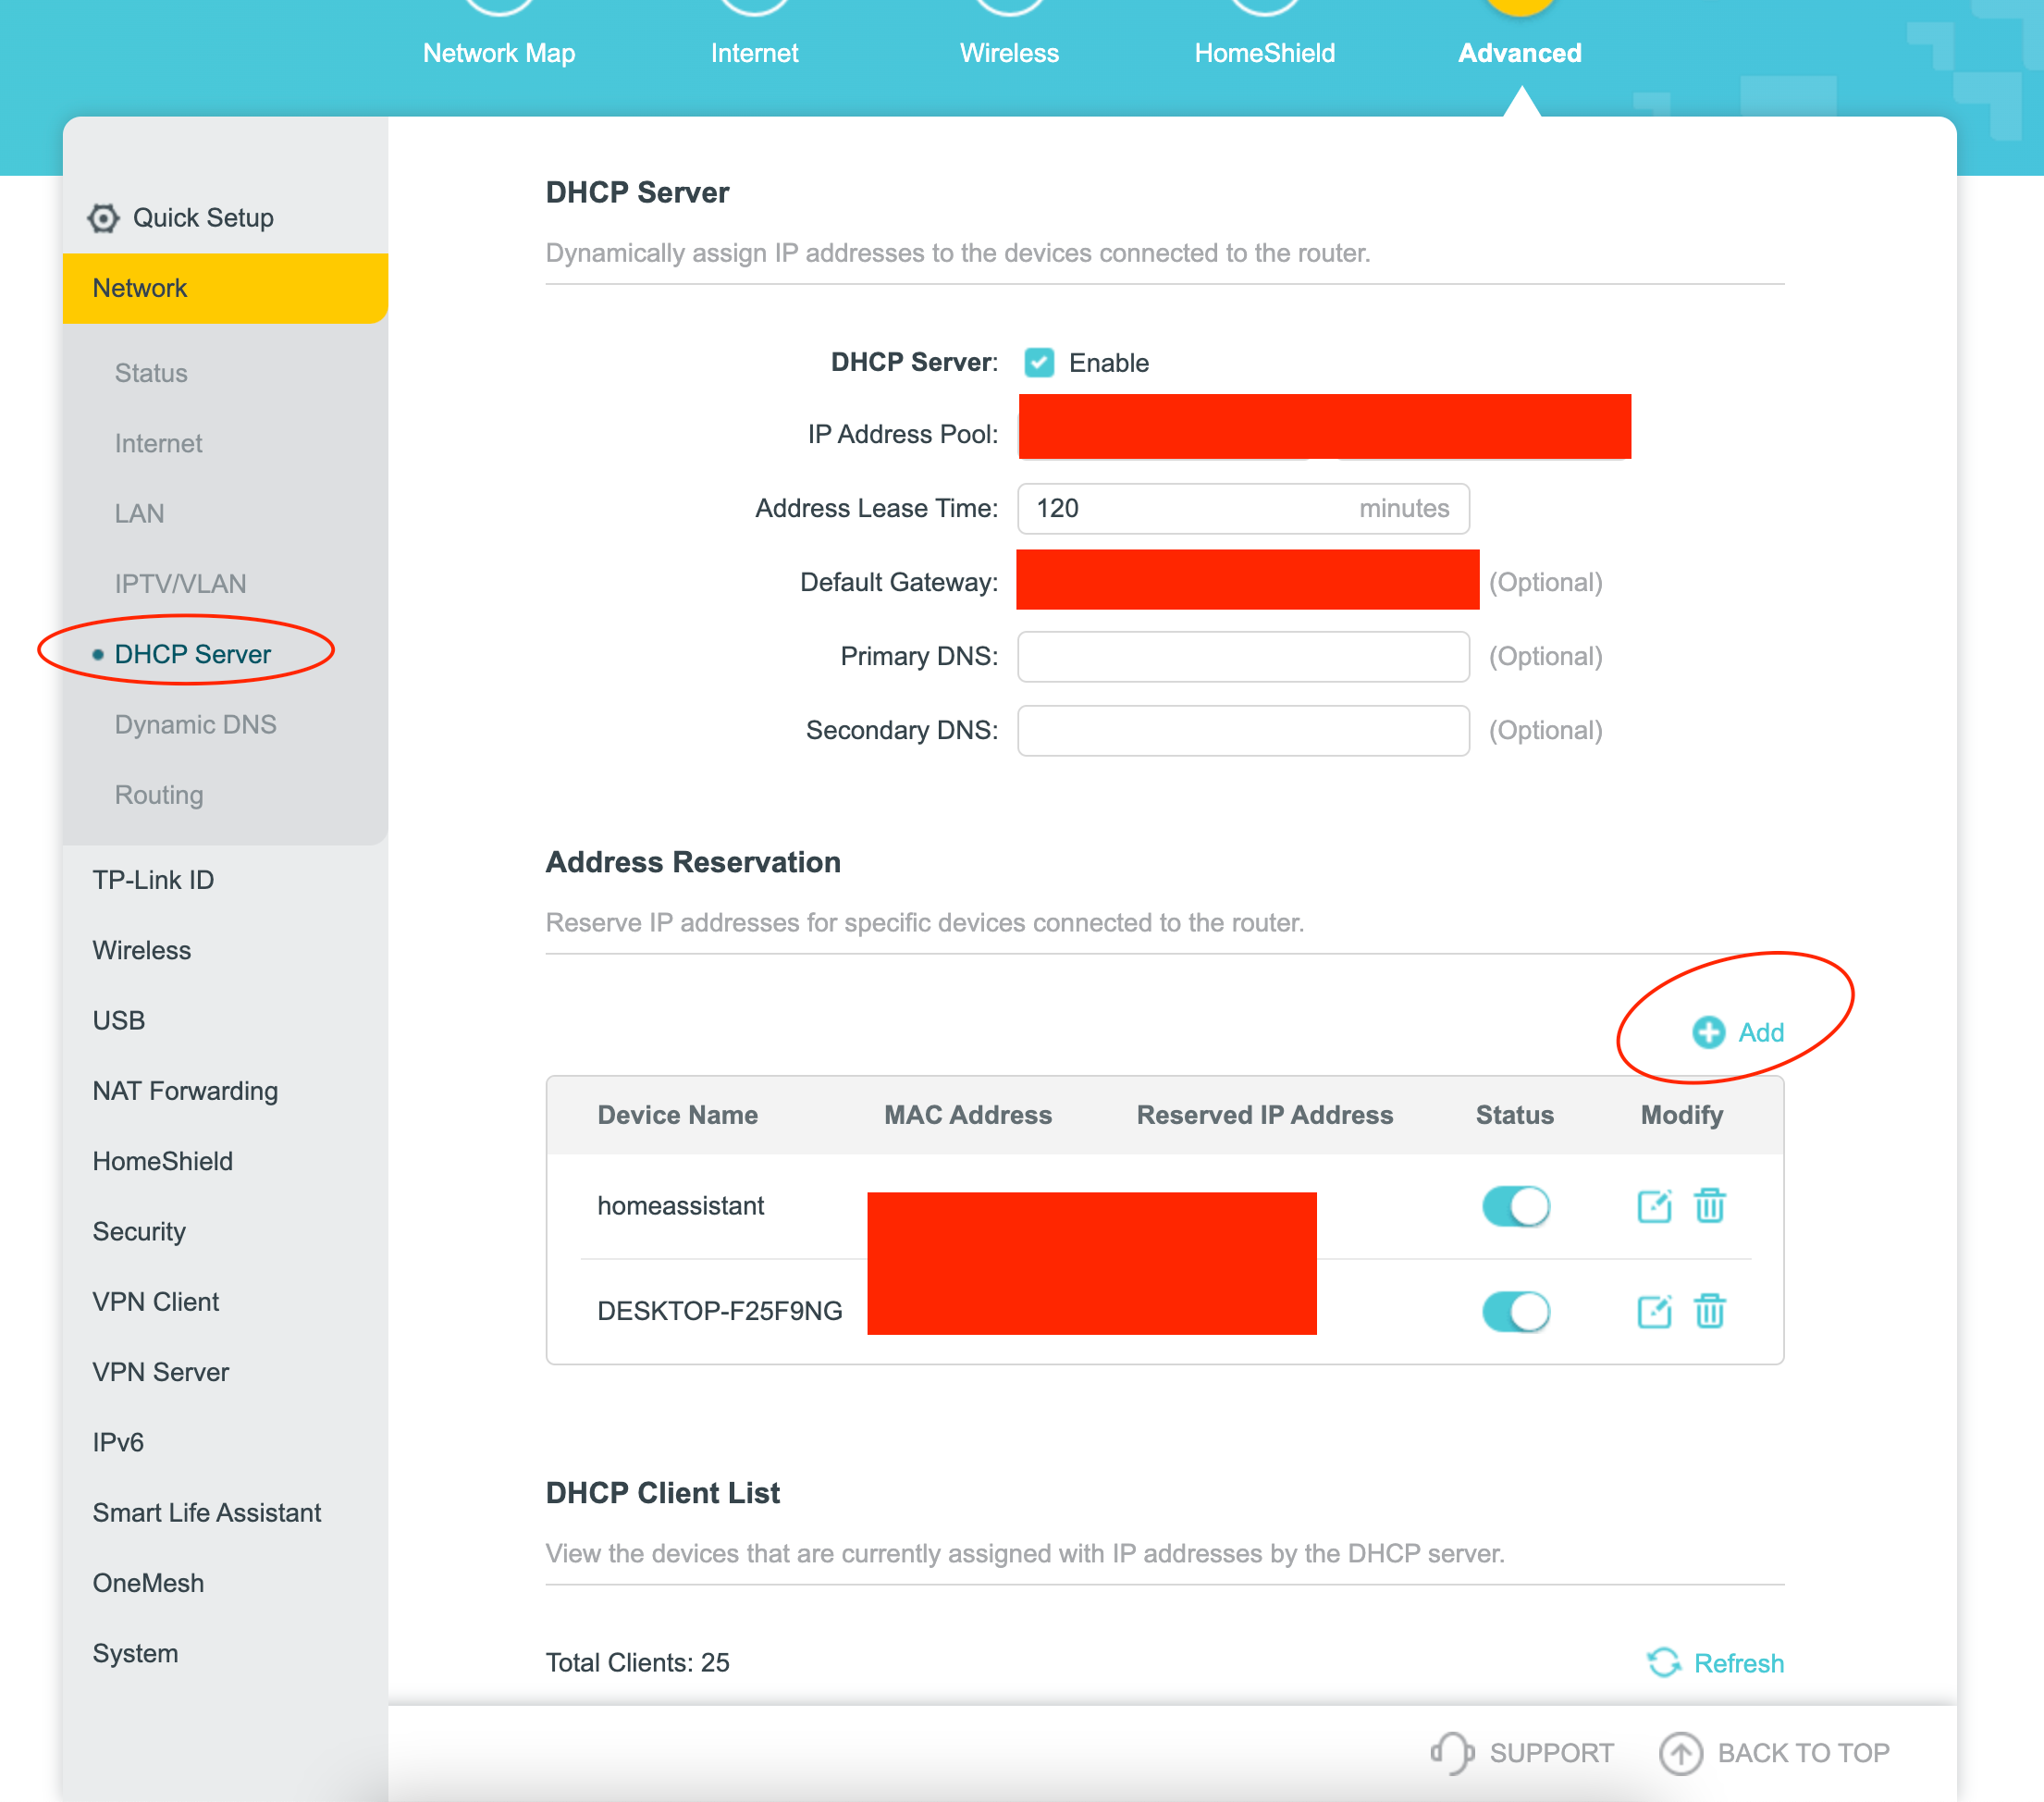
Go into your router settings and bind IP addresses
Different routers have different settings. I am using TPLink’s excellent Archer AX55 router so this section will be based on that.
Reserve local IP addresses for your Windows machine and the virtual machine. Make sure they are the same as noted above. This is important step and you will understand why in the next few steps.
Setup port forwarding to your virtual machine IP address
Forward 443 and 8123 both to 8123 over TCP where Device Ip Address should be the IP address of your virtual machine, not your guest machine.
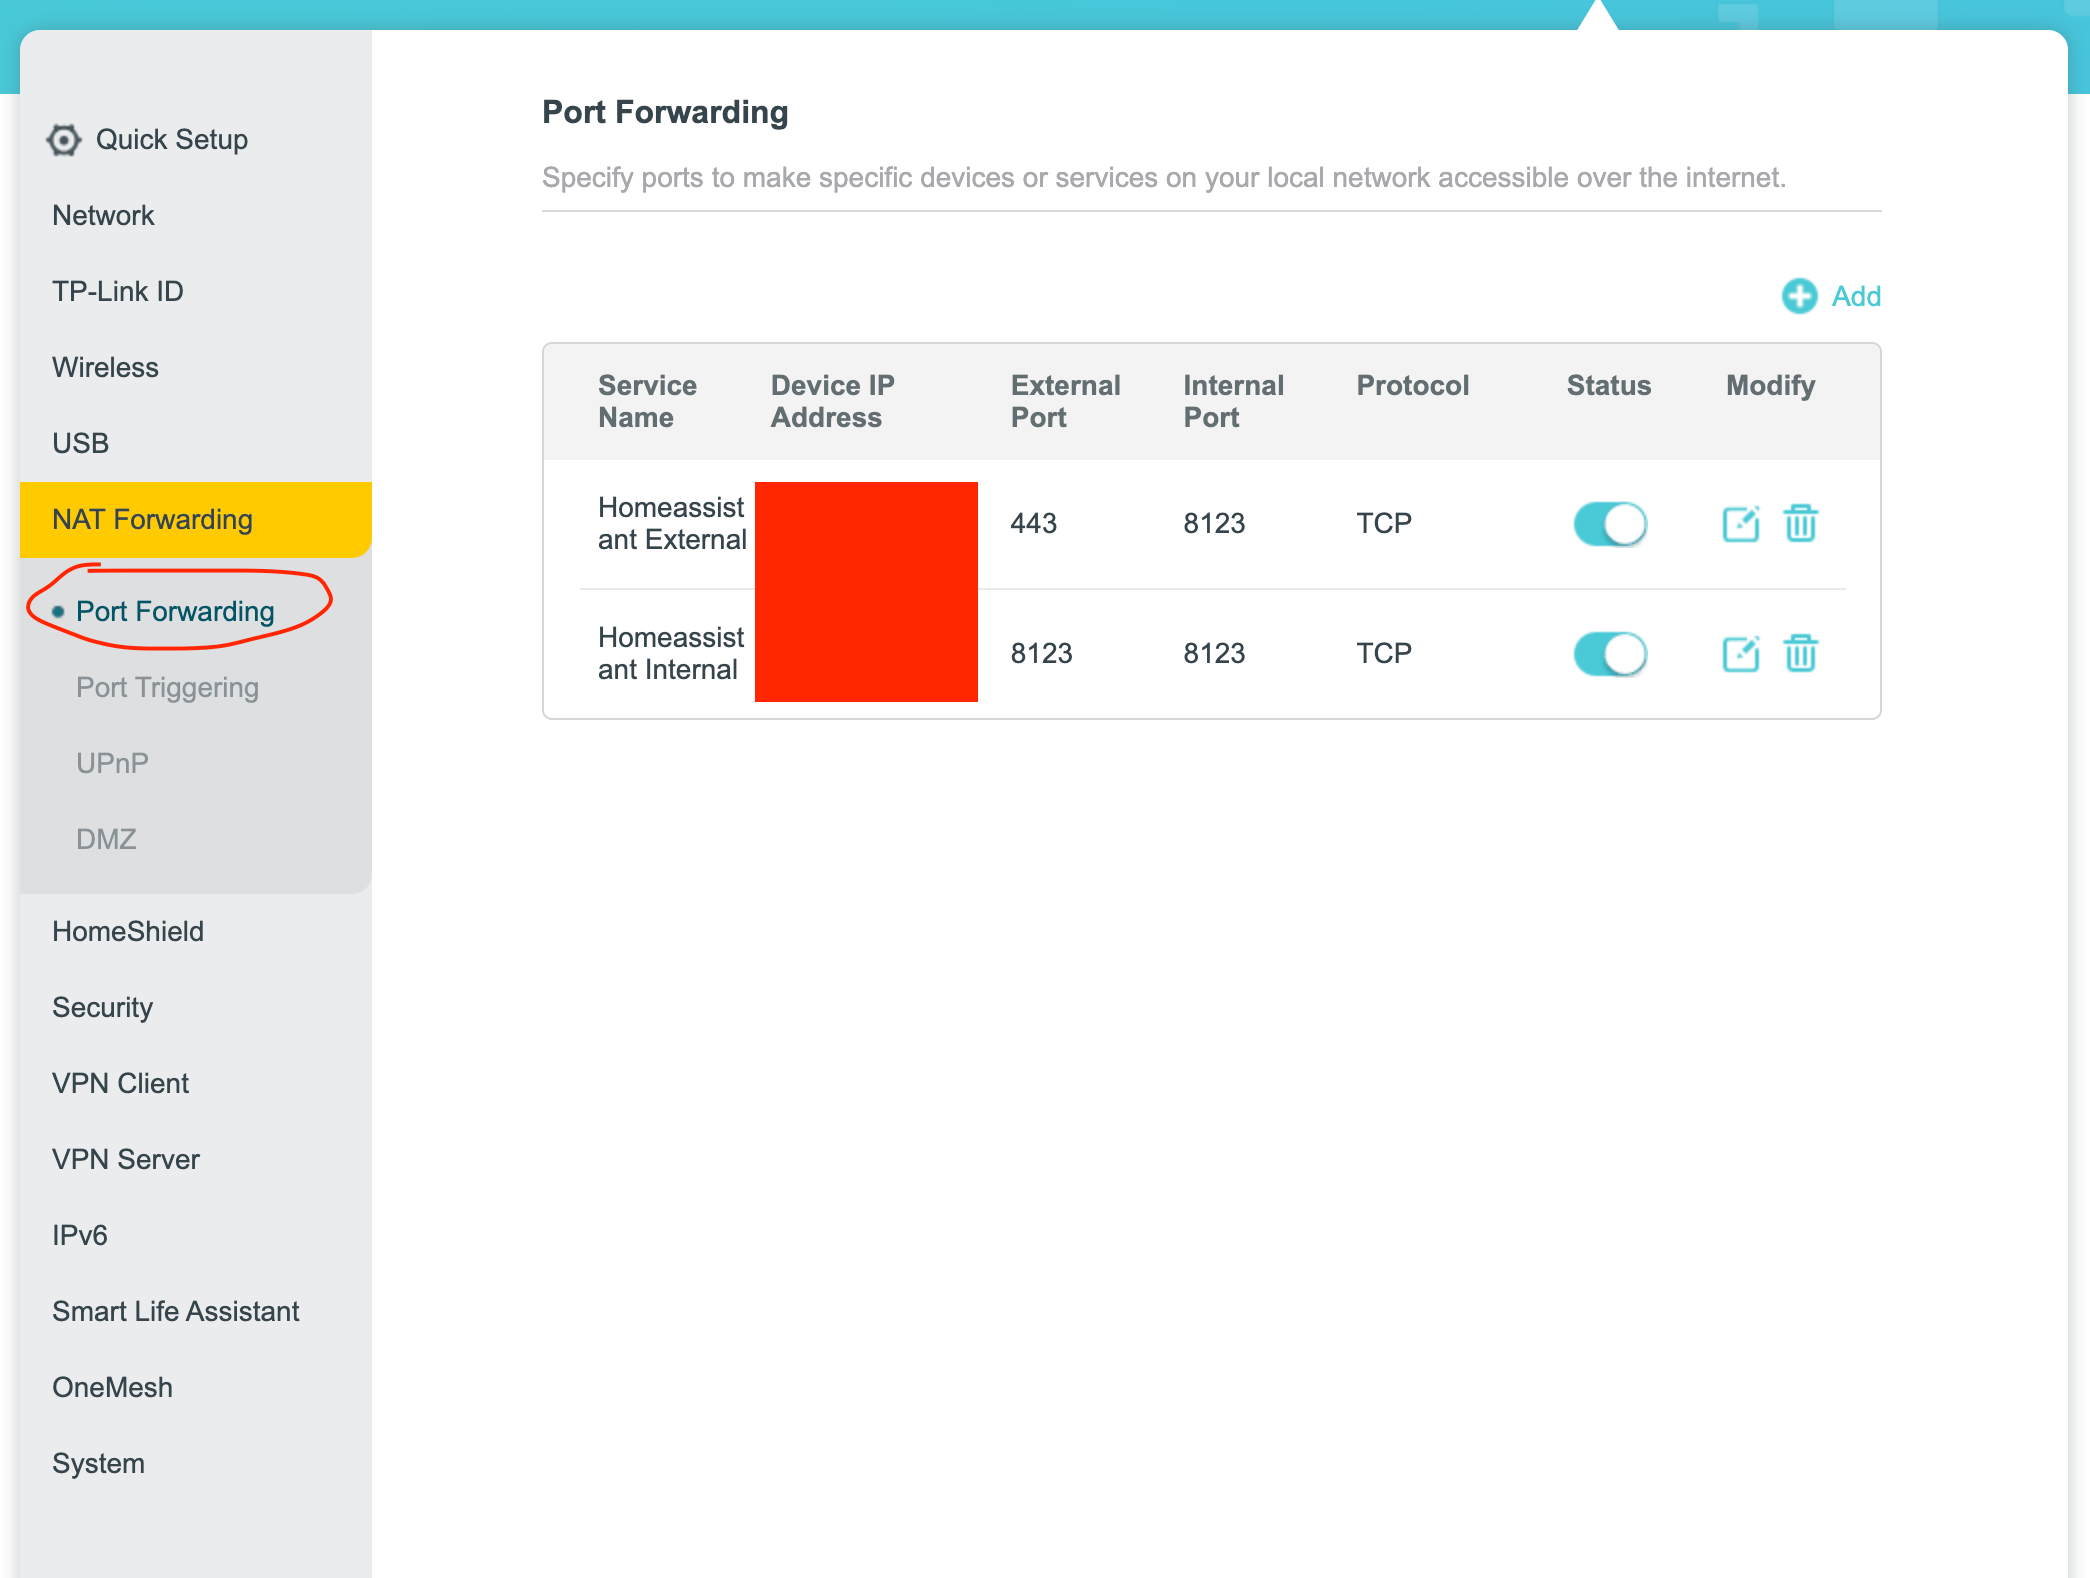
You are basically telling your routher that any traffic that is coming to your public IP on port 443 or 8123 should be sent to your virtual machine.
Signup for a Duck DNS account using your Google account
Signup on Duck DNS → create a domain → copy your token and keep it somewhere safe.
Install and configure Duck DNS Add on in Home Assistant

Make sure that Start on boot and Watchdog are toggled on. These two settings would ensure that your Duck DNS Add on is always running with Home Assistant.
Once Duck DNS is installed and running, go to configuration → click on 3 vertical dots → click Edit in YAML → copy paste the following YAML template filling it with appropriate values.
domains:
  - <domain-you-setup-in-duckdns>.duckdns.org
token: <duckdns-token>
aliases: []
lets_encrypt:
  accept_terms: true
  algo: secp384r1
  certfile: fullchain.pem
  keyfile: privkey.pem
seconds: 300
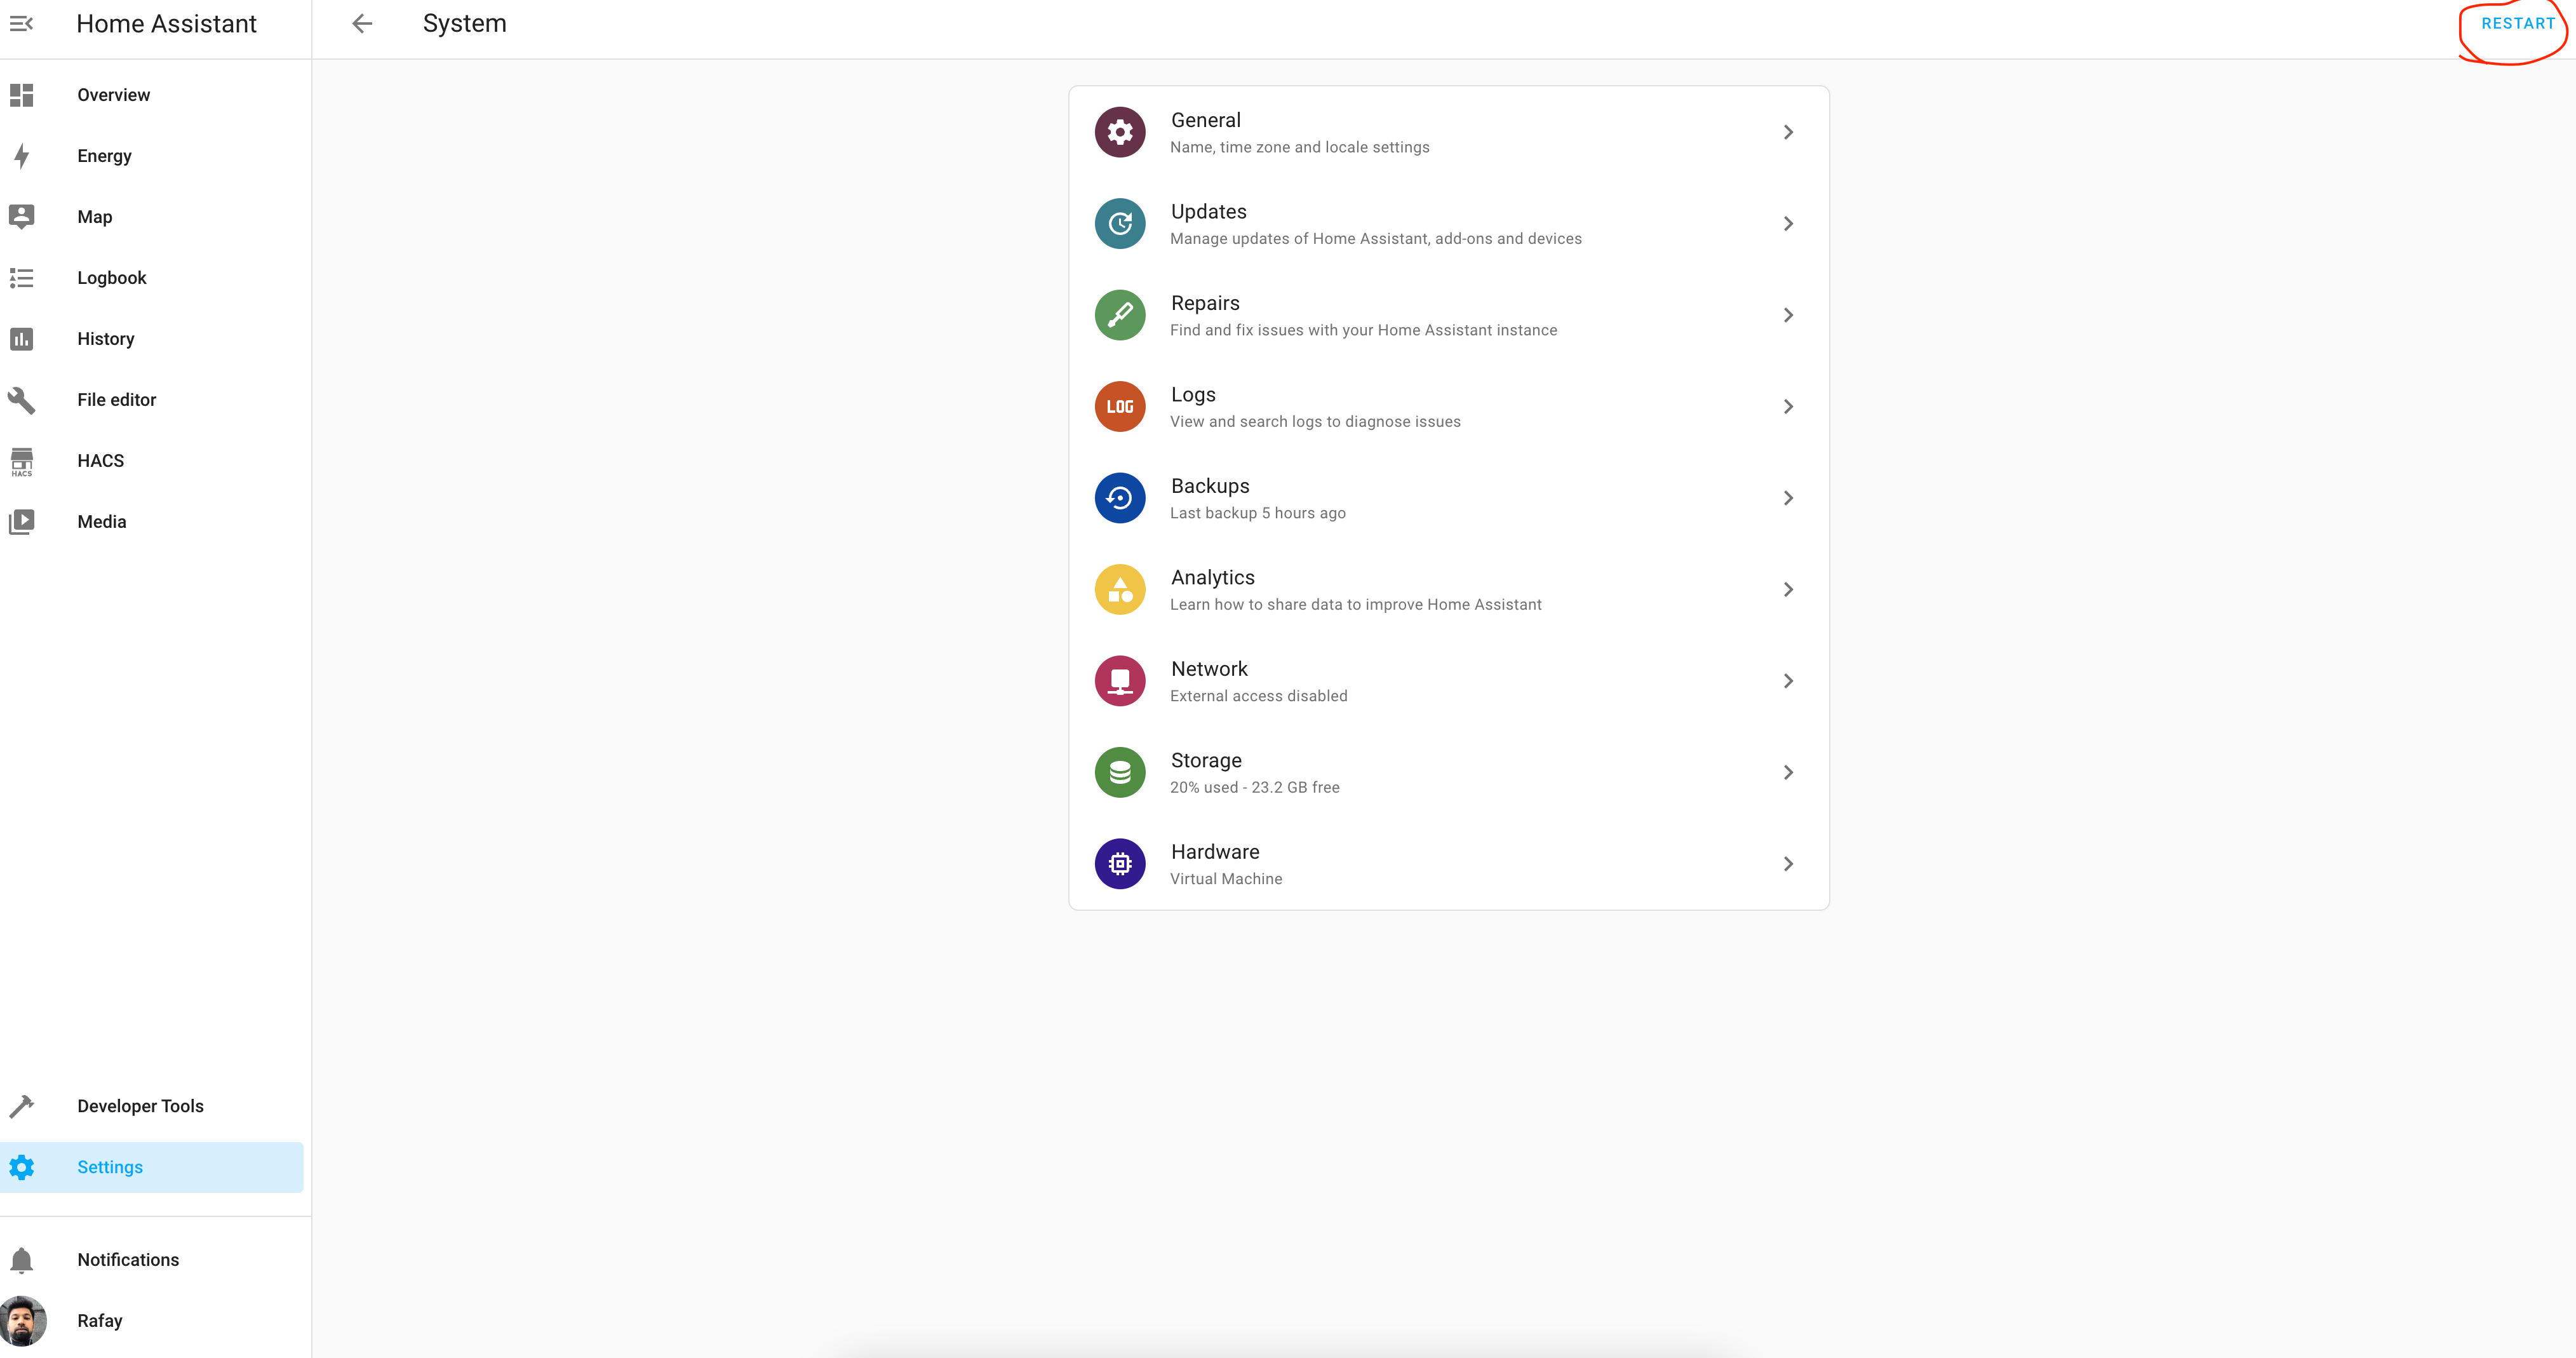
Save and restart your Home Assistant
Make sure that your Duck DNS account is updated with your correct IP
- Make sure you aren’t connected to internet through a VPN
- Get your public IP from What is My IP
- Go to Duck DNS and verify that it’s showing the same IP as above
You are all set to test your Home Assistant over the internet.
Try opening up https://<domain-you-setup-in-duckdns>.duckdns.org in the browser. This should now show you the main Home Assistant dashboard.
If you face any issues, let me know in the comments below. Any feedback for the tutorial is most welcome.
If you like this post, consider subscribing to my newsletter for more content. I would soon be covering more advanced topics such as event driven automations, automating security alarms, etc. so keep an eye on this space. Your subscription would help me continue writing more. Cheers 