Underfloor heating with zone control

Zone control for Underfloor heating

May 2023

Introduction

Goal of the project: controlling the temperature in the individual zones / rooms by means of Home Assistant, floor heating and a heat pump.

Heat Pump; Daikin Altherma all electric, can also cool

Heat release; underfloor heating through loops at 10 cm throughout the 160m2 house.

I work as an architect in IT so I have knowledge about networking, hardware and software. I can also hold a screwdriver and solder. I have basic knowledge about electronics, I know what relays, diodes, transistors and resistors are. I am rebuilding my entire house and have kids and a 40 hour job, so time is not on my side. Doing home automation for more than 10 years now, FHEM / Domoticz and Home Assistant. In the past I wrote complex software.

Design considerations

In my search for a system that suits me, I came across and considered the following;

  • I should be easy to build, I have limited electronics experience
  • I should not be to expensive
  • I have limited time, it must be able to be mounted quickly
  • I rather have ‘of the shelf’ components, I don’t want to much customization
  • No cloud / vendor lock in
  • It should be save

Requirements

These were my requirements;

  1. There is underfloor heating on 3 floors
  2. There are 10 zones that I want to be able to heat / cool independently of each other
  3. There are 3 underfloor heating distributors with a total of 18 loops and therefore 18 valves to operate
  4. Must also be able to cool
  5. Must work with Home Assistant, so Wifi / Zwave of Zigbee
  6. Safe and trustworthy
  7. Preferably ‘off the shelf’ products
  8. Be quick and easy to build
  9. Economically well-considered, one hour my time translates to 100 euro.

Inspiration projects

Of Course I searched for projects that did the same, and I came upon a few;

If I take a good look at this design and try to understand it, I come to the conclusion;

-The relays only open or close, there is no ‘50 percent’ mode on it. It’s on or off

-The Thermo-electric actuators therefore only have two possible positions; open or closed. Of course there will be temporary partial passage when switching over.

-You can put more than one Thermo-electric actuator on a relay.

-The Thermo-electric actuators actually use very little power, and have a low impact resistance

This made me realize that it’s just a matter of getting 220 volts to the thermo-electric actuators.

Furthermore, the 'voltlog’s 10 channel valve has been considered as controller’;

Nice boards, nice design. But the cons;

  1. Still pricey, 100 euros each, i would need 3
  2. out of stock
  3. 5 Volt power supply required
  4. Cupboard/box required
  5. Needs quite a bit building time too
  6. More complex to set up in Home Assistant, ESP programming / flashing required

Of course the ESP32 relay boards are a lot cheaper, but it also comes with even more work.

Plugwise also has a solution; ‘plugwise koen’, that would end up extremely costly, way over 2000 euro.

image

It does look like a nice all-in-one. But you cannot control these valves from HA directly, you MUST combine them with plugwise thermostats. And we don’t want that. So besides the high price, you are also not in control and you need to buy expensive plugwise thermostats.

Groups overview

My situation in detail;

Group / loop / valve Distributor Groups (power strip) Zone / Departure Switch
1 Ground floor 1 x 3 living room 1
2 Ground floor living room
3 Ground floor living room
4 Ground floor living room
5 Ground floor living room
6 Ground floor kitchen 1
7 Ground floor Hal/WC 1
8 First floor 1 x 6 Bedroom A 1
9 First floor Bedroom A
10 First floor Bedroom B 1
11 First floor Bedroom B
12 First floor Bedroom C 1
13 First floor Upstairs 1
14 First floor Laundry room 1
15 First floor Bathroom 1
16 Second floor 1 x 3 Attic 1
17 Second floor Attic
18 Second floor Attic
Total 3 2 x 3 fold

Total number of zones; 10

Total number of underfloor heating loops; 18

power strips; 2 x 3 and 1 x 6 fold

Parts list

Considering all of the above, I was looking for a good way to get 220 volts on the thermo-electric actuators. I came up with the following ‘off the shelf’ products;

Around 650 euro for 10 zones with 18 groups, pretty nice imho…

Cutting down on costs

You could also consider using terminal blocks and thus save costs on junction boxes and euro plugs. This saves you roughly 50-70 euros, but it takes longer to build because you need a different backboard, plus it should preferably be in a box. So, I sticked with the original number of junction boxes.

Cost calculation alternatives

If I were to take the ‘voltlog’ valve controller, the total price would be about 764 euros. (3 x 100 euros, plus 5 volt power supplies, boxes and small material. This would also mean at least 8 hours of extra building time ). In addition, these boards are not available at the time of writing. As a result, it is not really an alternative. I’m not even going to calculate plugwise’s solution, and the ESP relay boards would be too expensive time wise…

Hardware construction

The switched and distributed boxes are tied on the peg board using tie-wraps. This makes it manageable and there is enough ventilation. The thermo-electric actuators have very low power consumption, max 1 watt in operation, these switches can easily handle this. Without power they close automatically. Ikea’s cables are solidly built and the distribution box can easily handle all this. The thermal valves do take minutes to open/close completely, but they are silent. If there is a need for a different power connection, a plug block can easily be placed before a switch module.

Screwing 18 ‘euro plugs’ onto the thermo-electric actuators was still the most work. It took me less than one hour to do all 18.

image
image

The ‘euro plug’ bought for 2 euro per piece with the thermo-electric actuators at 14 euro per piece

Software settings

  1. Åskväder switching modules are easy to add to the Zigbee network. Near the on / off button is a small button, if you hold it for 5 seconds it will be added to the Zigbee network. Of course you need to choose ‘add device’ in Home Assistant on your Zigbee stack.
  2. Sonoff SNZB-02D are also easy to add to the Zigbee network, pressing the small button for 5 seconds will add them to the Zigbee network.
    The Sonoff SNZB-02D image

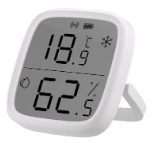
Next thing you need is to define a thermostat in Home Assistant. Attach it to the correct temperature sensor

Then you can make a thermostat, you have to connect it to the temperature measurement and to the relevant Åskväder that opens the correct valve(s);

In my case I had to define 10 thermostats in Home Assistant using the following code;

climate:
  - platform: generic_thermostat
    name: Master bedroom thermostat
    heater: switch.ikea_of_sweden_askvader_on_off_switch_switch_6
    target_sensor: sensor.sonoff_masterbedroom_temperature
    min_temp: 7
    max_temp: 21
    ac_mode: false
    target_temp: 17
    cold_tolerance: 0.3
    hot_tolerance: 0
    min_cycle_duration:
    seconds: 5
    initial_hvac_mode: "off"
    away_temp: 16
    precision: 0.1

After a reboot you can add the thermostats in lovelace;

image

I’ve added to turn off / on the heatpump when one of the zones go on / off;

alias: Zet warmtepomp aan als er een zone open gaat
description: “”
trigger:

  • platform: device
    type: turned_on
    device_id: 32722bfab06cdb74e2
    entity_id: switch.ikea_of_sweden_askvader_on_off_switch_switch_7
    domain: switch
  • platform: device
    type: turned_on
    device_id: 5d9eec50f814595c973
    entity_id: switch.ikea_of_sweden_askvader_on_off_switch_switch_5
    domain: switch
  • platform: device
    type: turned_on
    device_id: 9fbe10ffddf3769832d3
    entity_id: switch.ikea_of_sweden_askvader_on_off_switch_switch_9
    domain: switch
  • platform: device
    type: turned_on
    device_id: ace4aca2d0929b21
    entity_id: switch.ikea_of_sweden_askvader_on_off_switch_switch
    domain: switch
  • platform: device
    type: turned_on
    device_id: 34d46b1b4be21b1120f
    entity_id: switch.ikea_of_sweden_askvader_on_off_switch_switch_4
    domain: switch
  • platform: device
    type: turned_on
    device_id: db2d860c7ec2d78fee2b9
    entity_id: switch.ikea_of_sweden_askvader_on_off_switch_switch_6
    domain: switch
  • platform: device
    type: turned_on
    device_id: 5321673a0f7f8d9a23
    entity_id: switch.ikea_of_sweden_askvader_on_off_switch_switch_8
    domain: switch
  • platform: device
    type: turned_on
    device_id: 090c375f94bfc9d
    entity_id: switch.ikea_of_sweden_askvader_on_off_switch_switch_3
    domain: switch
  • platform: device
    type: turned_on
    device_id: 54abd5c09737a17d2
    entity_id: switch.askvader_zolder_switch_10
    domain: switch
    condition:
  • condition: or
    conditions:
    • condition: state
      entity_id: switch.ikea_of_sweden_askvader_on_off_switch_switch
      state: “on”
    • condition: state
      entity_id: switch.ikea_of_sweden_askvader_on_off_switch_switch_3
      state: “on”
    • condition: state
      entity_id: switch.ikea_of_sweden_askvader_on_off_switch_switch_4
      state: “on”
    • condition: state
      entity_id: switch.ikea_of_sweden_askvader_on_off_switch_switch_5
      state: “on”
    • condition: state
      entity_id: switch.ikea_of_sweden_askvader_on_off_switch_switch_6
      state: “on”
    • condition: state
      entity_id: switch.ikea_of_sweden_askvader_on_off_switch_switch_7
      state: “on”
    • condition: state
      entity_id: switch.ikea_of_sweden_askvader_on_off_switch_switch_8
      state: “on”
    • condition: state
      entity_id: switch.ikea_of_sweden_askvader_on_off_switch_switch_9
      state: “on”
    • condition: state
      entity_id: switch.askvader_zolder_switch_10
      state: “on”
      action:
  • device_id: e13478746f4237fa7
    domain: select
    entity_id: select.espaltherma_thermostat
    type: select_option
    option: Heating
    mode: single

alias: turn off heatpump
description: “”
trigger:

  • platform: device
    type: turned_off
    device_id: 32722bfab06cdb7
    entity_id: switch.ikea_of_sweden_askvader_on_off_switch_switch_7
    domain: switch
  • platform: device
    type: turned_off
    device_id: 5d9eec50f814595c
    entity_id: switch.ikea_of_sweden_askvader_on_off_switch_switch_5
    domain: switch
  • platform: device
    type: turned_off
    device_id: 9fbe10ffddf3769832
    entity_id: switch.ikea_of_sweden_askvader_on_off_switch_switch_9
    domain: switch
  • platform: device
    type: turned_off
    device_id: ace4aca2d0929b21d
    entity_id: switch.ikea_of_sweden_askvader_on_off_switch_switch
    domain: switch
  • platform: device
    type: turned_off
    device_id: 34d46b1b4be21b1120
    entity_id: switch.ikea_of_sweden_askvader_on_off_switch_switch_4
    domain: switch
  • platform: device
    type: turned_off
    device_id: db2d860c7ec2d78fe
    entity_id: switch.ikea_of_sweden_askvader_on_off_switch_switch_6
    domain: switch
  • platform: device
    type: turned_off
    device_id: 5321673a0f7f8d9a
    entity_id: switch.ikea_of_sweden_askvader_on_off_switch_switch_8
    domain: switch
  • platform: device
    type: turned_off
    device_id: 090c375f94bfc9d076
    entity_id: switch.ikea_of_sweden_askvader_on_off_switch_switch_3
    domain: switch
  • platform: device
    type: turned_off
    device_id: 54abd5c09737a17
    entity_id: switch.askvader_zolder_switch_10
    domain: switch
    condition:
  • condition: and
    conditions:
    • condition: state
      entity_id: switch.ikea_of_sweden_askvader_on_off_switch_switch
      state: “off”
    • condition: state
      entity_id: switch.ikea_of_sweden_askvader_on_off_switch_switch_3
      state: “off”
    • condition: state
      entity_id: switch.ikea_of_sweden_askvader_on_off_switch_switch_4
      state: “off”
    • condition: state
      entity_id: switch.ikea_of_sweden_askvader_on_off_switch_switch_5
      state: “off”
    • condition: state
      entity_id: switch.ikea_of_sweden_askvader_on_off_switch_switch_6
      state: “off”
    • condition: state
      entity_id: switch.ikea_of_sweden_askvader_on_off_switch_switch_7
      state: “off”
    • condition: state
      entity_id: switch.ikea_of_sweden_askvader_on_off_switch_switch_8
      state: “off”
    • condition: state
      entity_id: switch.ikea_of_sweden_askvader_on_off_switch_switch_9
      state: “off”
    • condition: state
      entity_id: switch.askvader_zolder_switch_10
      state: “off”
      action:
  • device_id: e13478746f4237fa7c
    domain: select
    entity_id: select.espaltherma_thermostat
    type: select_option
    option: “Off”
    mode: single
3 Likes

Hi Lectere!

Have been inspired by your project and am now thinking of partially equipping my underfloor heating with controllable valves. Thank you very much for this.

My question is now what parameters you use? Especially I am interested in “hot_tolerance” and how that affects the heat sensation.

Many thanks in advance,

/Cipo

For the moment I have it on ‘0’, but it’s summer here so, I’ll have to see how this goes in the winter.

Hi Lectre,

Found your topic while looking into how to control my own under-flooring heating, it’s my first time with such heating so I’m still figuring things out, but your seems to be the most elegant and cost effective solution out there so thank you for sharing :pray:

One quick question, while searching around I’ve found that most thermal actuators are either fully open or fully closed and to effectively control the temperature they need to be supplied with pulsating power (I believe it’s called PWM) does your system do that? Or does HA take care of it automatically?

1 Like

Thanks, I was pretty happy with this. I explored a lot of options, and this is very cost effective because it uses off the self components. While working perfectly.

Yes, the actuators are on or off. This works fine with the Home Assistant thermostat. No need for 50%, not for floor heating, because the heat pump regulates the water flow with the delta t setting…

I use 0 as hot tolerance. Things are heating up the lost couple of weeks, and it all works fine. I have one automation that turns off/on the heating of the heat pump depending on if one of the valves are open.

I am starting to think about pushing my current “dumb” Danfoss setup to Home Assistant. Very interesting.

FWIW I have been told that my current controller opens for 20 minutes any valve that has not been activated for more than 2 weeks, to prevent the valves from gripping and the pipes from clogging.

1 Like

Hi All,

Very nice implementation and very good approach. Very much appreciated you took time to share. :slight_smile:

I am also thinking if there is any chance I can get smarter home than the system I have today which is Danfoss Link. It works fine already for 5 years. sensors are wireless, it connects to wifi and has the app, it is cost efficient. Cons are - after I switched home wifi system to mesh network Danfoss CC sometimes looses connectivity to the servers and restart is required. This year I decided to try home assistant due to living 5 years in the house I ended up with 14 different apps for different things :confused: and also the only one from the family being comfortable with those different apps, UI’s and etc…
On top of this I am also wishing to add presence sensors in the rooms which in some cases have temp sensors and could be used also for heating control.

Currently I have 13 actuators that are 24V NC. 7 actuators in ground floor manifold and 6 in the the other floor. Local wifi or zigbee connectivity would be preferred. also to mention I have 230AC power at each manifold box. I would like to keep those actuators to reduce cost of change.

So the only bit I am missing in the puzzle is what relay I should by, there in the market I see tons of options and it is overwhelming some with RF control, some are tuya manufactured and needing tuya cloud. I would be very gratefully if someone could find some time and suggest anything specific, what would fit for the actuators I have???

Hi Lectere,
how is your setup working now when the weather got colder? any issues? I am planning on doing something similar, but came across some possible issues while researching. so i was wondering what is your experience.

  • Do you get large fluctuations in temperature with this setup?
  • Valves take some time to open up, (>3minutes) what happens when everything is closed and you start opening one valve and the automation triggers heatpump? doesnt that cause na overpressure in the system? (a pump pumping water against closed valves)

Thank you
Adam

q1; No large fluctuations, it does ‘overshoot’ a bit, but that’s fine. The heat is not wasted. The overshoot mostly depends on the type of floor cover. With wood it’s big, with tiles it’s small.
q2; good question, but no, accourding to the manual of my heatpump, I needed to install a ‘Omloopklep’, excuse my dutch, but that translates to ‘bypass valve’ installed on the highest position of my floorheating system. That will guarentee flow;
image

One thing to keep in mind is that the vendor of the floor heat distributors recommends opening each valve at last once every month. To prevent them from getting stuck. For now I do that with a card that includes the last-changed option as secondary info.

type: entities
entities:

  • entity: switch.ikea_switch_3
    icon: mdi:heating-coil
    name: Living room
    secondary_info: last-changed

My valves are 24V NC too. I ordered this 8 channels WiFi board with the case. It worked flawlessly for the past 2 weeks. Once the wired or wireless and MQTT interfaces were configured, the relays and the binary inputs were automagically detected in HA.

No Idea on the reliability of the board, but it looks pretty professional, and not some low grade Chinese stuff. Anyway, given the price, I will likely order a spare board.

It seems that they even have 16 channels boards

Hey, thank you for that write-up. I was also searching for a way to make my pretty dumb floor-heating smart. Pretty quickly I came across the fact that tasmota includes a thermostat option.

So I have purchased 3 Sonoffs 4Ch (1 for each floor), which gives me 4 zones per floor. I really only use this on one floor, as most of the house is open-plan. The Sonoffs get their temperature via Aqara temperature sensors in the respective rooms. I think total cost was something like 150 EUR.

All the regulation is done at the Sonoff level including different heating strategies (ramp-up vs. PI) and there is hardly any overshoot due to the implementation of the PI strategy and a nice pulse-width modulation.

There is a bit of tinkering involved, but if you are interested, I can share some more info.

See here for the thermostat option: Thermostat - Tasmota

The 4 channel sonoffs are really a nice alternative, since they are very cost effective and have native HA support. They are about 35 euro’s each, that’s almost the same price as the Ikea Askvader models, one switch costs 10 euro. You still need the valves, temp sensors and also needs 9 volt power supply. Don’t think you included that in your price.

The Ikea Askvader option has a little less build time and has less wires. (no power supply) Also, you need some soort of casing for it.

The big ‘no’ for the 4 channel sonoff option for me was the power supply with the extra build time. (I normally earn 150 euro per hour, so time is very pricly for me. In other words, if I can save one hour build time for 100 euro, thats a win for me)

I want the regulation done on HA level, I keep ending up to the conclusion; I always have my phone with me, so there is really no need for any wall device.

You do not need the 9v Power supply. I already have 230v Mains installed (how Else would you switch the valves?) And use these for the sonoff. I had the valves already installed and they were regulated via a wall mounted thermostat. In fact you don’t even need a thermostat, as the sonoff itself acts as one. The big plus: even when the HASS server is down, it works (in theory). At least with the last given temperature.

The nice thing are the ramp-up/pi/hybrid strategies. But I would not change a running system either if I were you

The difference is just that tasmota implements the thermostat in the device itself. You could theoretically connect to it via http put requests. No need for a thermostat at all…

Thank you so much for this post!. Amazing work @Lectere ! i stumbled upon your post last night and it kept me up all night excited to achieve the same. i am in the same similar hour rate and job role except wiring (Wago is my friend) and HA are one of my favorite hobbies!

Your post made me go for a shopping spree and I can’t wait to share my approach with you!

I am in the same situation with a Daikin Altherma 3 setup roof / tank / wall unit. 3 floors with 10x 5x and 2x valves. My ground floor always gets too hot (Madoka thermostat in living room) and the unit stops too soon while the rest of the house is cold! Daikin setup is stupidly located on the ground floor which does not help on pumping the water upwards either (2x extra expansion vessels). regardless of the 300L tank my water pressure is next to non existent. This is my second house with a Daikin. My previous house (2020 build) was all on one floor and it was absolutely amazing. Did not need to touch the valves at all. having a Zoneregelaar from Uponor was almost waste of money back then.

I think your post finally thought me the ultimate purpose of a controller attached to the actuators. it’s much simpler than i always used to think. thanks for that!

Here is My approach:

  • 3x 4-channel switch module from AliExpress (Link)
    It’s equipped with RF, WiFi and even physical buttons. I have similar switches for all my lights behind all of my switches for many years and they are quite stable and integrate well with HA.

  • instead of EU plugs i’m going with a conjunction box perf floor and wiring to minimize the spacing and further push down the cost as i already have the wires (blue brown yellow).

  • The 4x main wires will have an additional physical switch before the 4x channel relay on the wire to offer another level of manual override.

  • I also already had the wifi AAA battery thermostat and humidity units from the image below in each room already so this was a no brainer for me.

I will share the pictures as soon as i receive it all and hooked up.

Couple of questions

  1. i figured from your post that you are combining valves into channels instead of 18 channels. anything in between or just simply inter-connect?
  2. the 3 minute delay of the valve vs thermostats monitoring reoccurrence. how is that working for you? any tips?
  3. what do you get on power-loss? do you do anything manual?

thanks again! you rock!

  1. Yes, I’ve done combinations, 18 loops, 10 switches.
  2. Can you rephrase the question? What do you mean with reoccurrence?
  3. In case of a powerloss, the molenhoff vales just close automatically, so yea, your heatpump ain’t doing much then either…

Thanks for the complements! Adn yes, it’s really not that hard. It’s HA controlling the switches to get the 220volt on the vales.

Keep in mind that every zone should opened at least once per month.

1 Like

Thanks for the tips! . It’ll take a while until i have my Chinese hardware on :joy: so eager to try it out. I was tempted to buy the valves from china aswell except power draw is times compared (3W)

Regarding the time those valves need to close and open. I have my thermostats on every 15 minute refresh so was wondering whether you almost n3ed to match the temperature check-in times of the thermostat or get it lower than 15.

I may go for a fancier one combined with presence sensors maybe.

Just a matter of time until they equip these wall panels S8E with a presence. They already have the temperature

That Tuya 4ch relay box looks nice, are you planning on flashing it with ESPHome or keep the Original FW on it?

Hi @Lectere , I read your project and it gave me many answers as we are planning something similar. Unfortunately, we are new to HA, and as for underfloor heating, I’m also a little lost. Maybe you could give me advice or explain what I need. :pray:

We have underfloor heating but with a gas boiler - Protherm. It has a Protherm MiSet central thermostat. TECHNOLINE distributor - 11 circuits. Unfortunately, we already bought the house with this, and what’s worse, we didn’t receive any documentation for the underfloor heating, so at the moment I don’t even know which circuit is which room. But that will be a different fight.

From your project and comments that I tried to understand, I found out that I need:

  • thermo-electric actuators
  • thermostats or temperature sensors
  • some ESP
  1. Did I forget something? Is there anything else needed? Of course I know that I need drawers and similar

  2. Regarding thermo-electric actuators - I read several posts about the fact that there are 2 types - ON / OFF valves and adjustable valves. Can you tell me which ones are better and possibly why?

  3. What about ESP - do I understand correctly that it is basically DIY? Does it need to be programmed then? My husband and I work in IT, so maybe we can do something, but I’m worried if our knowledge will be sufficient. In some other post I also found Z-Wave (Multi-relay controller,Mcohome) - does this type no longer need to be programmed? Or did I misunderstand something?

  4. My last question is about my central thermostat. Can I disconnect it then? How exactly or on the basis of what will my boiler know when to start heating?