Hi all,
I’m creating this post to show how I installed a Nuki Lock 3.0 without a Nuki Bridge and fully local
Update 2022-12
I discovered a new addon that works really well, has pre-built images so it doesn’t have to build it on the HA machine. I added the installation instructions to the Software section.
If you installed the bridge with the script I provided, make sure to delete the service unit:
sudo systemctl stop nukibridge
sudo rm /etc/systemd/system/nukibridge.service
Reasoning
I spent a few months looking for a good smart lock. I had a few requirements:
- Relatively cheap
- Not changing my current lock mechanism since I have a pretty secure and expensive door.
- No drilling my door
- Full local control, no proprietary cloud or app mandatory
- Ability to open the door, not just unlock it
After some time researching I concluded that Nuki was my match and went for it. Can’t complain at all.
Hardware
- Nuki Lock 3.0: https://shop.nuki.io/es/soluciones-de-acceso/smart-lock-3-cilindroeuro/
- Raspberry 3B+
That’s it 
 This kind of smart locks demand that you can insert the key in both ends of the door lock and turn the key
 When buying the lock, make sure you find a coupon code which will reduce the price by 30€.
The end price should be then 139€ for the entire setup
Software
The lock can be controlled via Bluetooth from the phone with the Nuki app, without connecting it to the cloud at all.
But I wanted to be able to open it not only when I’m close to it, and also have entities in HA for information about the lock state. For that I installed a fantastic project that will make the Raspberry (where my HA instance is) act as a Nuki Bridge for free.
- RaspiNukiBridge: GitHub - regevbr/RaspiNukiBridge: Simple Nuki Bridge implementation using asyncio
- hass_nuki_ng Home Assistant Integration: GitHub - kvj/hass_nuki_ng: Better support for Nuki devices in the Home Assistant
Nuki Lock Instalation
- Pick one of the two systems to install the Lock on the door. Either the tape one or the screwed one. I wen with the tape one but for a less permanent solucion I would go with the screwed. Mention that it is not screw into the door, but that tight around the existing lock.
This is the screwed version:

As you can see this 3 screws will tight around the metal lock. Nuki provides the allen key to tighten them.
2. Install it onto the door. This is the result:

- Insert the key into the lock, remove the plastic that protects the batteries and plug in the Lock.
Configuring the lock
Before going with pair process, you need to configure the Lock to fit your door through the Nuki App. This step is to tell the Lock how many times it needs to rotate to fully lock/unlock the door. It is fully local through Bluetooth and does not need to connect to the cloud or even the internet.
Bridge Installation
If you don’t want to use a bridge and control the lock only from your smartphone over Bluetooth, ignore this step. Although it won’t be able to integrate with HomeAssistant.
Alternatively to RaspiNukiBridge, there are is an addon (there are a few really but this one is the only one I got working) that you can install and simplify the process a lot, I strongly recommend using it:
-
IMPORTANT Make sure you configured the Lock with Nuki app.
If you skip this process the pairing with the bridge won’t work
Using Addon (Recommended)
- Visit this link: GitHub - regevbr/RaspiNukiBridge: Simple Nuki Bridge implementation using asyncio
- Add the repository and then install the add-on from HomeAssistant
- Read the addon installation documentation. But basically put the lock in pair mode and Start the addon.
- Restart the addon! For some people, not restarting the addon causes problems.
Using local python lib
-
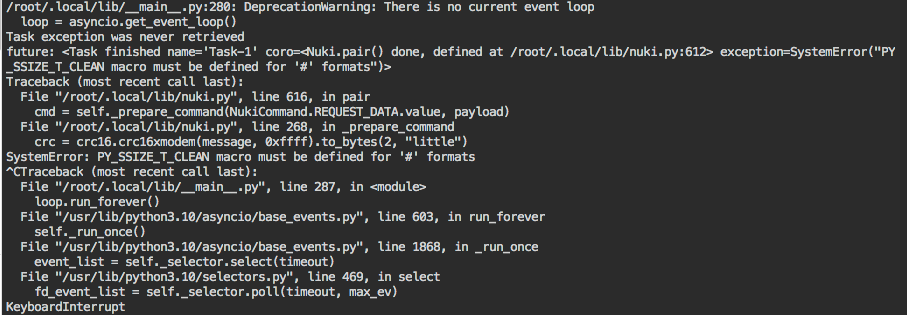
I created a script to ease the pairing process, mainly using the work of ftarolli. Run the following command to start it:
sudo wget -O - https://gist.githubusercontent.com/victorigualada/064e6b3a20ec53fdfe14a9982f1bf902/raw/191435eaa58468681afc955d1dc906012642601a/raspi-nuki-bridge-pair.sh | bashThe script will clone the RaspiNukiBridge into
~/.local/bin
Once the script finishes it will print some lines to create a service that will automatically the bridge start on boot. -
To test if it works you can run:
python ~/.local/lib/RaspiNukiBridge/__main__.py --lock
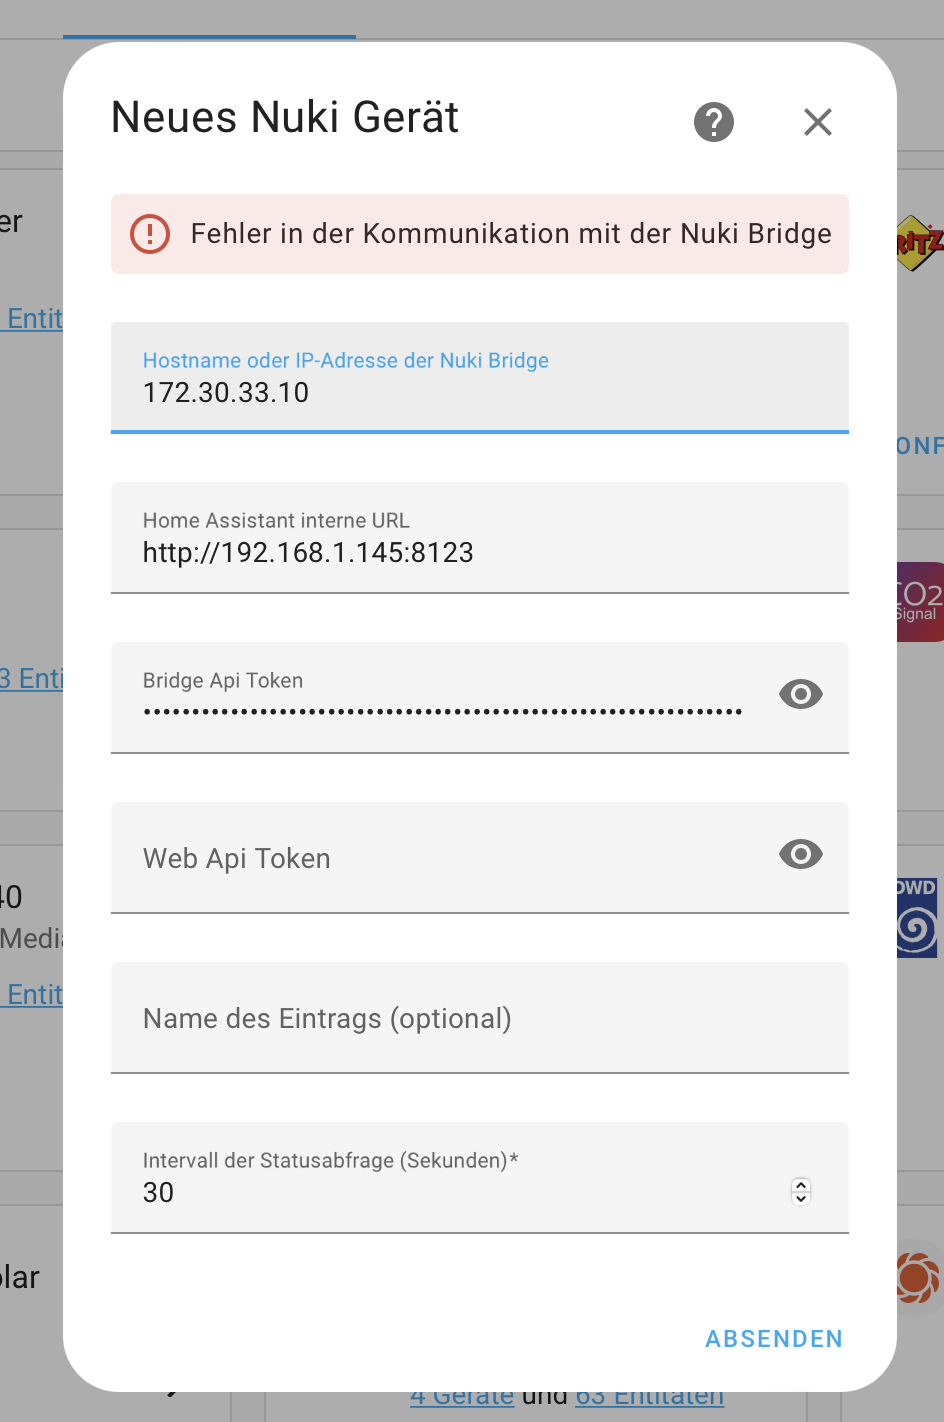
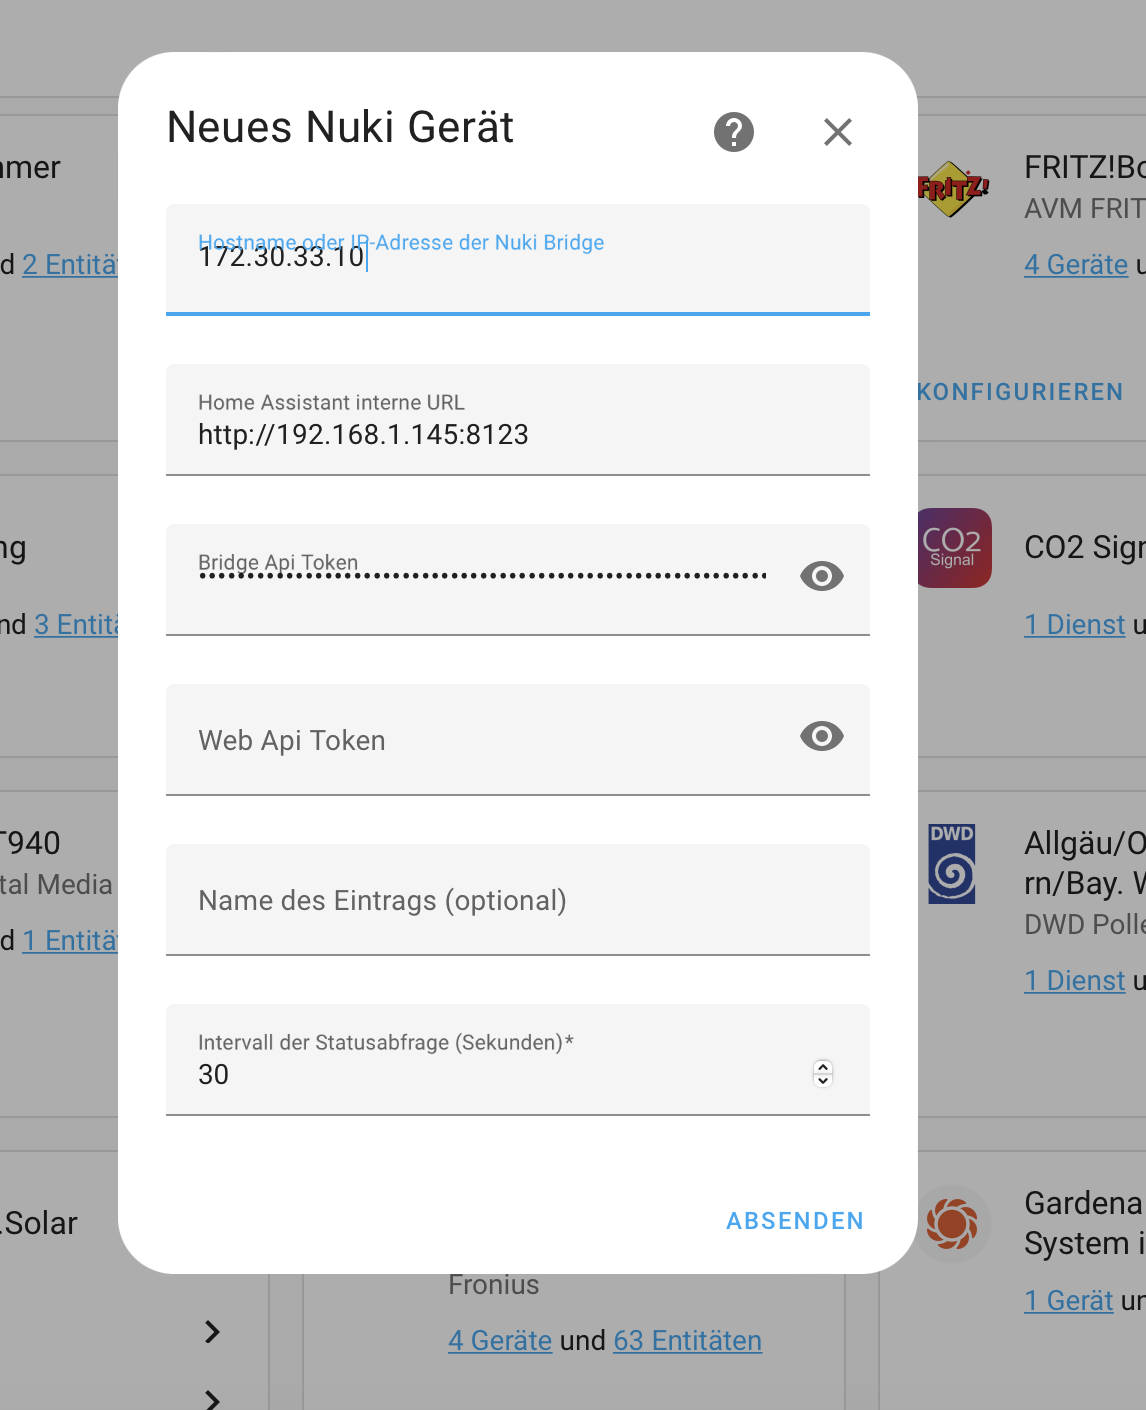
Install the HA integration
Once the bridge is installed and working, go ahead and install the integration following these steps.
If you changed the port in the addon config, you should concatenate the port to the IP when configuring the integration like so:
127.0.0.1:<port>
If you are running the Supervised or Docker installs, the IP of the bridge is not going to be 127.0.0.1. You will need to find the container’s IP with the following command:
docker inspect -f '{{range.NetworkSettings.Networks}}{{.IPAddress}}{{end}}' $(docker ps --format '{{.Names}}' | grep nuki)
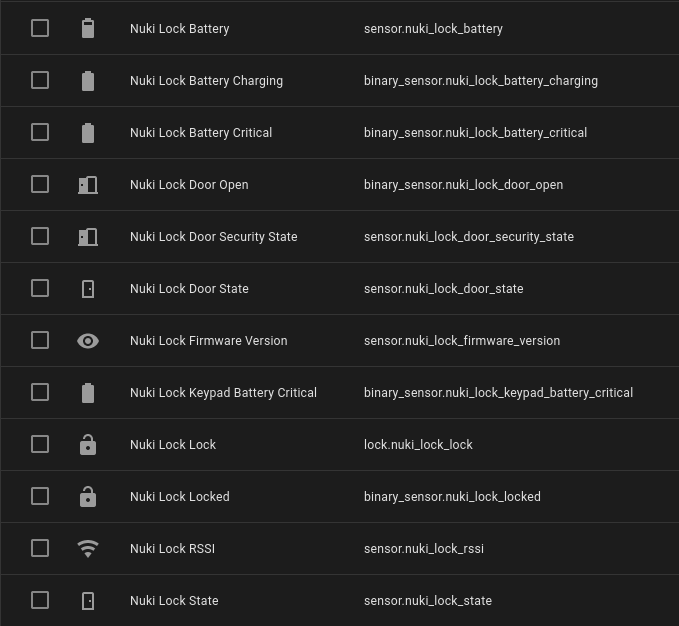
These are all the entities exposed for the Lock:
Bonus Track 1
Install the mushroom cards to get a nice lock entity like this:

Bonus Track 2
I installed a widget with fingerprint authentication in the Companion App that allows me to open the door with just one tap on my phone. I use the lock.open service for the lock.nuki_lock_name entity.
Hope this helps people to get around their mind, because it took me a few months to take the step and spent so many time reading about smart locks.
Cheers!