Firstly a big thank you to rymo for all his work on this.
I manage to get it all working and I’m fairly useless and new to home assistant and esp8866.
Two problems were as follows.
Flashing the esp07s. I couldn’t get the chip to flash. I have previously had little problems flashing with other smart devices, however I was using the fdti usb to serial power the chip. That output was 5v and the boards I was flashing already managed the 3.3v to the chip. In this case I needed to give 3.3v directly to the chip. I used a raspberry pi to provide the 3.3v. However I could seem to flash the chip unless I tied the ftdi ground to the chip ground… not sure if that was a coincidence or not. Maybe I was doing something else the first few tries.
I used esphome via a hass.io install. I couldn’t get the custom patched firmware working. And couldn’t even install using the instructios as hass.io is so locked down. Thankfully the suggestion to use WSL and Ubuntu to generate the firmware worked out well.
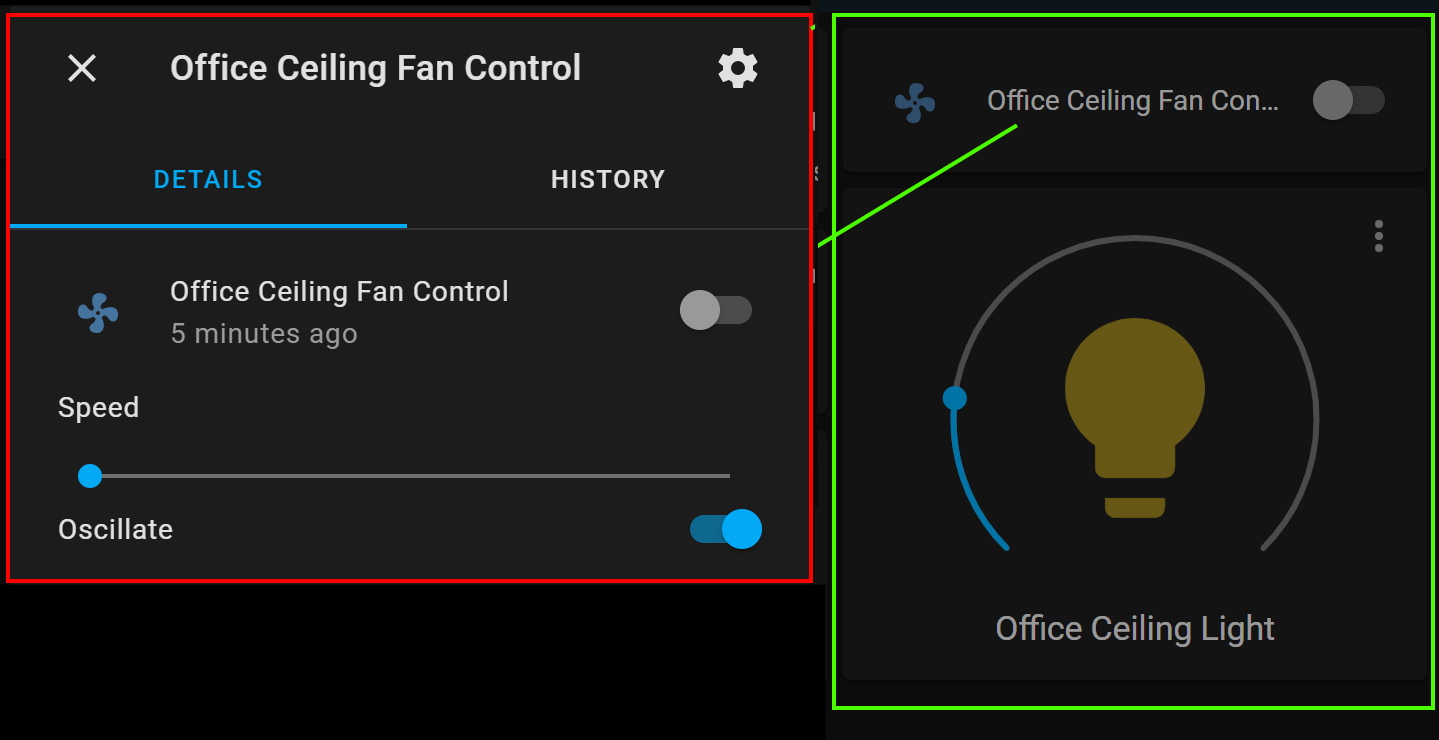
At this stage I have control via home assistant.
It would be nice to get all 5 speeds selectable and rename the oscillation to winter/summer. But I’ll tinker around next week to see if i can. 8 just brute force stuff so it might never work.
Anyway. Thanks to rymo again, and hope any of my failures can get you past if you are stuck.
I think api and ota are required, even if they are blank. These are the passwords you then type in to initially connect or run ota updates. I have a password set on mine, I just use my wifi password. I have them all in a secrets.yaml.
I didn’t need the light section in mine…as my fan doesn’t have a light. Don’t know any other updates to the config. I haven’t had a chance to play and see if I can improve the config to get more precise control of the fan. I know they have gone across to percentage based speeds on home assistant and will be depreciating fan speeds eventually. This is good I think as it will make it easier to get all of the speeds… maybe I’ll get around to playing with it one day when life doesn’t get in the way. I’m slowly learning.
And yes, upload the ESP firmware via tasmota, I did have some issues uploading initially I think but that was more a networking issue, the mDNS didn’t work, I ended up hardcoding the IP first, then changing to the mDNS.
substitutions:
  device_name: f_bed1
  friendly_name: "Bed 1 Ceiling Fan"

#################################

esphome:
  platform: ESP8266
  board: esp01_1m
  name: ${device_name}
  esp8266_restore_from_flash: true

wifi:
  ssid: !secret wifi_ssid_iot_study
  password: !secret wifi_password
  fast_connect : true

  ap:
    ssid: ${device_name}
    password: !secret ap_password

captive_portal:

api:
  password: !secret api_password

ota:
  password: !secret ota_password

logger:
  # Disable UART logging as these pins are used for Tuya MCU comms
  baud_rate: 0

uart:
  rx_pin: GPIO03
  tx_pin: GPIO01
  baud_rate: 9600

tuya:
# DP1   Fan On/Off
# DP3   Fan speed 0=lowest, 5=highest
# DP4   Fan direction 0=summer, 1=winter
# DP9   Light On/Off
# DP10  Light brightness 0=min, 100=max
# DP11  Light temperature 0=cool, 100=warm
# DP102 ?
# DP103 ? Timer value, 0=off, 1=1h, (2=2h?), 3=4h, 4=8h
fan:
  - platform: "tuya"
    name: ${friendly_name}
    switch_datapoint: 1
    speed_datapoint: 3
    # This works, but isn't plumbed all the way through to Home Assistant frontend
    # Requires https://github.com/esphome/esphome/pull/1409
    # direction_datapoint: 4
    # Instead, oscillating = winter mode
    oscillation_datapoint: 4
    # Requires https://github.com/esphome/esphome/pull/1391
    # further enhanced by https://github.com/rmounce/esphome/tree/tuya-fan-speed-tweaked
    speed_value_low: 0
    speed_value_medium: 2
    speed_value_high: 4
Hi All, I’m brand new too HA so there’s been lots to learn. I discovered today that it’s possible to integrate the fan/light with local tuya without replacing the wifi module and have successfully set this up. Can someone please tell me what the advantages are of the ESPHome integration by replacing the wifi module vs the Local Tuya integration?
As a user of both localtuya (for my Arlec grid fan) and esphome I think the advantage of esphome is better integration and far more customization. Although for a lot of prebuilt tuya devices I have found that I just end up replicating the function of the original device in esphome and putting the smarts in HA.
I think the main reason for not using localtuya at the moment is the maturity of the project. But this is a chicken or egg scenario as the project needs more users and contributors to become better.
The local keys are a bit tricky to get but this is no more skill required than flashing esphome.
Another consideration is that you are relying on tuya to keep the localapi open/unchanged. With the recent tplink api issues this is never a given. You can mitigate this by blocking them from the cloud though once you have them integrated.
The reasons I am giving localtuya a shot is that if /when I sell the house I want to be able to just reset the devices and leave them for the next owner. With tuya I can do this.
As this project/thread is a controller replacement you can always go back to tuya if you want. This is not an possible and/or easy process if you reflash an onboard controller.
I have posted on the au hardware thread with some more detail. Link
I do plan on writing up a more detailed post and contributing my finding/changes to the localtuya project.
Thank you Tim for such a detailed reply, I found it very helpful. I think I’m going to see if the Local Tuya integration meets my requirements.
When I get more time I’ll continue with replacing the wifi module so I can see first hand the differences. I’ve already built the new wifi module, just need to flash it with the ESP firmware I built today.
@rymo I’m not sure how to DM you on these forums, so this will have to do.
I have three of the 433MHz arlec ceiling fans and I’d like to integrate them to HASS without having to go via the terrible 433MHz interface. Do you have any more of those boards left? The board in the non-gridconnect version has the same footprint as the ones in your photos, though without the 0.1" SIP socket populated.
I’ve received the boards, soldered them up and flashed them with esphome. Thanks! They were super easy to integrate into hass too. So far so good.
I could power the boards up on the bench, and they’d connect to hass, however they wouldn’t power up when inserted into the fan controller. I suspect the older pre-tuya arlec fan controller boards I have don’t have the components populated to route from the J2 header over to the smarts:
The 6x1 SIL header you see on the board was crudely unsoldered from the J3 header visible in the bottom left, then straightened and soldered back on at J2. I read ground on J2 pin 1 (rightmost in this picture), but as far as I can tell it’s not getting 3.3V on VCC, based on there being no continuity between J2 pin 2 and the VCC pin on the 433MHz radio on the left of the board.
There’s a bunch of suspiciously empty pads just up from J2. I suspect on the non-gridconnect versions of this control board J2 is not usable in this way.
Do you happen to have any photos of your fan board disassembled, showing the PCB underneath the wifi daughterboard?
@tjhowse these are the only pictures I have on hand. My fans are still in box (waiting for house build) so if I get a chance I’ll try and get a better shot.
Looks like you have a different MCU as well as some unpopulated components, though the presence of the J2 header suggests that it may still be Tuya compatible?
Nice project Rymo, Love the circuit board replacement idea.
I ended up going down another path, which tinlis1 mentioned. And I did get two Arlec Grid Ceiling Fans setup with Localtuya in Home Assistant (No cloud apart from the initial setup)
Basic Steps:
Install HACS on HA, Setup LocalTuya
Pair the Ceiling Fans (and all other grid devices while you are at it) with the “Smart Life” app on your Mobile
Setup an Rooted Android emulator and sign in with that Smart Life account. (Youtube guides)
Dig out the XML file from the app and locate your device keys
Setup the ceiling fan in HA, Select LocalTuya intergration, Pick the device from the dropdown and enter the key. Match the attributes as per screenshot, Setup two devices, one Fan the other Light.
Hi Hawker,
I was wondering if you could give a little more detail to the way you went about this method?
I have only just started with HA today and have 6 of the Arlec Fans/Lights to deal with and I think your post/method is my best option knowing where I am at with all this stuff. I have HACS installed as well as localtuya and will pair all the fans with Smart Life app tonight (currently paired with Grid Conenct app). I have an android emulator setup and i guess this is the part where I start to need a bit more help. Look forward to hearing from you! Cheers!
EDIT: After watching YouTube vids as you suggested in you basic steps, I think I have it figured out. Haven’t tried yet but will do over this weekend and see how I go. Thanks for posting your method either way!
If you install the tuya local component via HACS and then replace the three files from the link in my previous post then you should get full speed local control of the fan.
Just make sure you get the right tuya local component.
I’ve got the fan (with light) into HA and fan turns on/off. I have to figure out all the settings for it now. Haven’t got light working yet.
EDIT: Light is working. Can turn on & off and adjust brightness or intensity or whatever its called. Cant get fan to work since changing the three files.
EDIT 2: Seems to all be working now. Thanks
EDIT 3: What should the fan settings be now with the three files changed?
Thanks mate. I’ve tried to remove the Fan Oscillating Control dps line but once I submit and go back in its there again. Not sure how to remove it and I cant find it in any config file to delete it manually??
EDIT: OK figured that bit out. Now just need to work out how to set the colour range properly. The config calls for a min and max kelvin but the light doesn’t have that set directly.
It has this when I view in developer tools > states
I haven’t managed to get the colour temp part working either. One day I will have a look at the light python code and make it more flexible but as I don’t ever change the colour I haven’t had it high on my list of things to do.
So based in the post above your fan is working with direction and all 6 speeds?
As I submitted the new fan integration for the I am always looking to hear from those who it worked for. Otherwise I only ever hear from those who it didn’t work for.