Hi! I have been using this integration for a while, but only from the app and controlled by me coming home / leaving (and (dis)arming) the alarm using automations. I now have the Linkind Zigbee Keypad with Zigbee2MQTT and I want to use it directly with MQTT in Alarmo.
Can anyone help me figure out what I have to configure?
I really don’t know what topic’s and payloads I have to define…
This is what I receive when I set an alarm state on the Keypad with a (test) code:
I don’t think it is possible to do directly.
Alarmo will expect a payload on the command topic like such:
{ "command": "arm_away" }
for arming, and this for disarming (assuming you have a pin configured):
{ "command": "disarm", "code": "1234" }
You would need something like Node-Red to convert the MQTT traffic from zigbee2mqtt to what’s needed for Alarmo.
Maybe it is also possible via HA automations, since you can trigger on incoming MQTT data, in the same automation you could publish to the alarmo command topic.
An alternative would be to not use the MQTT interface, but connect the HA entity representing your keypad (must be some alarm_control_panel or sensor device) to the alarmo entity via service calls. An example of this you can find about 5 posts up.
Thanks for the replies! I don’t use nodered, but there’s a lot of info I’ll be looking into any further! I had something strange: I have 1 user with a test code, when I use that it doesn’t work. When I arm/disarm with 1234 (not the test code) it doesn’t work. Is this defined somewhere else in the config or something?
I have filled these fields based on the messages that where coming in:
I am also trying to get Alarmo triggered (and send a confirmation) from a keypad. In your screenshots is only a part of the used string / commands visible, could you sent the entire string so I can try to test that out?
Did you get this to work with personal codes? I see you use nodered but I try to get it to work without.
Help is really appreciated! Thanks!
Installed correctly and the board works but, if I add an Entity sensor in Alarmo, the board stops changing the mode and if I remove or disable the entity, it will work again
What am I doing wrong?
Hello to all, i have a question regarding ability integrate Alarmo with security company console. Is there any chance to connect HA Alarmo with them? I believe that I could use [SIA Alarm Systems - Home Assistant](SIA integration). Any advice would be helpful. Thanks.
The Alarmo card in Lovelace tablet shows the incorrect translation of the “State” and I would like to change it, is it possible?
To overcome this possibility, I made a more practical tab that shows 4 buttons but does not change the color and status of the single button; if I enable arm_mode:, all become red and if I disable arm_mode: null, all become green.
What is the best solution to apply?
“Door” sensor with all “Active Modes”
but if the “Entrance” sensor is active with “at home” mode, the “door” sensor is inactive for 5 minutes
is it possible to create with Alarmo?
@Nettuno69 Out of the 3 questions you have asked here, all 3 times I didn’t really understand what you meant. I don’t want to be rude, but I could probably help you better if you phrase your question more clear.
As for this question:
I believe the alarmo-card uses the translation from HA. For italian (I assume you are italian), see here.
If this translation is incorrect, please notify the HA development team.
Alarmo-card also has the possibility to customize the displayed name per state, see here.
Alarmo is made compatible with the Android MQTT Alarm Panel, so if you’re looking for a control panel, I can recommend it.
As for combining with other alarm systems, I think this is hard to achieve. The problem is that Alarmo is designed as ‘master’ of the system, i.e. it needs direct access to all sensors and will decide when system is armed/disarmed/triggered. Most alarm systems have this functionality internally, so it is hard to keep them in sync regarding states, delay times, pin codes, sensor info etc. if all have their own behaviour. This is not what Alarmo is designed for.
It’s true, I have only been HA for a week; I come from the VERA System which has another logic.
In my learning path, I often find incomplete instructions, that I understand the reasoning but it is not explained where it should be applied and often it is necessary to insert lines in the configuration.yaml but the Verification from error … uffff (forgive the outburst of the newbie)
In Vera system, a sensor had the property of “armed” or “disarm” with a switch from its detection function, giving way to create automations by virtue of the state, eg. if arm sounds the alarm if Disarm turn on the entrance light
(maybe in HA you have to create the Templates but I don’t know how)
In Alarmo I would like to bring this function back to “at Home” mode, that is:
If the “Entrance sensor” has detected movement, for the next 5 minutes turn on the entrance light and the “Door Sensor”, when it detects the opening, must NOT signal the alarm.
If the “Entrance sensor” has NOT detected movement, the “Door sensor” must signal the alarm
I hope I have explained well, thanks for your patience and above all, forgive the translation
I understand this feeling. Documentation quality of HA is a bit of a weak point. Especially for me as hobbyist trying to create this plug-in, the route to success can be quite difficult.
Documentation for Alarmo is probably also poor, I am spending way more attention on maintaining the code than the documentation. If you have tips for improvement, please let me know! For me it’s hard to spot the missing pieces, since I know exactly how things work.
In HA, the alarm system is completely separated from the sensors. The alarm is defined in an alarm_control_panel entity, which you have to arm/disarm. The sensors are watched (by the alarm device) to determine whether arming is allowed, and of course when the system is triggered.
I cannot help you with adding intelligence / arm state to sensors directly, I recommend you to get used to the HA approach instead.
In Alarmo you can only choose to either include or exclude both the ‘Entrance sensor’ and ‘Door sensor’ for the home mode, but they cannot work together.
The only exception is by defining a sensor group, where triggering only occurs in case ‘Entrance sensor’ and ‘Door sensor’ are both active, but it does not consider in which order this occurs.The sensor group feature is intended for motion sensors which sometimes have ‘false’ positives.
I suggest you to create a separate binary sensor which indicates whether ‘Door sensor’ was activated without ‘Entrance sensor’ being activated, and include this binary sensor in Alarmo for the Home mode instead.
Example (I didn’t test it but it might be a starting point), must be added to configuration.yaml:
template:
  - binary_sensor:
     # this sensor will turn on together with entrance sensor, turns off after 5 minutes without motion
      - name: "Entrance Sensor delayed"
        delay_off:
          minutes: 5
        state: >
          {{ is_state('binary_sensor.entrance_sensor','on') }}
      # this sensor will turn on if door is opened without motion in the last 5 minutes
      - name: "Door Sensor without entrance"
        state: >
          {{ is_state('binary_sensor.door_sensor','on')
             and is_state('binary_sensor.entrance_sensor_delayed','off') }}
Note that binary sensors can also have states ‘unknown’ (=system is starting) and ‘unavailable’ (=communication lost), you might want to extend the template sensors for detecting these cases.
I strongly recommend to use packages, allowing you to create a folder with separate yaml files for splitting the configuration. So you could add the template sensors to a ‘hall_sensor_logic.yaml’ so you can keep things organised.
The concept is clear, I have to apply myself in practice.
Forgive the comparison due: in the Vera system there are the Timer Cards, I saw the passage of time being able to create automations based on their term, restart etc.
Here, I do not see the timer scrolling, I cannot stop it which is frustrating but I will find the way. (maybe it’s the idea for a plugin!)
I tried to understand packages, I saw the aliens
Your Template works perfectly and thank you, I will use your help to learn more
To configure the Card, I give error “Custom element not found: alarmo-card”, I think I have to put a “alarmo-card.js” file, (which I can’t find in the link ), into www/alarmo-card and then I have to insert the statement in configuration.yaml, right?
There is a timer entity in HA which can be started and stopped by the user, although I believe there is no ‘live’ countdown visible.
Simply put in the top of the configuration.yaml:
homeassistant:
  packages: !include_dir_named packages
  #rest of the things, like timezone, units, etc.
Now you can create a folder ‘packages’ and put unlimited yaml files (names don’t matter) here, they will altogether form ‘one big’ configuration.yaml. So it’s just a way of organizing your setup, nothing more.
If you plan to use more plugins in HA, I suggest to install HACS. It’s a plugin which adds a library of 3rd party plugins, so you can simply pick Alarmo, and Alarmo-card for installing. HACS takes care of installing it and gives you instructions of what you should do (e.g. restart HA after installing). I recommend it since it also helps a lot with updating your plugins. Alarmo has releases approximately every month.
For adding the card to HA without HACS, see instructions here.
Thanks for your patience, your simple explanations took logic (even packages), now everything works fine.
I wish you Merry Christmas from Italy … a greeting
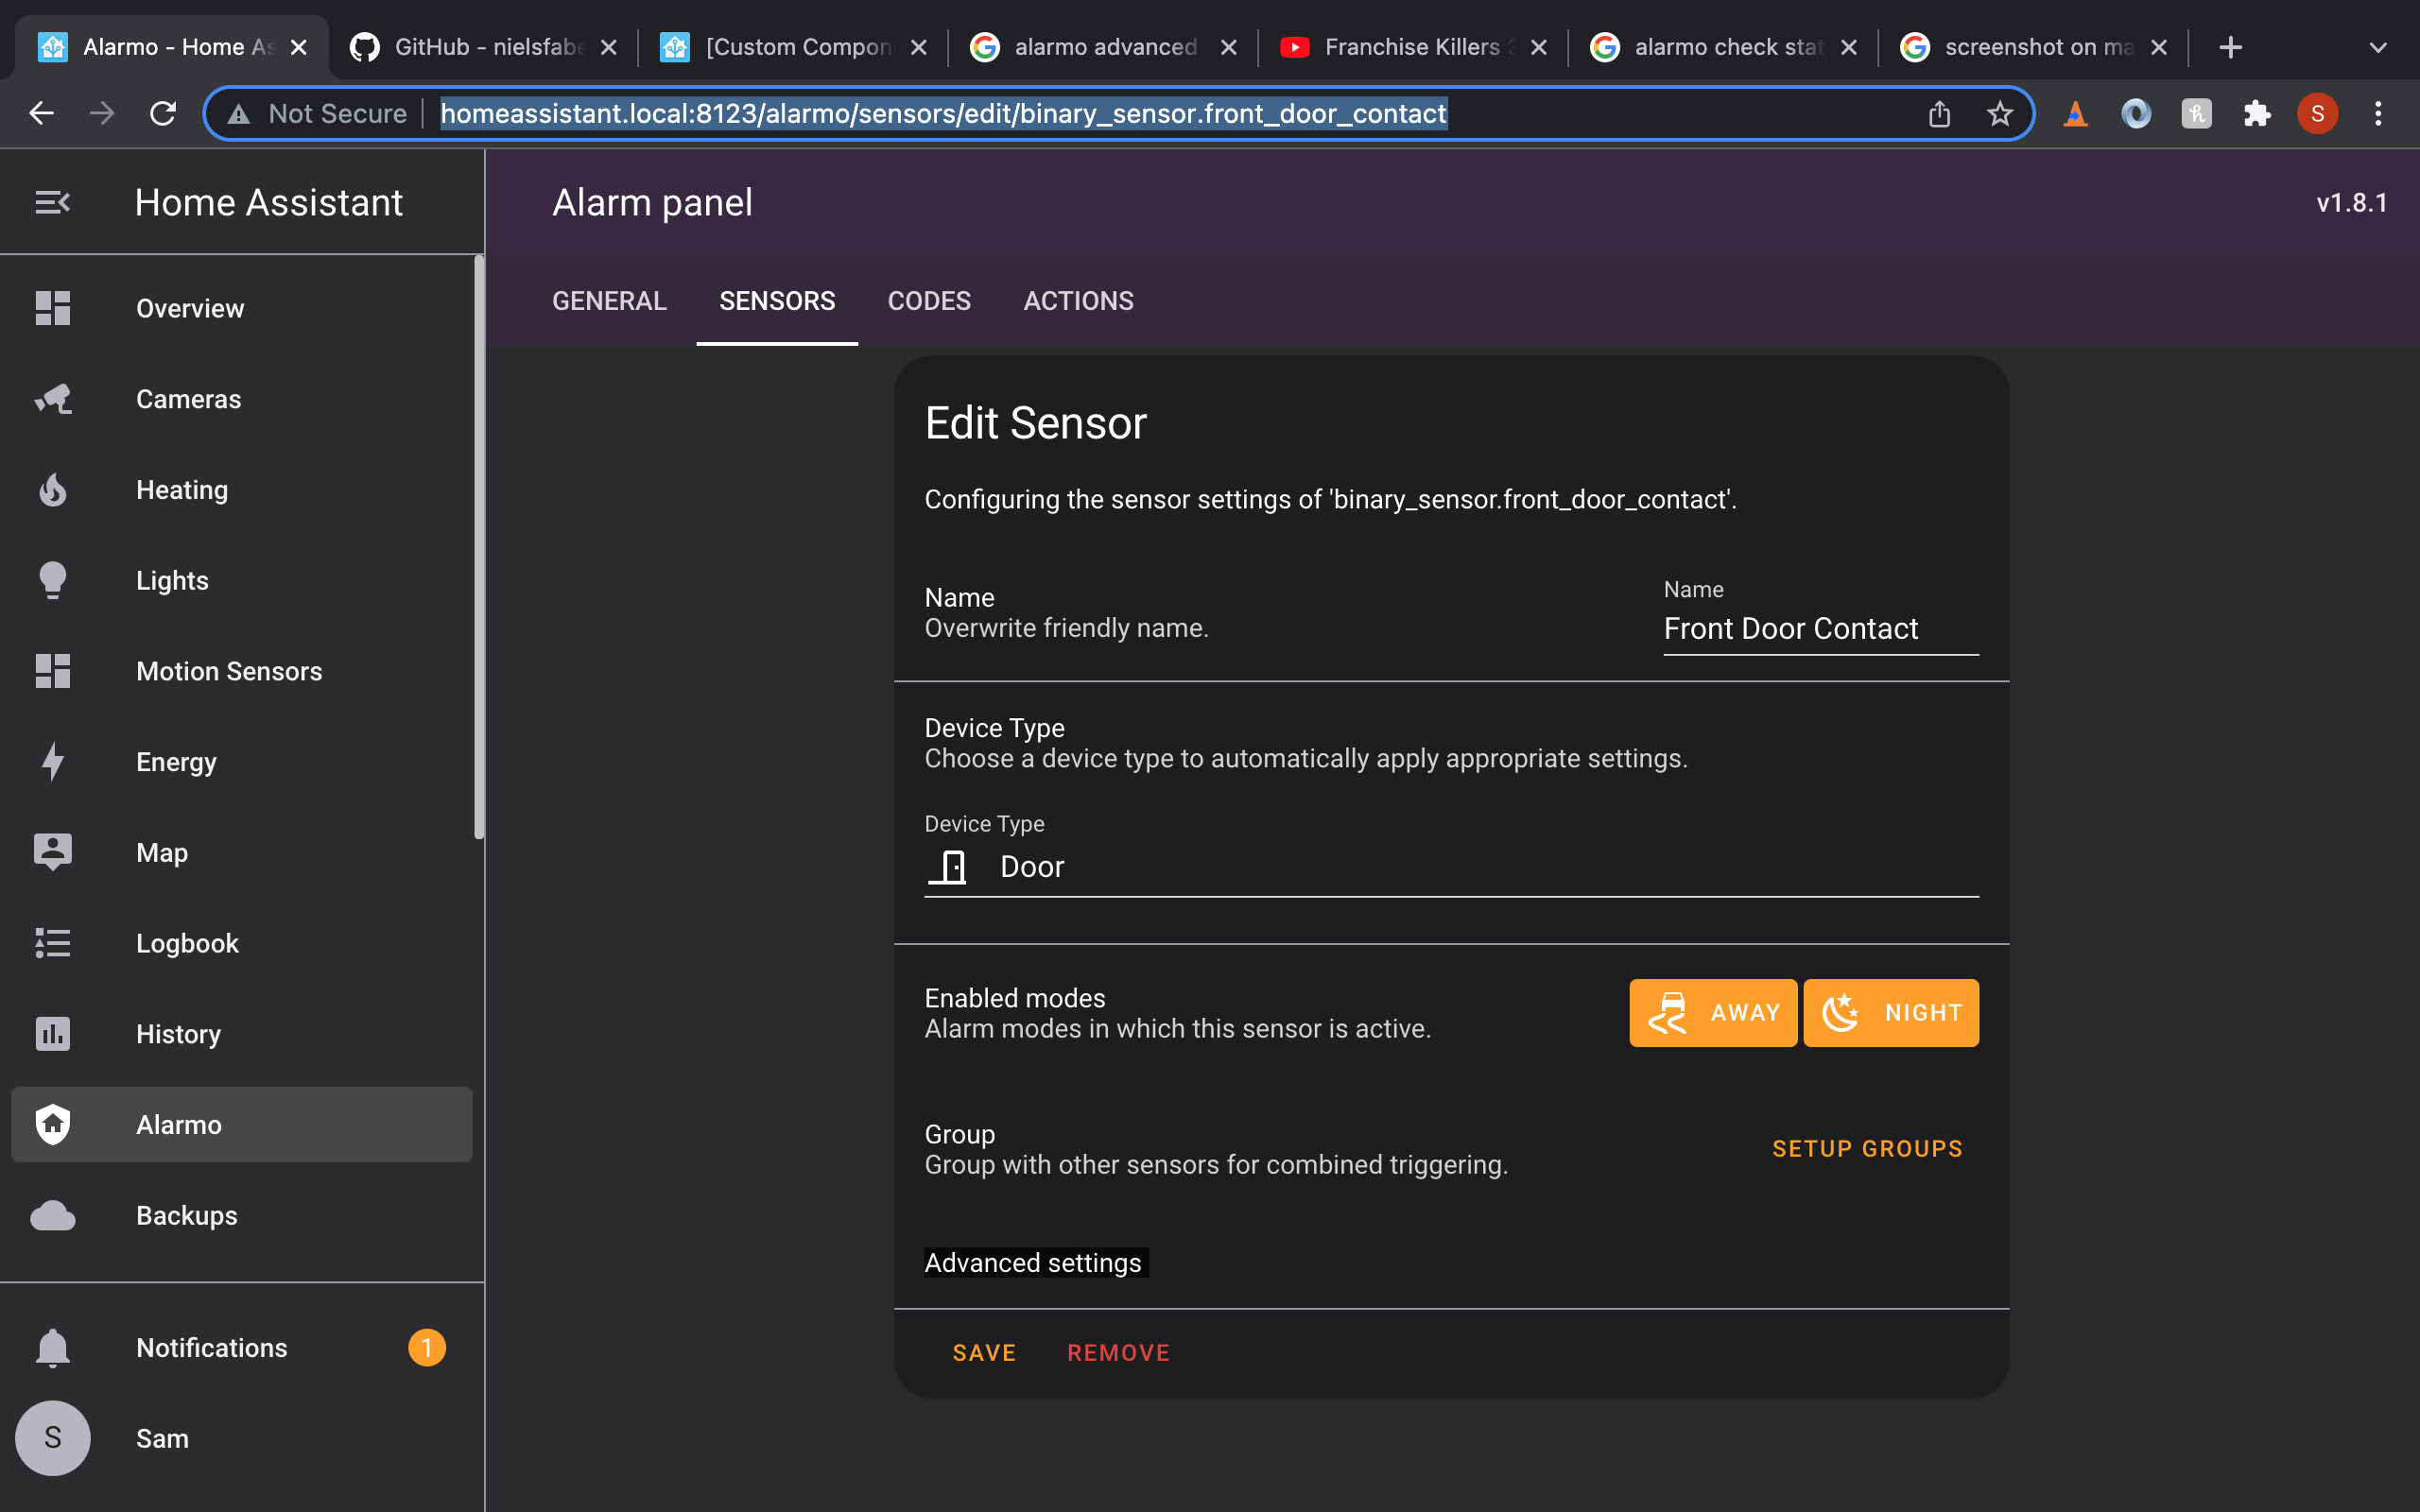
I am trying to set configuration options on sensors, specifically the front door contact which is set to type ‘Door’. I cannot see any advanced options, just the header for advanced options. I have tried different browsers and the app all do the same.
I cant figure out what I am doing wrong, anybody got any suggestions?
Are you running latest-greatest version of HA?
Could you switch to standard theme just to make sure it is not hidden due to having the same color as the background?
Can you check whether the icon buttons show up fine in other pages throughout HA (e.g. in Configuration → integrations):