Example of configuring the MQTT bridge with the Mosquito broker add-on version 6.0.1.
The bridge needs to be deployed on one machine that will send and receive messages, and on the other machine we will allow access for the first machine. And so. it is done as follows.
1) Settings of the Mosquitto broker addon on the first machine with Home Assistant
On the first machine, in the share folder, we create a mosquito folder and create a mosquito.conf file inside. In this file, we insert the code for the MQTT bridge to work
connection main hass
address 192.168.1.108:2222
bridge_attempt_unsubscribe true
cleansession true
remote_username mqtt
remote_password mqtt
remote_clientid main_hass
try_private true
allow_anonymous true

# if you need to have all topics without a filter
topic # both 0 "" ""

# if it is not necessary that there are all topics, then we use a filter and specify specific topics
#topic zigbee2mqtt/# both
#topic lumi/# both
#topic homeassistant/# out
Note
bridge_attempt_unsubscribe
If a bridge has topics that have “out” direction, the default behaviour is to send an unsubscribe request to the remote broker on that topic. This means that changing a topic direction from “in” to “out” will not keep receiving incoming messages. Sending these unsubscribe requests is not always desirable, setting bridge_attempt_unsubscribe to false will disable sending the unsubscribe request
remote_clientid
Set the client id to use on the remote end of this bridge connection. If not defined, this defaults to ‘name.hostname’ where name is the connection name and hostname is the hostname of this computer. This replaces the old “clientid” option to avoid confusion. “clientid” remains valid for the time being
try_private true
If try_private is set to true, the bridge will attempt to indicate to the remote broker that it is a bridge not an ordinary client. If successful, this means that loop detection will be more effective and that retained messages will be propagated correctly. Not all brokers support this feature so it may be necessary to set try_private to false if your bridge does not connect properly.
Next, in the settings of the Mosquito broker addon, we specify the following, where we specify the true value in the active line, this is necessary for the addon to look at our settings

logins:
  - username: mqtt
    password: mqtt
customize:
  active: true
  folder: mosquitto
certfile: fullchain.pem
keyfile: privkey.pem
require_certificate: false
Saving and reloading the addon Mosquitto broker
2) Settings of the Mosquito broker addon on the second machine with Home Assistant
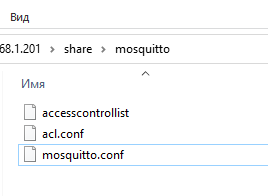
On the second machine, we configure the white list, add the mqtt user to the white list.
We create access control list and apt.conf files, where we specify in the acl.conf file

acl_file /share/mosquitto/accesscontrollist

in the access control list file itself, we specify the connected user, this is from the first machine

user mqtt
topic readwrite #
In the config of the Mosquito broker addon, we do the same as the first one
Save the settings and reload the Mosquito broker addon
Текст на русском
Пример настройки MQTT моста c аддоном Mosquitto broker версии 6.0.1.
Мост нужно разворачивать на одной машине, которая будет передавать и получать сообщения, а на другой машине мы разрешим доступ для первой машины. Итак. делается следующим образом.
1) Настройки аддона Mosquitto broker на первой машине с Home Assistant
На первой машине, в папке share создаем папку mosquitto и внутри создаем файлик mosquitto.conf. В этот файлик мы вставляем код для работы MQTT моста
connection main hass  # указываем любое имя
address 192.168.1.108:2222 # указываем IP адрес и порт второй машины
bridge_attempt_unsubscribe true
cleansession true
remote_username mqtt
remote_password mqtt
remote_clientid main_hass
try_private true
allow_anonymous true

# если нужно, чтобы были все топики без фильтра
topic # both 0 "" ""

# если не нужно, чтобы были все топики, то используем фильтр и указываем конкретные топики
#topic zigbee2mqtt/# both
#topic lumi/# both
#topic homeassistant/# out
Примечание
bridge_attempt_unsubscribe
Если у моста есть темы, которые имеют направление “выход”, поведение по умолчанию заключается в отправке запроса на отмену подписки удаленному посреднику по этой теме. Это означает, что изменение направления темы с “вход” на “выход” не приведет к продолжению приема входящих сообщений. Отправка этих запросов на отмену подписки не всегда желательна, установка bridge_attempt_unsubscribe в значение false отключит отправку запроса на отмену подписки
remote_clientid
Установите идентификатор клиента для использования на удаленном конце этого мостового соединения. Если не определено, по умолчанию используется “имя хоста”, где имя-это имя подключения, а имя хоста-имя хоста этого компьютера. Это заменяет старую опцию" идентификатор клиента", чтобы избежать путаницы. “идентификатор клиента” остается действительным в настоящее время
try_private true
Если для параметра try_private установлено значение true, мост попытается указать удаленному брокеру, что это мост, а не обычный клиент. В случае успеха это означает, что обнаружение циклов будет более эффективным и сохраненные сообщения будут распространяться правильно. Не все брокеры поддерживают эту функцию, поэтому может потребоваться установить значение try_private равным false, если ваш мост не подключается должным образом.
Далее в настройках аддона Mosquitto broker указываем следующее, где указываем в строке active значение true, это нужно для того, чтобы аддон смотрел на наши настройки
logins:
  - username: mqtt
    password: mqtt
customize:
  active: true
  folder: mosquitto
certfile: fullchain.pem
keyfile: privkey.pem
require_certificate: false
Сохраняем настройки и перезагружаем аддон Mosquitto broker
2) Настройки аддона Mosquitto broker на второй машине с Home Assistant
На второй машине настраиваем белый лист, добавим пользователя mqtt в белый список.
Создаем файлики accesscontrollist и acl.conf, где в файлике acl.conf указываем
acl_file /share/mosquitto/accesscontrollist
в самом файлике accesscontrollist указываем подключаемого пользователя, это с первой машины
user mqtt
topic readwrite #
В конифге аддона Mosquitto broker делаем аналогично первому
Сохраняем настройки и перезагружаем аддон Mosquitto broker