Water filter quality and water softener status

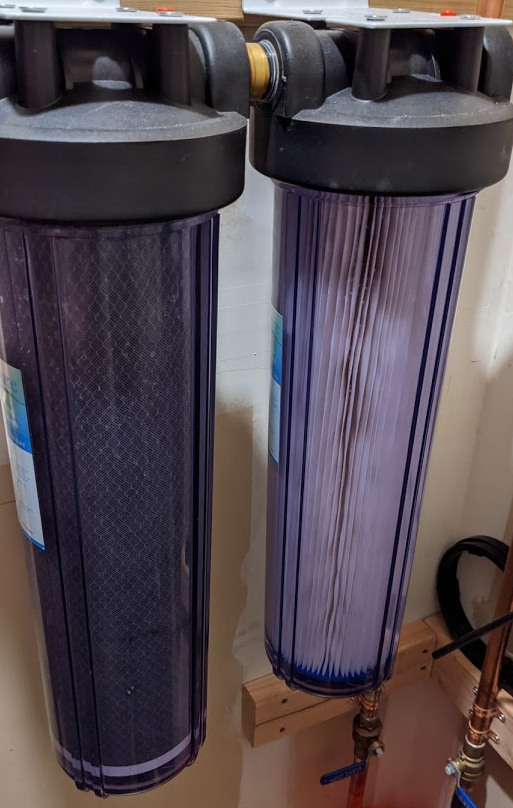
About a month and a half ago I learned how to sweat plumbing for the purpose of installing a whole house filtration system. I opted to go with this setup because it has clear housings and brass threads.

I spent some time planning the route and where I was going to break into my water line. Just before I got started, I realized that many of the whole house filter systems come with pressure gauges before and after the filters; I thought about this and it makes sense as a way to determine how “plugged” the filter is if there’s a large pressure drop during water demand. So, I decided to put a couple of places to put the pressure sensors.

You can see the hook-ups in both pictures (with plugs installed). The first picture at the top left and the second picture on the top right. The top line is the return (filtered) and the bottom is supply (unfiltered). I installed a hardware gauge so I’d have some absolute value to calibrate the sensors to and some way to just visually see what the pressure is, if I’m curious. Once I had the system installed, it was time to design the electrical stuff.

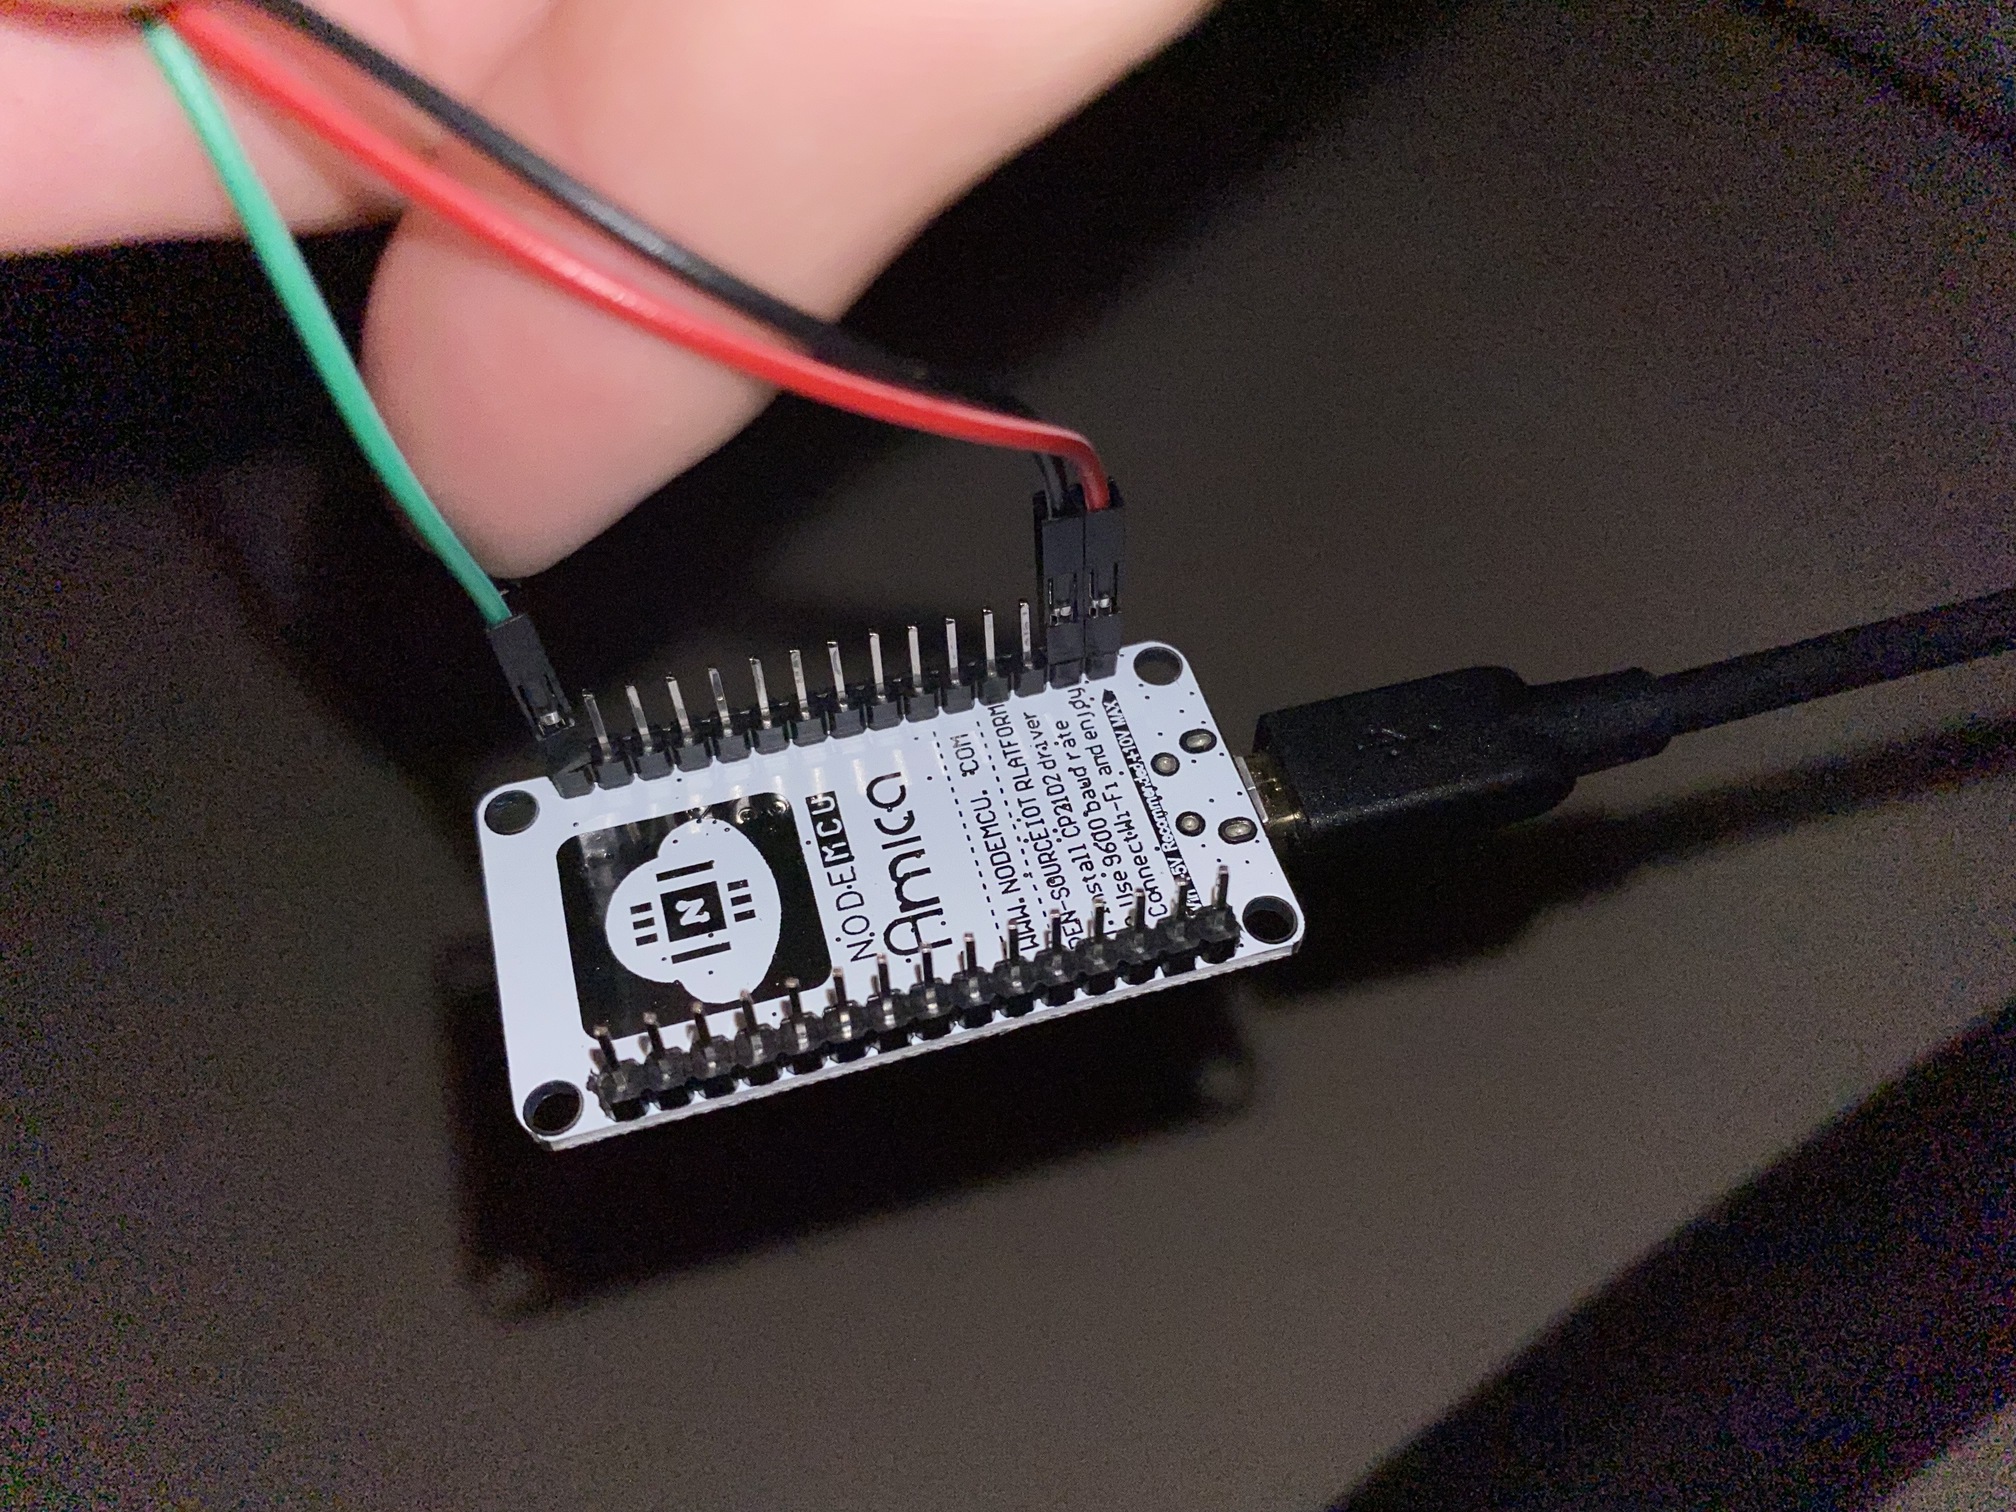
I realized quickly that I can use just a standard issue pressure transducer sensors with the analog input on the esp8266, works great!:

… but there’s only one adc input on the esp8266, so I looked closer at ESPHome and found the ads1115 which uses i2c to enable four (more precise) ADC inputs.

I also wanted to find some way to measure how much salt there was in our water softener bin because it very slowly washes away over time and having an automation in home assistant tell me that it needs more salt would be very helpful. I realized quickly that the bin is almost completely independent of the system and HEAVY. Each bag of salt weighs 40lbs. So, a scale would be pretty accurate. So, I found this article and bought the stuff to build the same kind of thing.

I used a couple of pieces of plywood and had a friend 3D print the load cell holders from a model I found on thiniverse.com. I mocked up the whole thing and tested it out:

Then, I installed it and configured the software:

I’m still trying to figure out how best to use the Incoming and Outgoing pressure to indicate “Filter Health” but with Pat’s help, I am VERY close now.

Here is the ESPHome file I used to create this system:

i2c:
  sda: D2
  scl: D3
  scan: True

ads1115:
  - address: 0x48
  
sensor:
  - platform: wifi_signal
    name: ${friendly_name} WiFi Signal Strength
    update_interval: 600s
  - platform: ads1115
    multiplexer: 'A0_GND'
    gain: 6.144
    name: "Incoming Water Pressure"
    id: incoming_water_pressure
    update_interval: never
    unit_of_measurement: "psi"
    icon: "mdi:gauge"
    accuracy_decimals: 1
    filters:
      - calibrate_polynomial:
          degree: 4
          datapoints:
            - 0.455 -> 0.0  
            - 0.722 -> 10.0
            - 0.824 -> 15.0
            - 0.948 -> 20.0
            - 1.061 -> 25.0
            - 1.178 -> 30.0
            - 1.280 -> 35.0
            - 1.398 -> 40.0
            - 1.501 -> 45.0
            - 1.622 -> 50.0
            - 1.738 -> 55.0
            - 1.859 -> 60.0
            - 1.977 -> 65.0
            - 2.097 -> 70.0
            - 2.209 -> 75.0
  - platform: ads1115
    multiplexer: 'A1_GND'
    gain: 6.144
    name: "Outgoing Water Pressure"
    id: outgoing_water_pressure
    update_interval: 5s
    unit_of_measurement: "psi"
    icon: "mdi:gauge-low"
    accuracy_decimals: 1
    on_value:
      then:
        - component.update: incoming_water_pressure    
    filters:
      - calibrate_polynomial:
          degree: 4
          datapoints:
            - 0.539 -> 0.0
            - 0.775 -> 10.0
            - 0.854 -> 15.0
            - 0.963 -> 20.0
            - 1.051 -> 25.0
            - 1.148 -> 30.0
            - 1.232 -> 35.0
            - 1.348 -> 40.0
            - 1.432 -> 45.0
            - 1.530 -> 50.0
            - 1.637 -> 55.0
            - 1.743 -> 60.0
            - 1.854 -> 65.0
            - 1.971 -> 70.0
            - 2.078 -> 75.0
      - throttle: 10s
      - or:
        - heartbeat: 300s
        - delta: 0.04
  - platform: ads1115
    multiplexer: 'A3_GND'
    gain: 6.144
    name: "${friendly_name} Illuminance"
    update_interval: 5s
    unit_of_measurement: lx
    accuracy_decimals: 0
    filters:
      - or:
        - heartbeat: 600s
        - delta: 0.05
      - lambda: |-
          return (x / 10000.0) * 2000000.0;
  - platform: hx711
    dout_pin: D0
    clk_pin: D1
    gain: 128
    name: "Salt Bin Weight"
    update_interval: 10s
    unit_of_measurement: lbs 
    icon: "mdi:shaker"
    accuracy_decimals: 1
    filters:
      - median:
          window_size: 61
          send_every: 60
          send_first_at: 6
      - lambda: return x * -0.0000911 + 23.3;
19 Likes

Very cool, thanks for sharing!

@SpikeyGG this is a great post and parts of this are exactly what I am looking for. I am truly a novice at this and was wondering if you could share how you connected the pressure transducer sensor into the analog input on your esp8266 with the use of an ads1115. Simple point to point wiring diagram or a close up picture of your breadboard would be great. Thanks for sharing what you have created.

@shepler007,

Here’s a closeup of my build, you can see the red (+5V) black (gnd) and yellow (signal) running into the ADS1115:

I just made sure to power the ADS1115 with +5V too so your not oversupplying the inputs. The output signal (yellow) from the pressure transducer goes directly to the A0/A1/A2/A3 pin on the ADS1115. That little purple guy is a light sensor I had extra so I threw it on there too, leaving a single open analog input (A2). I’m thinking I might add a pressure regulator and another pressure sensor so I can measure before that and have incoming, regulated and filtered water pressures…

Sorry, I don’t have a wiring diagram. I’d like to be able to draw one but I haven’t found an easy/good application to do that with. Ideally, it’d be a webapp like draw.io but specifically for laying out circuits to share. You know of one?

No worries about being a novice… I am too. Just buying cheapo electronics and trying stuff. Don’t be afraid! I try to get like 5 of everything so if I burn something out by hooking it up wrong, I can replace it (and then try to remember not to do that again. :slight_smile:). It has the added benefit of being quickly redundant so I build all my stuff with Dupont connectors like this, for example:


FYI, this PCB isn’t the same one as I’m using above.

That way if a component goes out of whack, I can pull it out and pop in a new one.

1 Like

@SpikeyGG,

This is awsome. Thank you for sharing.

What kind of an ESP module are you using?

I don’t know of a way to make wiring diagrams either. I know how to follow them. :slightly_smiling_face: I have made some PCB boards for my own ESP-01 projects around the house. maybe I could make a PCB for this when I start digging into it this weekend. If I do layout a PCB I would like to send it to you as a second set of eyes before I have them made. I will also be happy to send you some just for helping and sharing.

I am the same way when it comes to buying extra parts buy five burn up four and get fith one working. :slight_smile:

Thanks again for sharing.

@SpikeyGG, I forgot to ask what does the back of that PCB look like? I want to make sure I don’t miss anything on the PCB design. Thanks again. Scott

I’m using an esp8266 (lolin nodemcu) a few months back I was able to buy two of them shipped to my house from China on AliExpress! They’ve rose in price a bit since then but they’re still VERY reasonable for what you can do.

Remember that the PCB above that’s all wired up is not the same device as my UtilityRoom device made for monitoring the water pressure and softener. That one takes a Wemos D1 Mini and was going to be used to monitor car presence and my garage door state (along with temperature, humidity, light and some motion detection). The back looks like this

I figured out a way a while ago to use silicone glue and a piece of fridge magnet and some neodymium magnet discs to make an easy removable PCB connection (so long as the thing you’re attaching to is ferrous metal). It works very well! I used it on my laundry room device that monitors my washer and dryer states. :slight_smile:

1 Like

Thanks for taking the time to write this up. I found it very useful. I’m interested in the salt bin part and noticed you didn’t calibrate the hx711 load cells. Also could you explain the lambda formula you used to convert the raw value into pounds. Is the the 23.3 the weight of your softener when empty? My readings are in the millions so I’m sure I’m missing something. Thanks again.

Hi @cyn,

I just used empirical data to set the equation. I took a few measurements looking at the debug output in ESPHome and I had a few different plate (disc) weights on hand (like 10lbs). I found that the load cells were very predictable. I just started the linear equation with two points: no load (0lbs just the wood on top) and one 10lbs weight and calculated the equation (using rise over run slope equation and y=mx+b). To my surprise when I removed all the test weight and stood on the scale, it was very darn accurate!

I didn’t touch the equation after that and it works well. I’ve watched the salt bin weight over the last couple of months and about every week the softener does a brine flush and I can see the weight of the bin drop by ~2-3lbs. I would have never knows the cycle of the softener as well as I do now with visibility to its weight. Anyway, it went from very full nearly 100lbs to ~40lbs and I could see the brine at the bottom of the tank so I added a 40lb bag of salt and the weight went up by 40lbs as expected. :slight_smile:

I hope this helps,
-Greg

Thank you, got it mostly working. Need to get over to thingverse and figure out how to order those holders. Thanks for your help.

Hey @SpikeyGG, first of all, thank you so much for the post, after reading about 10 times I think I am close to producing something similar to what you have here in this project. While my project is similar, it is not exactly the same. Since I only need one sensor, I elected to go with the ESP8266 for my setup. Basically, I am trying to read the pressure in my water well so I can trigger my irrigation system to stop irrigating when the pressure reaches a certain level. I have ESPHome up and running and have the ESP8266 connected to my WiFi network. I am powering my pressure transducer as you pictured above. My question is, how hard would it be to edit your posted ESPHome file to work with the 8266 instead of the ads115, or does it even matter? Quite frankly I’m still a noob at HA, and definitely my first time fooling around with the 8266. Thank you in advance or any and all assistance you are willing to provide.

Hey @cmerritt82, it’s not hard. The biggest pain point is dialing in the value to reality because you have to either calculate the equation or collect and use empirical data to define the mapping. You just need to use the ADC sensor in ESPHome. It’ll look something like this:

sensor:
  - platform: adc
    pin: A0
    name: "Water Pressure"

You’ll need to define a filter to get the accuracy and if you collect empirical data you can do the same thing I did to match it up to reality.

By the way, it’s been about seven months since I installed my filter setup and this morning my wife took a bath and complained that the pressure seemed low. I checked the stats and we had over an 8psi drop across the filter elements! I haven’t touched the filters since February 2020 so I decided when she’s done with the bath I’ll swap them out. I just got done and took some empirical data on fresh filters and I have a maximum drop of ~4psi when the tub, sink, and toilets are running now! :stuck_out_tongue:

Here’s the pre-data and post-data if you care:


The first stage filter was digusting!

Anyway, good luck!

1 Like

oh man!!! that is a lot of cleaning to do! Thanks so much, just found your other post and am working on the code now. I have to say, I’m on this mission because my wife complains about no water pressure when the sprinklers are running. moral of the story… happy wife = happy life and we get to learn some cool new technical stuff along the way, will give this a try, thanks!!!

Did you end up going with the approach of measuring the weight of the salt tank? If so, how has it worked out? If not what did you end up using?

Hey @EricE, yeah, been using the scale salt measurement the whole time. After I got it stood up, I was able to wait until the tank was nearly empty and learned that the minimum weight was: ~40lbs. Then I filled it all the way up so I could get the max value: ~140lbs. Now I have a very accurate measure of how much I have and I know that the bags you buy from the store are 40lbs each so I can add a bag whenever I have room for 40+ lbs. :slight_smile:

Here’s what it looks like tonight:
image

ok, so maybe a bit more advice. Attached are photos of what I currently have (I know it is not pretty yet, but want to get it working first).

Also, here is a screen shot of my current ESPHome file uploaded to my ESP8266 with no config errors being reported.

The sensor I purchases is: https://www.amazon.com/gp/product/B00NIK9E10/ref=ppx_yo_dt_b_asin_title_o01_s01?ie=UTF8&psc=1

This is a 5V input sensor and why I used the calculation (as a starting point from the other post). I have it wired as shown in the picture (making sure green was NOT ground which did throw me at first). The ESP8266 only supplies 3.3v on its pins, but the VIN pin (when I metered it) seemed to be throwing off approx 4.5v, so I used this pin to power my sensor (using USB as primary power source for both the 8266 and the sensor).

My question is, why can’t I get anything to show up in Home Assistant like your pretty graphs above? I’m kind of at a stopping point and need a fresh set of eyes to review and give me some thoughts. I feel I am very close, but maybe not. As always, any and all thoughts/comments are greatly appreciated.

As a note, I do see the ESP8266 showing up in Home Assistant, just not the ADC… I fooled around with lovelace (another first for me), but can’t even seem to see anything there or within decives.

thanks again!

btw, this is next on my list once I get the water pressure sensor working, I have a salt bin for softening and this will be great so I don’t have to go check the thing once a week to be sure we have enough salt…

It sounds like you’ve got the device hooked into Home Assistant you just need to verify that the sensor is showing up. I can think of two way to check that.

  1. Try going into ESPHome and pulling up the log for the device. You should set the logger: to DEBUG first though because that will tell you when the ESPHome devices sends data to Home Assistant. This is the best way in my mind to verify that the data is getting sent correctly from ESPHome.
logger:
  level: DEBUG
  1. Secondly you can check the ESPHome device in Home Assistant and verify that all the sensors coming from it are the ones you’d expect. Configuration>Integrations then click on the ESPHome device you’re interested in. It will show you how many devices and how many entities it has. The entities should cover your Water Pressure value, if they don’t try removing and re-adding the device.
    image
    Then when I click on entities it brings this up:

That’s what mine looks like.
-Greg

ok, update for the night. After a lot of flashing and setting a static ip on the 8266, I was able to get the sensor to show up in HA, progress! However, the readings are not correct, in fact it seems like whether using the lambda or polynomial formulas, I’m getting 0V reading. After further reviewing the transducer I bought, there is conflicting information on whether the sensor is a 12V input or 5V input. This is after checking my wiring and crimping. I just ordered another 100PSI sensor which states it works with 5V (several use it with rasperry pi). That will be here on Thursday and will report back then. Either way I consider it progress, thanks again for all your assistance @SpikeyGG

ok, so happy to report back, I just had a bad wire connection and was able to get the sensor working tonight, eurka!

image

Still tweaking on the forumla as it seems to be a lot of trial and error to get it dialed in just right, however, I can’t say thank you enough for your help, next up, will try the salt bin weight thing going.

Thanks again @SpikeyGG!!

1 Like