Custom Component: Generic SunSpec modbus TCP monitoring (inverter, meter etc)

With this component you can monitor your SunSpec Modbus compliant device (solar inverter for example). Should work with any certified product listed here:

You can customize what data to read from the device using the configuration flow.

The custom component can be found here:

I have only tested this with my own solar inverter, Kaco Powador 20.0.TL3, testers are welcome!

2 Likes

I just completed the custom component for ABB/Power-One inverters. 3-4 days of studying and debugging the sunspec register map, documentation was horrible. But it works, finally. While working on it, I was thinking: "why nobody thought about a generic sunspec client, so it would work with all inverters sunspec certified?

And here it isā€¦finally. :slight_smile:

I just installed it, was so eager to test it, but it gives me a connection timeout error. And Iā€™m sure the inverter is running, since Iā€™m using modbus tcp with my component, I also disabled it thinking it would create issues (but it shouldnā€™t), and it gives me the same problem.

The error:

2021-06-09 10:37:51 ERROR (MainThread) [custom_components.sunspec] Failed to connect to host 10.1.10.162:502 - timed out

And right after I tried connecting with my modbus testing tool, you can see itā€™s the same IP/port:

If you want me to test something let me know, Iā€™d be glad to help.

Hi!
I have had some issues with my inverter as well, sometimes it seems to get too many requests all at once and stops responding. So make sure youā€™re not hitting it with other clients at the same time.
I have published a new release, 0.0.2 which has an increased timoute (from 5 s to 30 s) and with a configurable slave id, perhaps that can help?
If you still have problem, please turn on debugging for the component and let me know what is says just before the error.

Hi,

just tried this version, and it works great, probably the Slave ID was the problem, my inverter has a Slave ID = 2.

Hereā€™s the output of your component, compared to the test python sunspec client v1 (I noticed you use sunspec v2 library) I had installed for testing:

(env) āžœ  ~ python env/bin/suns.py -a 2 -i abb-vsn300.axel.dom

Timestamp: 2021-06-10T06:12:14Z

model: Common (1)

      Manufacturer (Mn):                            Power-One
      Model (Md):                                      -3G82-
      Options (Opt):                                        X
      Version (Vr):                                      C008
      Serial Number (SN):                    077909-3G82-3112

model: Inverter (Three Phase) (103)

      Amps (A):                                          2.38 A
      Amps PhaseA (AphA):                                2.38 A
      Amps PhaseB (AphB):                                2.66 A
      Amps PhaseC (AphC):                                2.89 A
      Phase Voltage AB (PPVphAB):                       420.5 V
      Phase Voltage BC (PPVphBC):                       416.5 V
      Phase Voltage CA (PPVphCA):                       420.0 V
      Phase Voltage AN (PhVphA):                        243.5 V
      Phase Voltage BN (PhVphB):           237.10000000000002 V
      Phase Voltage CN (PhVphC):           239.60000000000002 V
      Watts (W):                                         1904 W
      Hz (Hz):                             49.980000000000004 Hz
      WattHours (WH):                                72434304 Wh
      DC Watts (DCW):                                    1921 W
      Cabinet Temperature (TmpCab):                     239.9 C
      Other Temperature (TmpOt):                         32.1 C
      Operating State (St):                                 4
      Vendor Operating State (StVnd):                       6
      Event1 (Evt1):                               0x00000000
      Event Bitfield 2 (Evt2):                     0x00000000

model: Multiple MPPT Inverter Extension Model (160)

      Number of Modules (N):                                2
   01:Input ID (ID):                                        1
   01:DC Current (DCA):                    2.5300000000000002 A
   01:DC Voltage (DCV):                                 389.6 V
   01:DC Power (DCW):                                     975 W
   02:Input ID (ID):                                        2
   02:DC Current (DCA):                                  2.32 A
   02:DC Voltage (DCV):                                 409.5 V
   02:DC Power (DCW):                                     946 W

model: Nameplate (120)

      WRtg (WRtg):                                      10000 W

model: Basic Settings (121)

      WMax (WMax):                                          0 W

model: Immediate Controls (123)

      WMaxLimPct (WMaxLimPct):                            100 % WMax
      WMaxLimPct_RvrtTms (WMaxLimPct_RvrtTms):                   60 Secs
      WMaxLimPct_RmpTms (WMaxLimPct_RmpTms):                   60 Secs
      WMaxLim_Ena (WMaxLim_Ena):                            0

A t first glance, I only see a problem with these 2 values:

image

The first one is the evt1 and the second should be the ā€œOperating Stateā€ (St in sunspec), that should show a value of 4 right now, that means the inverter is running and producing power.

The cab temperature value is wrong, but itā€™s not a bug in the component, but in the inverterā€™s firmware: the scale factor for that particular register is wrong. I corrected it in my component manually.

Great work, if I only knew you were developing this, I wouldnā€™t have spent al that time on register maps of the inverter. But I learned a lot during the process anyway. :slight_smile:

Iā€™m glad to hear that slave id fixed it and that itā€™s working for you!
I noticed you had the MPPT model in your script as well, you can enable that in the component by clicking to configure on the intergrations page and check box 160 if you want to monitor that as well.

The first field (with value MPPT) is actually the ā€œStā€ field, you can see it in the sensor attributes. Value 4 translates to the symbol ā€œMPPTā€ in the spec. State
MPPT should mean the inverter is generating AC power.

The other field that has no value works the same way, refers to one or more error symbols, right now there are none so it shows up empty.

This repo is really helpful: models/model_103.json at e59e9aa33e21758cb45d01efbbd6b0e9ee229101 Ā· sunspec/models Ā· GitHub
Itā€™s being used by the pySunSpec2 library, so all that metadata is available and is what the component is using for units, labels etc.
I also started out with version 1 of the library and had no idea about v2, someone from the SunSpec Alliance informed me about it and said that version 1 would not support newer models (70x for example).

It was a great learning experience for me as well, trying to figure out the testing bits now so that i can get it fully tested and hopefully ready for release on HACS :slight_smile:

Thanks for your feedback!

The script is part of the pysunspec library, when you install the library it comes with it, and it automatically discovers all sunspec models for the device and enumerates everything. That is really the cool part for me, you donā€™t have to do much. :slight_smile:

In pysunspec2 they havenā€™t provided a script, but I asked on github and one of the devs replied saying they will provide it in next release.

I now enabled M1, M103, M160 on the component. I think when you first install the component, it should automatically enable all available models for the device, just like the script does, it enumerates everything. But itā€™s good that you can enable it after. :slight_smile:

I found sunspec2 while looking at their github, if you check here youā€™ll see it at the top, and itā€™s their recommended version now: SunSpec Alliance (github.com)

Yes, you learn by doing more than using. I learned a lot about modbus, the register maps, and so I understood why SunSpec came out with SunSpec Modbus. :slight_smile:

You made a great job Johan. Thanks for sharing it.

1 Like

I have one suggestion Johan: you could map the sensors to sensor types, so you can also associate the appropriate icon type.

Something like this:

from homeassistant.const import (
    DEVICE_CLASS_CURRENT,
    DEVICE_CLASS_ENERGY,
    DEVICE_CLASS_POWER,
    DEVICE_CLASS_TEMPERATURE,
    DEVICE_CLASS_VOLTAGE,
)

SENSOR_TYPES = {
    "Manufacturer": ["Manufacturer", "comm_manufact", None, "mdi:information-outline", None],
    "Model": ["Model", "comm_model", None, "mdi:information-outline", None],
    "Options": ["Options", "comm_options", None, "mdi:information-outline", None],
    "Version": ["Firmware Version", "comm_version", None, "mdi:information-outline", None],
    "Serial": ["Serial", "comm_sernum", None, "mdi:information-outline", None],
    "AC_Current": ["AC Current", "accurrent", "A", "mdi:current-ac", DEVICE_CLASS_CURRENT],
    "AC_CurrentA": ["AC Current A", "accurrenta", "A", "mdi:current-ac", DEVICE_CLASS_CURRENT],
    "AC_CurrentB": ["AC Current B", "accurrentb", "A", "mdi:current-ac", DEVICE_CLASS_CURRENT],
    "AC_CurrentC": ["AC Current C", "accurrentc", "A", "mdi:current-ac", DEVICE_CLASS_CURRENT],
    "AC_VoltageAB": ["AC Voltage AB", "acvoltageab", "V", "mdi:lightning-bolt", DEVICE_CLASS_VOLTAGE],
    "AC_VoltageBC": ["AC Voltage BC", "acvoltagebc", "V", "mdi:lightning-bolt", DEVICE_CLASS_VOLTAGE],
    "AC_VoltageCA": ["AC Voltage CA", "acvoltageca", "V", "mdi:lightning-bolt", DEVICE_CLASS_VOLTAGE],
    "AC_VoltageAN": ["AC Voltage AN", "acvoltagean", "V", "mdi:lightning-bolt", DEVICE_CLASS_VOLTAGE],
    "AC_VoltageBN": ["AC Voltage BN", "acvoltagebn", "V", "mdi:lightning-bolt", DEVICE_CLASS_VOLTAGE],
    "AC_VoltageCN": ["AC Voltage CN", "acvoltagecn", "V", "mdi:lightning-bolt", DEVICE_CLASS_VOLTAGE],
    "AC_Power": ["AC Power", "acpower", "W", "mdi:solar-power", DEVICE_CLASS_POWER],
    "AC_Frequency": ["AC Frequency", "acfreq", "Hz", "mdi:sine-wave", None],
    "AC_Energy": ["AC Energy", "acenergy", "kWh", "mdi:solar-power", DEVICE_CLASS_ENERGY],
    "DC_Power": ["DC Power", "dcpower", "W", "mdi:solar-power", DEVICE_CLASS_POWER],
    "DC1_Curr": ["DC1 current", "dc1curr", "A", "mdi:current-ac", DEVICE_CLASS_CURRENT],
    "DC1_Volt": ["DC1 voltage", "dc1volt", "V", "mdi:lightning-bolt", DEVICE_CLASS_VOLTAGE],
    "DC1_Power": ["DC1 power", "dc1power", "W", "mdi:solar-power", DEVICE_CLASS_POWER],
    "DC2_Curr": ["DC2 current", "dc2curr", "A", "mdi:current-ac", DEVICE_CLASS_CURRENT],
    "DC2_Volt": ["DC2 voltage", "dc2volt", "V", "mdi:lightning-bolt", DEVICE_CLASS_VOLTAGE],
    "DC2_Power": ["DC2 power", "dc2power", "W", "mdi:solar-power", DEVICE_CLASS_POWER],
    "Status": ["Operating State", "status", None, "mdi:information-outline", None],
    "Status_Vendor": ["Vendor Operating State", "statusvendor", None, "mdi:information-outline", None],
    "Temp_Cab": ["Cabinet Temperature", "tempcab", "Ā°C", "mdi:temperature-celsius", DEVICE_CLASS_TEMPERATURE],
    "Temp_Oth": ["Booster Temperature", "tempoth", "Ā°C", "mdi:temperature-celsius", DEVICE_CLASS_TEMPERATURE],
}

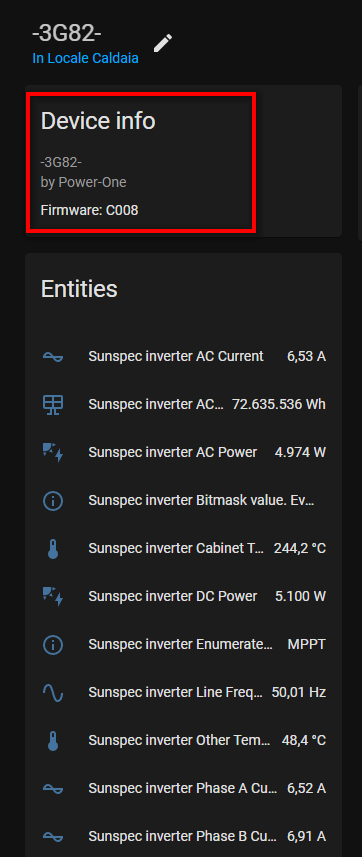
And I also noticed this: probably instead of the firmware/software version, you would want to put the model right above the manufacturer name.

Thanks for the suggestion, will have a look at that!
The reason i didnā€™t want to include all models by default is that a lot if the available models contain static data that isnā€™t really all that interesting, so it would produce a lot of sensors that are not very useful.
Perhaps MPPT should be on by default though (model 160).

From what I understood studying a little bit of SunSpec docs:

  • M1 (the Common model) should be mandatory for all devices, maybe as a single sensor with all the info as 5-6 attributes of the sensor.
  • M101 data mandatory for single-pashe inverters
  • M103 and M160 data mandatory for 3-phase inverters

Since you developed a nice and general integration for all SunSpec devices, obviously these are the kind of things that youā€™ll need to think about because itā€™s harder than developing vs a single specific device. :slight_smile:

Thanks again for your work.

New release is out (0.0.3) with your icon suggestion applied :+1:
Model 160 is now enabled by default and device info updated.
Great feedback, thank you!

1 Like

That was fast! :slight_smile:

My pleasure, now I can get rid of my custom componentā€¦letā€™s see if I have everything I need.

Now, all custom components that pull data from sunspec certified devices are practically useless.

For frequency, you can use mdi:sine-wave. You didnā€™t like it? :slight_smile:

Another very important thing I noticed: the sensors donā€™t have any prefix. I would suggest that in the configuration phase of the component, in the config_flow, you ask for a prefix, proposing a default. Because there could be more sunspec devices of different vendors, etc.

1 Like

For the various operating states: Iā€™d suggest to put the actual value (eg 4 for my specific operating state) and in the attributes of that sensor the sunspec enumerated value (eg MPPT for value 4). This way a user could use it to customize the status (I would put the real meaning, taken from the list of my specific vendor, 4 means Running and Producing Power).

Thanks again for the feedback!

I must have missed the frequency icon, will fix in next release :slight_smile:
Iā€™l have a look at an optional prefix config option, good suggestion.

Regarding the St field (and all enums and bitfields), i prefer having the actual symbol there for the sensor value, a text symbol says more than just a number.
Those symbols are in the spec and will always be the same, so if you want to customize that sensor you could just compare symbols instead of numbers (ie instead of check for value 4 check for the string ā€˜MPPTā€™).
I can add the number value as a state attribute though.

Also have a look at the field named ā€œInverter Vendor specific operating state codeā€ (StVnd), this is supposed to be vendor specific and is always a number, perhaps that would give you what you want?

1 Like

Thanks, the prefix is really important.

I agree, if the text is meaningful though. :slight_smile:
Unfortunately the SunSpec, being a general specification, cannot be detailed on these things, thatā€™s why I was simply asking to not lose the numeric information, so a user could eventually remap the number to a meaningful text associated to the code number. An attribute is a good idea.

unfortunately that register is not implemented for all models, mine included. :slight_smile:

Thanks again.

Version 0.0.4 is out with sensor prefix and model selection step added in setup.
Enum and bitfield raw values are also available as a sensor state attribute/

2 Likes

Great job Johan. I installed it and it works, but I have to do more in-depth testing to give you feedbacks.

Currenly Iā€™m busy completing my custom component, but Iā€™m struggling to solve a minor but blocking issue on config flow: Config Flow label issue

I had thought about looking at yours, if I donā€™t get any hint on the forum. :slight_smile:

Thanks,

Alessandro

Hi Johan,

your component is working fine. :slight_smile:

I wanted to ask you: what part of the code is used to set the info in ā€œDevice Infoā€? Is it the code in entity.py? Because in my component I only have the manufacturer, and Iā€™d like to put the real model info and the fw version. Thanks for any hint on this.

As you can see (screenshot of my component), my inverter doesnā€™t give the real model in descriptive format, but a sort of code taken from the serial#. In my component I implemented a lookup table, with corresponding codes, to get the real model info, basically the first byte of the Options field is the index of the table. I had to access specific vendorā€™s docs to get it. Also for the status codes, same thing, there were 2 different tables for each status code.

image

Yes the device_info method of your entities are used for ā€œDevice infoā€, in my component all entities share the class defined in entity.py.

Interesting how they managed to complicate the model name on your inverter, a bit odd to use a standardized spec and make such things non-standard :wink:
There are room in the spec for vendor specific things such as your operating state (i think itā€™s StVnd in the bottom of that screenshot right), those are currentyly not supported in my component (will only show the number), iā€™m not sure if and how to handle that yet.