Copy the results and paste them to a text file for safe keeping. You’ll reference this at a later time.
Migration
Locate your device and network_key. If you don’t already know them, they will be in a hidden file within your configuration folder.
device - This is the path for the USB Stick network_key - This is the key used when adding a secure node.
1.1 Browse to /config/.storage/
1.2 Open core.config_entries with a text editor.
1.3 Search for Zwave in the file.
1.4 Inside that section will be a path to a usb device and a key. The usb device will look something like /dev/ttyACM0 or /dev/serial/by-id/usb-<bunch of numbers>. The key will have the format 0xD3, 0x05, 0x0A, etc.
Save the device and network_key to a text file for later use.
Remove Zwave 1.4 from HA.
This requires you to delete it from the integrations in the UI
or
Delete it from configuration.yamlThis of course depends on how you integrated it.
Reboot your entire system.
These steps are needed because the zwave 1.4 is tightly integrated with home assistant. Without restarting the hardware, home assistant keeps holding on to the zstick.
Install Zwave JS addon.
Add the copied device and network_key from the .storage files into the Zwave JS configuration. Remove the 0x’s and the commas and spaces from the network key, so 0x1A, 0x23, 0x5D becomes 1A235D.
Fix all ‘unknown’ devices by waking them up. No need for a refresh node, just wake them up.
Install Zwave JS integration and see what you have.
(optional but this is what I did)
7.1. Delete Zwave JS integration (I did this because names were unknown in HA still)
7.2. Restarted Zwave JS after waking all devices.
7.3. Install Zwave Js Integration and see what you have.
7.4. Go to Step 7.1 if things aren’t where you want them.
Rename Devices using the text file as a reference from the Preparation #4 step. This is the most time consuming step
Can anyone tell me what format the network key needs to be in for the zwave js server addon? The original ozw format of 0x or is it like zwave js to mqtt where it’s just the 32 bits?
Well that would make sense because they both seemed to work! But the interface right now doesn’t show any status for the connection being secure or not so I wasn’t sure
Didn’t helped me. Where to find device and network key? Not found in string from template. No path /config/.storage from the 1st reply. This guide is not working.
I found from information in system, that my device path is maybe /dev/ttyACM1, it shows an error in next step. But it looks that is working.
Okay. @brotherseb is right on the location of the file where you can get the values you need. Keep in mind, that this starts in /config, not the config that you are used to playing in when editing yaml files.
Once you get that open, you are looking for network_key and usb_path
Correct, which is why I wrote steps 7.1 to 7.4, it’s a cyclical process. Either way, you should be watching the logs on first startup. If you’re having issues because the current zwave_js implementation is lacking, then I suggest you try the ZwaveJS2MQTT route as it has a nice UI. You’ll end up in the exact same position but you’ll see a list of devices prior to adding the integration.
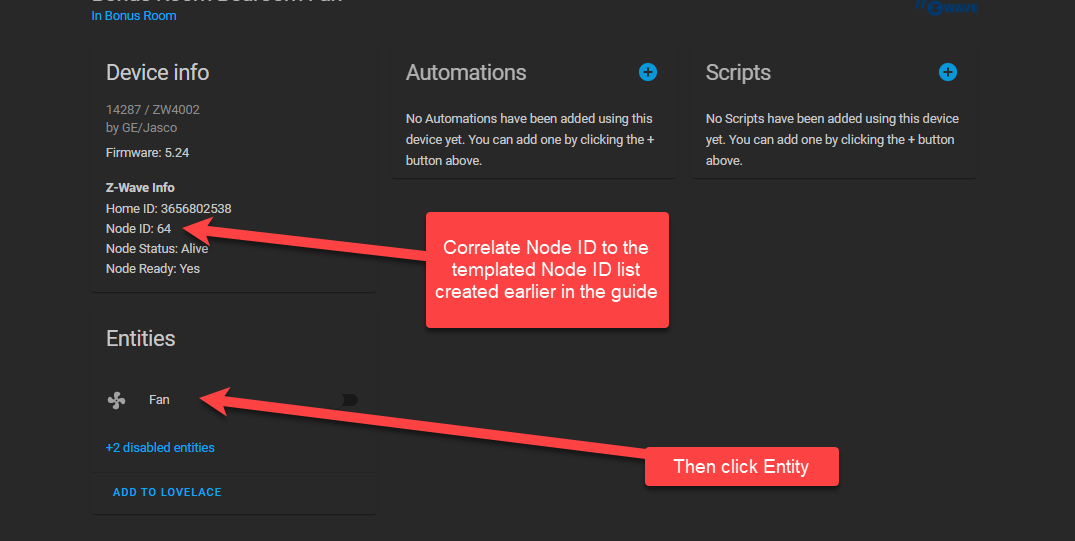
I don’t suppose there is an easy way to tell which device is which without going around and flipping them off an on with the app to tell which is which? (IOW, in 1.4, the exported stuff was by Node xx, but most of the things in zwavejs says in-wall smart dimmer or things like that.
If you performed the preparation steps, it would have made a list of your current network based on the node ID. Then in the integration, click on a device and it’ll list a node_id at the top