In ESP Home 2025.6.0 support was released for Thread and thread enabled boards the H2 and the C6, I thought I’d document my bumpy experiences getting an example Thread project going with HomeAssistant:
Pre-requisites
Assumed knowledge:
You have set up at least 1 ESP Home wifi device before trying a thread device
HA installation with:
Thread integration enabled and working
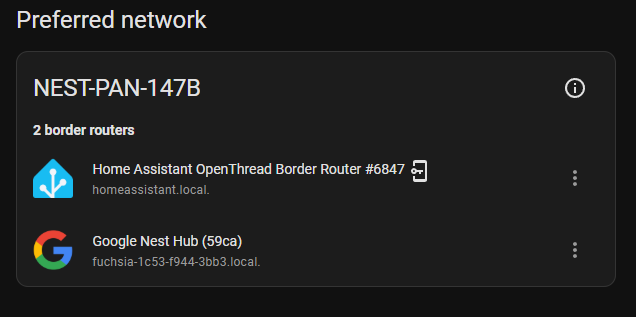
Requires at least 1 boarder router, in my case I had a Google Home Display and a SkyConnect (with the OpenThread add-on) on the same network (How to combine networks)
An ESP32 H2 or C6 - example below is the H2
ESPHome Device Builder (I find it can crash my raspberry pi 4 so I use a seperate docker installation)
I believe having IPv6 enabled on your router may be a requirement - but I’m not certain about this - its not clear to me if thread traffic ever goes near your router or whether it all happens on it’s own network with border routers doing 6->4 NAT.
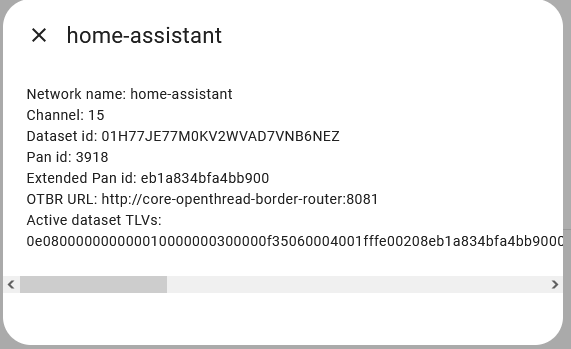
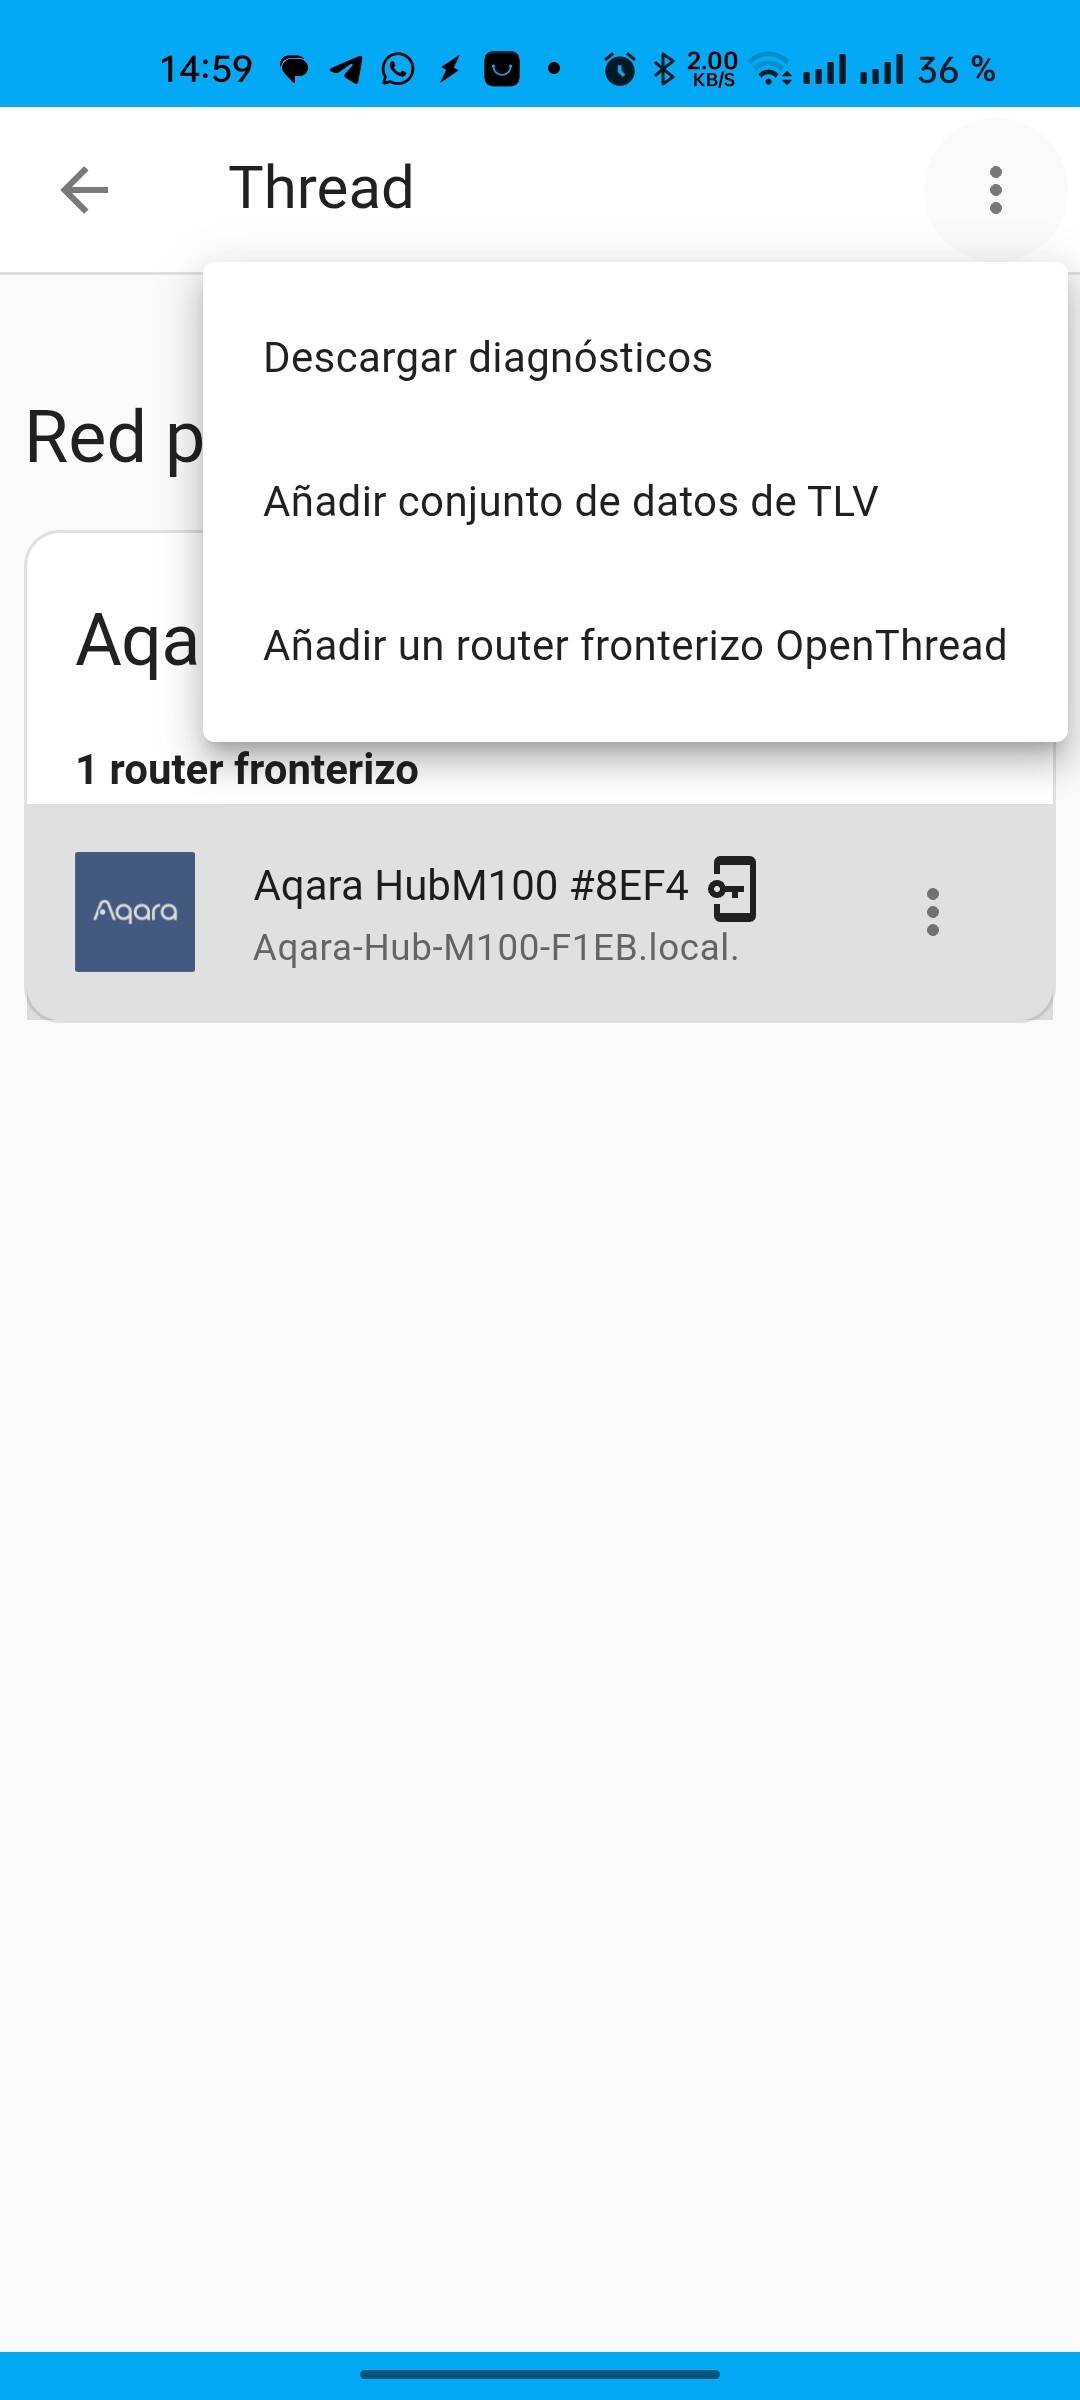
Getting your tlv
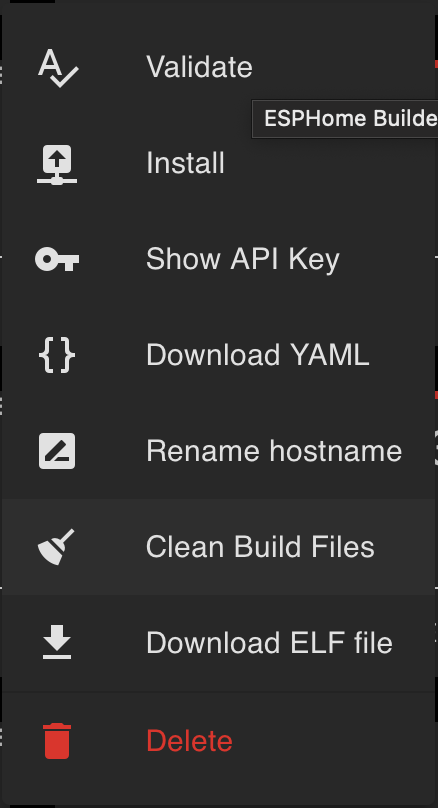
In home assistant, go to the Thread integration page, click ‘configure’, then click on the circular icon in the top right
Instead connect the H2 to your compute and do the ‘add device’ flow in ESPhome, if you’re like me you’ll see two COM devices appear, I tended to go with the one that started with JTAG.
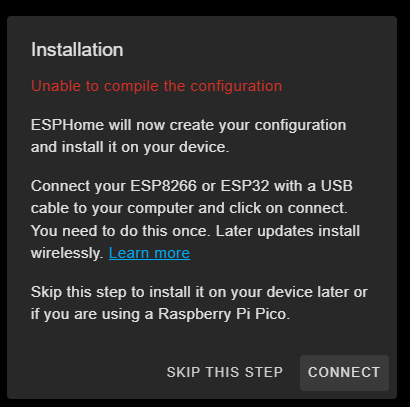
The flow would repeatedly fail for me, I guess it is early days for the H2:
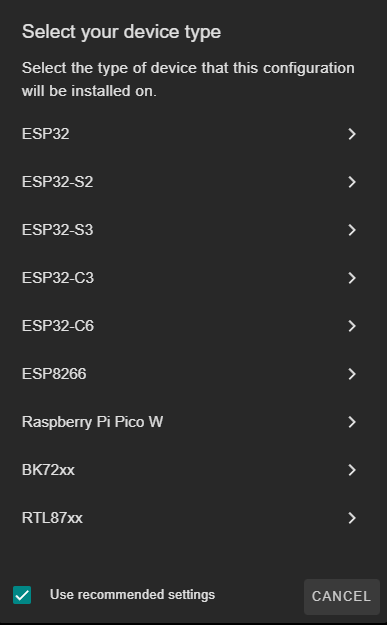
I clicked “ESP32” and then clicked “skip” when it offered to install
Installation
Click on ‘edit’ for the new device, we are going to delete/replace most of this default config, except for everything inside the api: and ota: tags so copy and paste them somewhere safe
 esphome:
   name: thread-test
   friendly_name: thread-test

 esp32:
   board: esp32-h2-devkitm-1
   variant: ESP32H2
   framework:
     type: esp-idf

 # Enable logging
 logger:

 # Enable Home Assistant API
 api:
   encryption:
     key: "YourEncryptionKeyGenerated by ESPHome"

 ota:
   - platform: esphome
     password: "yourOTApasswordGeneratedByESPhome"

 network:
   enable_ipv6: true

 openthread:
   tlv: yourTLVfromStep0

 # Output and light configuration for a single red LED
 output:
   - platform: gpio
     pin: GPIO1
     id: red_led

 light:
   - platform: binary
     name: "Red LED"
     output: red_led
Click install → “Plug into this computer” and follow the steps.
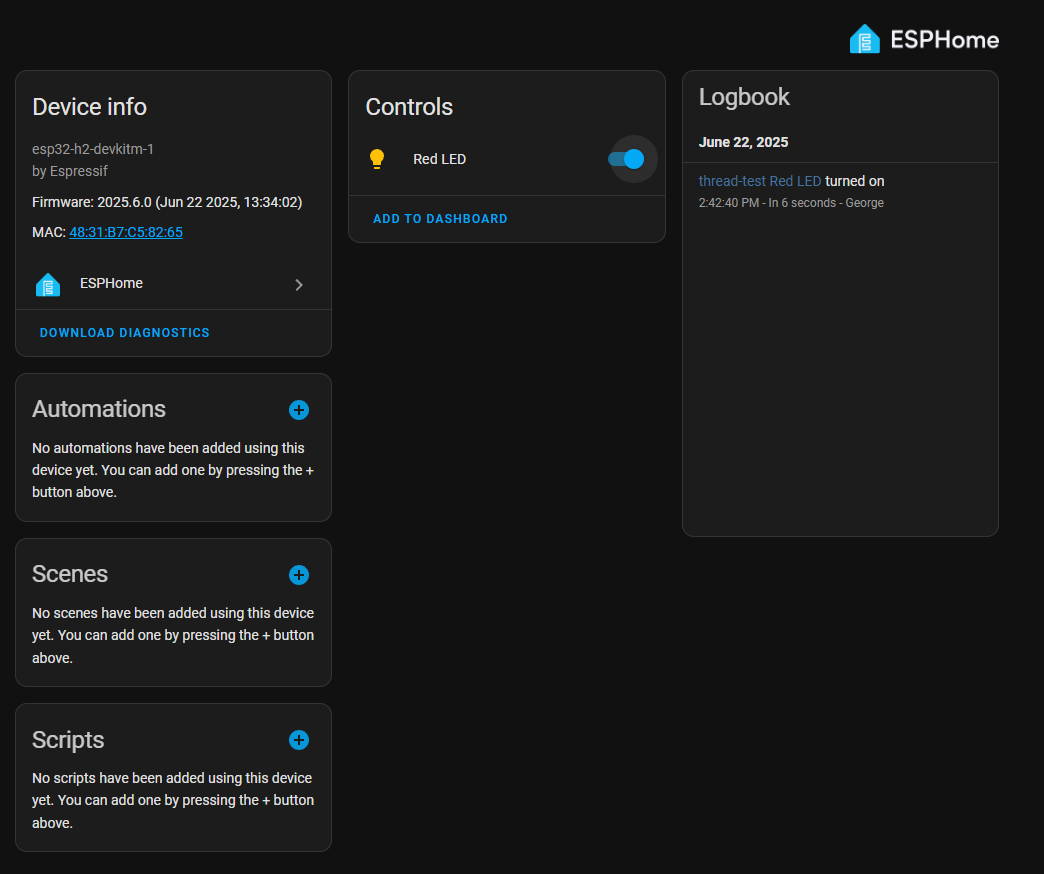
Adding to home assistant
I found that the device was auto-discovered, I have no idea how I would have added it otherwise.
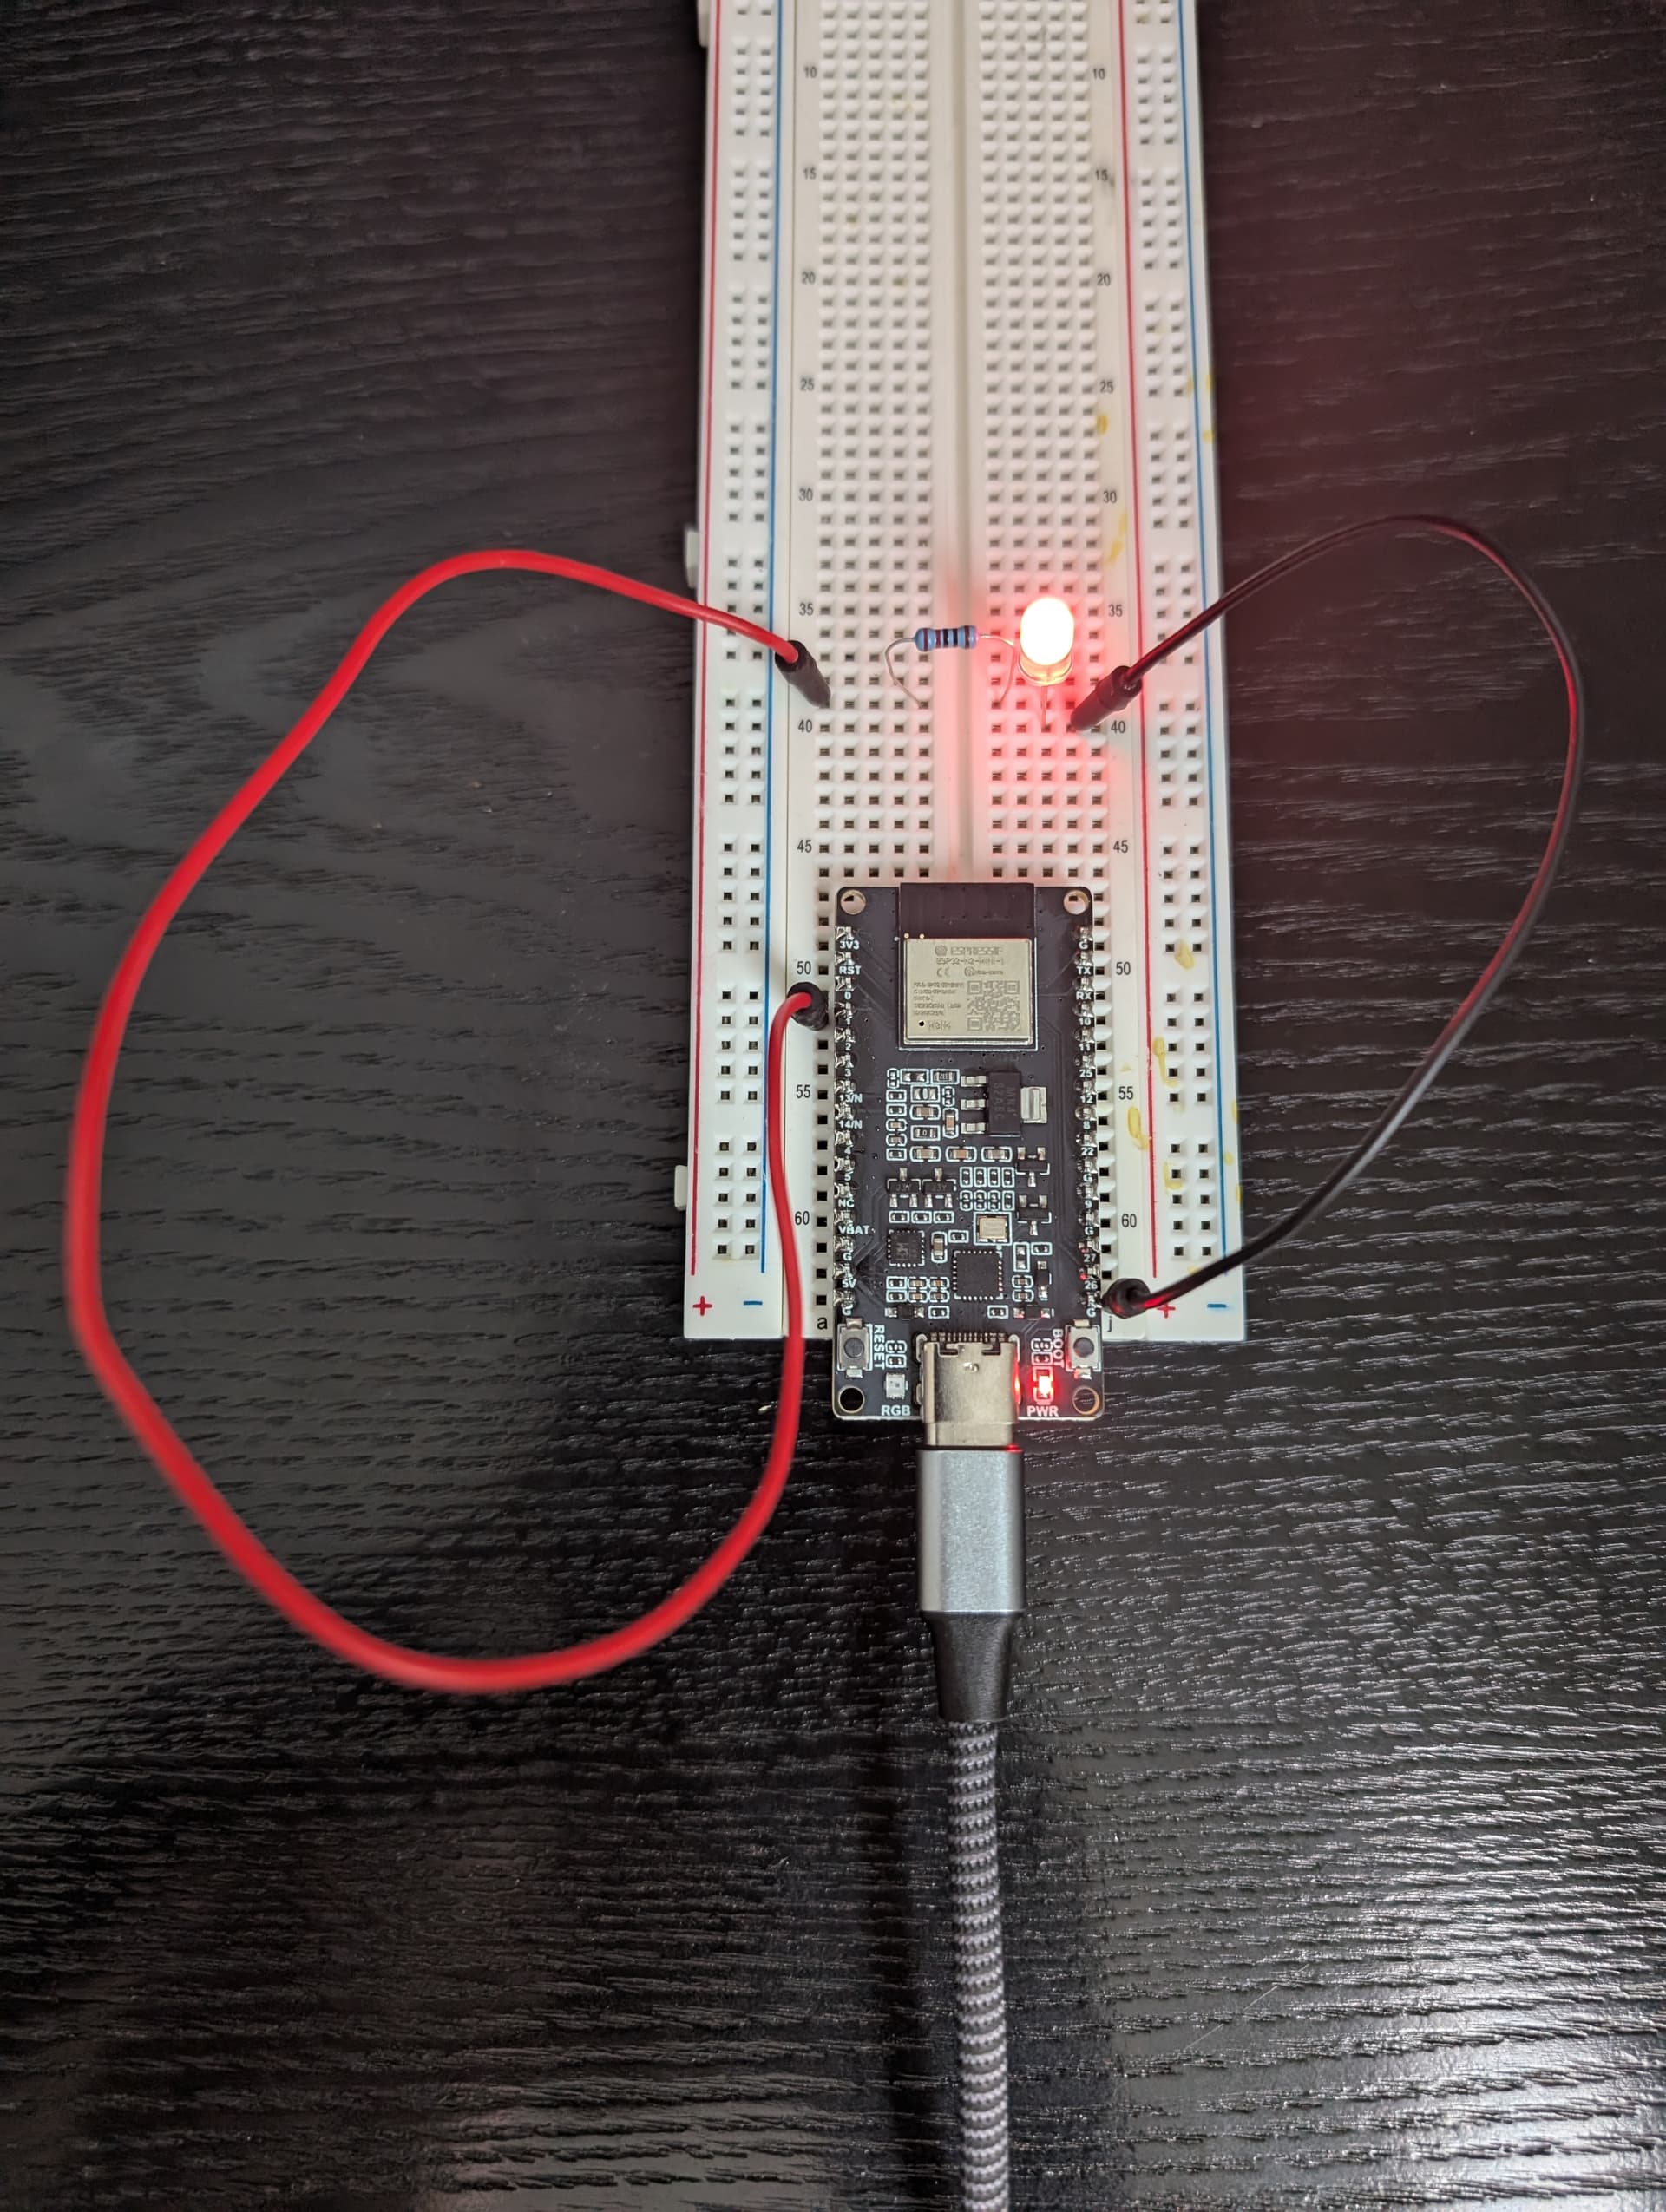
Breadboarding
To control the red LED I had a set up like this, note GPIO1 and a 100 or 220Ohm resistor
I’m trying with an ESP32 H2 and at the end of step 2 I get this error:
“Configuration does not match the platform of the connected device. Expected an ESP32 device.”, any idea on what is going on?
Hmm I would have thought that board would work.
I used this one: Waveshare ESP32-H2 Development Board - The Pi Hut
The H2 support seems to be quite limited in ESP home at the moment, I would try the C6 instead.
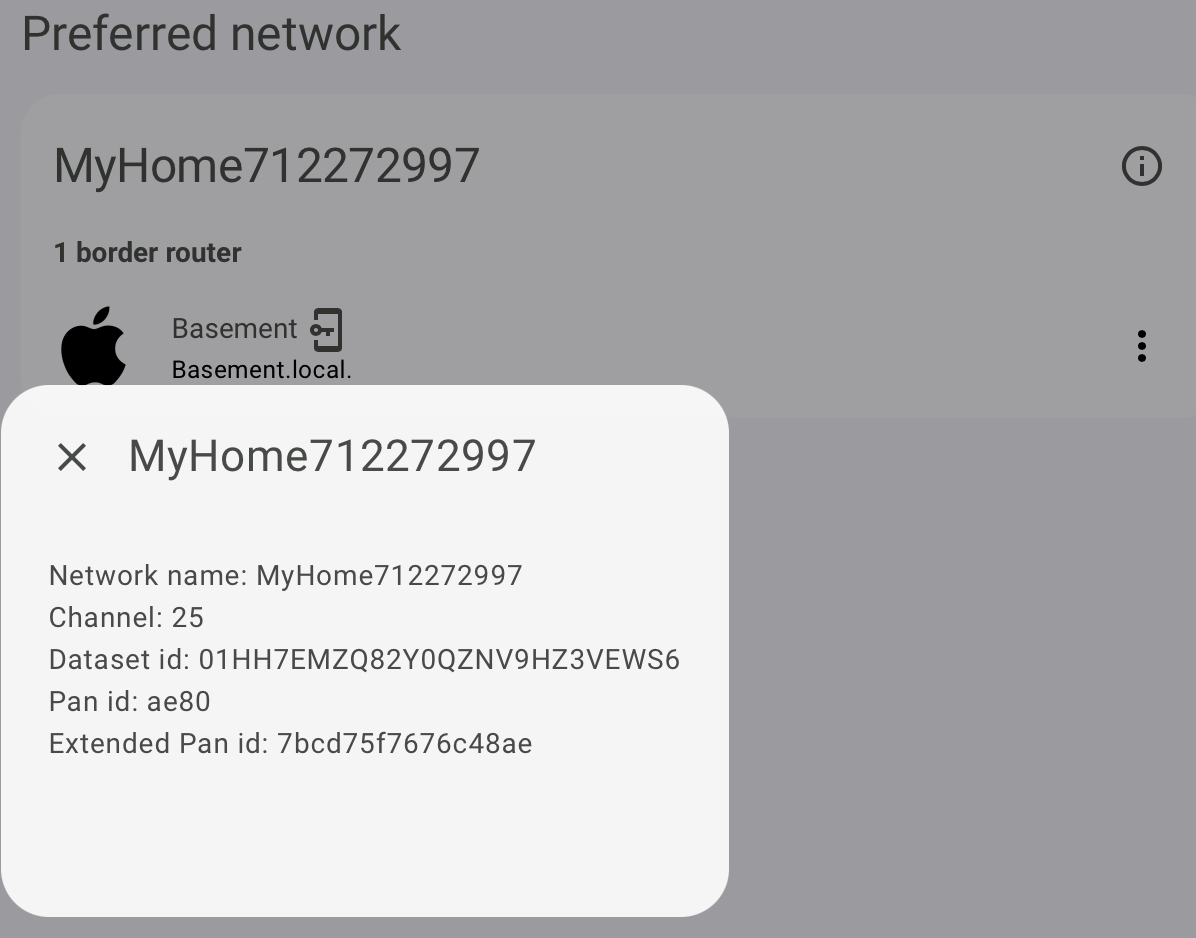
I am trying to get the TLV for my network, but if i click on the (I) button, i only see network name, channel, dataset ID, panID and extended pan id, no TLV.
In my thread network information from the (i) button, I don’t see a TLV. How can I fix that? Is something wrong with my Thread network and/or connection to home assistant?
Note that I don’t have/use Open Thread border router since (a) I have a HomePod mini that does this fine, (b) I don’t have a thread dongle for my HaOS box.
I notice in the iOS companion app, if I go to Debug->Thread and wait a bit, I do see the “active operational data set” there which looks like a TLV number (0e08000…). And I’ve used the “Transfer to Home Assistant” button there multiple times, but the TLV still doesn’t show up in the screenshot above…
I’m thinking either the UI needs a refresh, or HA needs a reboot.
The entry is showing a “key in a phone” icon which is suppose to mean that the HA Thread integration knows the Thread dataset for that Thread network.
I’ve rebooted/refreshed multiple times in the last 2 days (I’m doing lots of development and updating). Still no change to the above UI. I can get the TLV from the companion app, so that’s ok for trying out an ESP32-H2 (I think; we’ll see)
FWIW: the other reason I was concerned is that all 5 of my Thread->HomeKit->HA endpoint devices (QingPing T&H sensors) dropped off my Thread network and refused to reconnect for several days (“Pair verify timed out” messages in the log). This has now rectified itself for 4/5 devices at least. That at least does demonstrate that HA is actively connected to this Thread network, even though the above screenshot suggests there may be an issue.
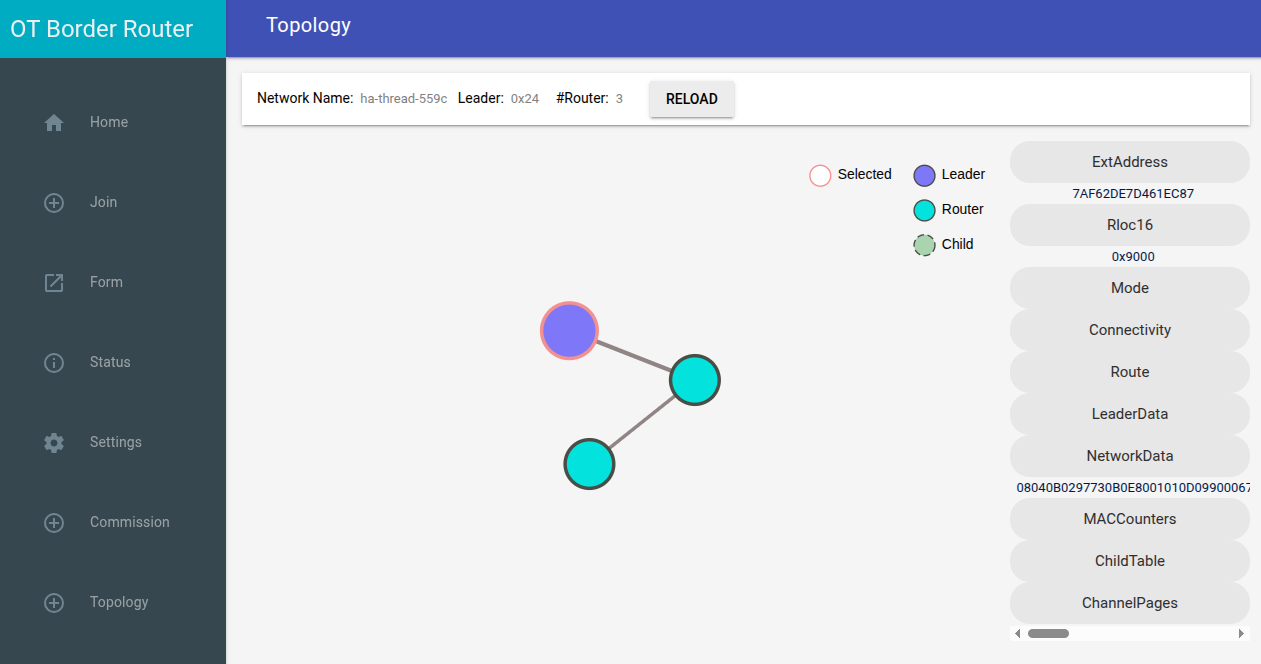
The module seems to connect fine to OTBR. The connection appears in the “Topology” page of the OTBR web interface:
The OBR + module nrf52840dongle + esp32-c6 under esphome
Using the ESPHome protocol. Or rather, HA discovers it, and connects to it using that protocol.
Does your HA installation support IPv6? Because AFAIK, it should. I’ve been using both H2’s and C6’s running Thread (using my Apple Thread network) and HA.
The rebooting message you get is normal: if an ESPHome device has no clients (like HA) for a particular amount of time (15m by default), it will reboot (documented here, search for reboot_timeout).
[20:55:59][D][sensor:131]: 'esp32c6-2 Uptime': Sending state 4.45900 s with 0 decimals of accuracy
[20:56:08][D][text_sensor:085]: 'RLOC16': Sending state 'fffe'
[20:56:11][D][text_sensor:085]: 'IP Address': Sending state 'fd43:b533:bfc7:1:ea75:b1d2:dced:e895'
I can ping this adress:
$ ping fd43:b533:bfc7:1:ea75:b1d2:dced:e895
PING fd43:b533:bfc7:1:ea75:b1d2:dced:e895 (fd43:b533:bfc7:1:ea75:b1d2:dced:e895) 56 data bytes
64 bytes from fd43:b533:bfc7:1:ea75:b1d2:dced:e895: icmp_seq=1 ttl=254 time=204 ms
64 bytes from fd43:b533:bfc7:1:ea75:b1d2:dced:e895: icmp_seq=2 ttl=254 time=28.1 ms
64 bytes from fd43:b533:bfc7:1:ea75:b1d2:dced:e895: icmp_seq=3 ttl=254 time=37.7 ms
And tracepath does show me an ICMP path through the HA server.
So for now, everything is working correctly. The only thing missing is the HA part, which needs to discover this module, right?
 icon in the top right