openHASP: An MQTT driven Touchscreen / Scene controller
Most users already know the original HA SwitchPlate: HASPone thread by @luma. If not, check out his project because it is the foundation on which we built openHASP!
Note: The firmware is currently still a pre-release version. Feel free to try it out.
openHASP started out as an HA SwitchPlate fork replacing the propriatary Nextion panel with a commodity display. This is achieved by using the excellent lvgl graphics library. Much like HASPone, in openHASP you can display a series of pages with fully customizable objects. However, the layout of those screens is entirely up to you!
You can find several example layouts in the documentation to get started:
The lvgl library allows for complete control of almost any object property. openHASP lets you send these commands over MQTT. Over the past 16 months we've slowly integrated features while adding support for other microcontrollers like ESP32.
There are binaries available for several devices, like the ESP32-Touchdown, FreeTouchDeck, M5Stack core2 and WT32-SC01. With the help of @blakadder we've added support for the popular Lanbon L8 and it runs quite smoothly:
I’ve just received´my M5Stack Core2, which I intend to use as a controller for HA. But I can’t figure out how to get the device into flash mode to put the pre-compiled binary on it. Any pointers? I have the USB drivers installed and I’ve tried ESPHome Flasher, ESP-Flasher as well as M5Stack’s own M5Burner.
I have used Tasmota PyFlasher and esptool.py to upload the firmware without any issue. Both tools will automatically put the M5Stack core2 into flashmode. Just specify the appropriate COM port and firmware file.
After a little while there is see a message Hard resetting via RTS pin… and the device should reset by itself.
In Tasmota PyFlasher there is a message Unplug/replug or reset device to switch back to normal boot mode. Because the M5Stack has in internal battery unplugging it will not reset the device. So, press and hold to power button for 6 seconds to power it down. Then press again to power up…
After a few seconds you should see the screen to configure WiFi:
After successful upload of the full firmware, subsequent updates can be done by uploading the ota firmware in the web UI.
Make sure to press the Reboot button after changing the MQTT settings.
Also, you can connect to the serial console using Putty or another serial monitor at 115200bps. This will allow you to see the startup log and connection attempts. That should give a good indication of what’s wrong.
Hi
While waiting for my WT32-SC01 to be delivered I thought I’d read through the setup notes.
Thank you for creating some great reference documentation.
Hello, just started my first OpenHASP implementation on a WT32-SC01 (320x480). It works great… But can I also set the radius of the buttons? When I draw a button I get a rather big radius. I see no radius set parameter.
If you scroll all the way to the bottom of a page you will find a link called “Edit on GitHub”. That will take you to the Github document where you can edit the markdown of that page.
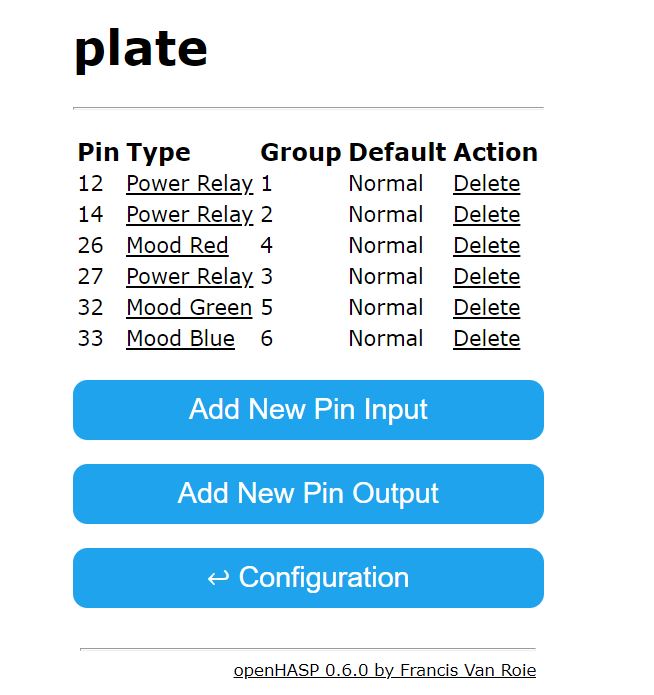
moodlight and backlight light entities appear on my hass, but relay is no where to be found. im using L8-HS and these are my gpio setting pointing to the relay based on the documentation. anything i did wrong? btw touch control with gpio relay is ok. mqtt still doesnt work? im using latest integration in hass
You have to use component version consistently with the firmware version on your plates. For example, if your plates are at firmware version 0.5.x, you also need to use component version 0.5.x to ensure interoperability. Home Assistant will show a warning if it finds a version mismatch. Note that you can only have one version of the component installed at a time so a mix of plate versions cannot be deployed.