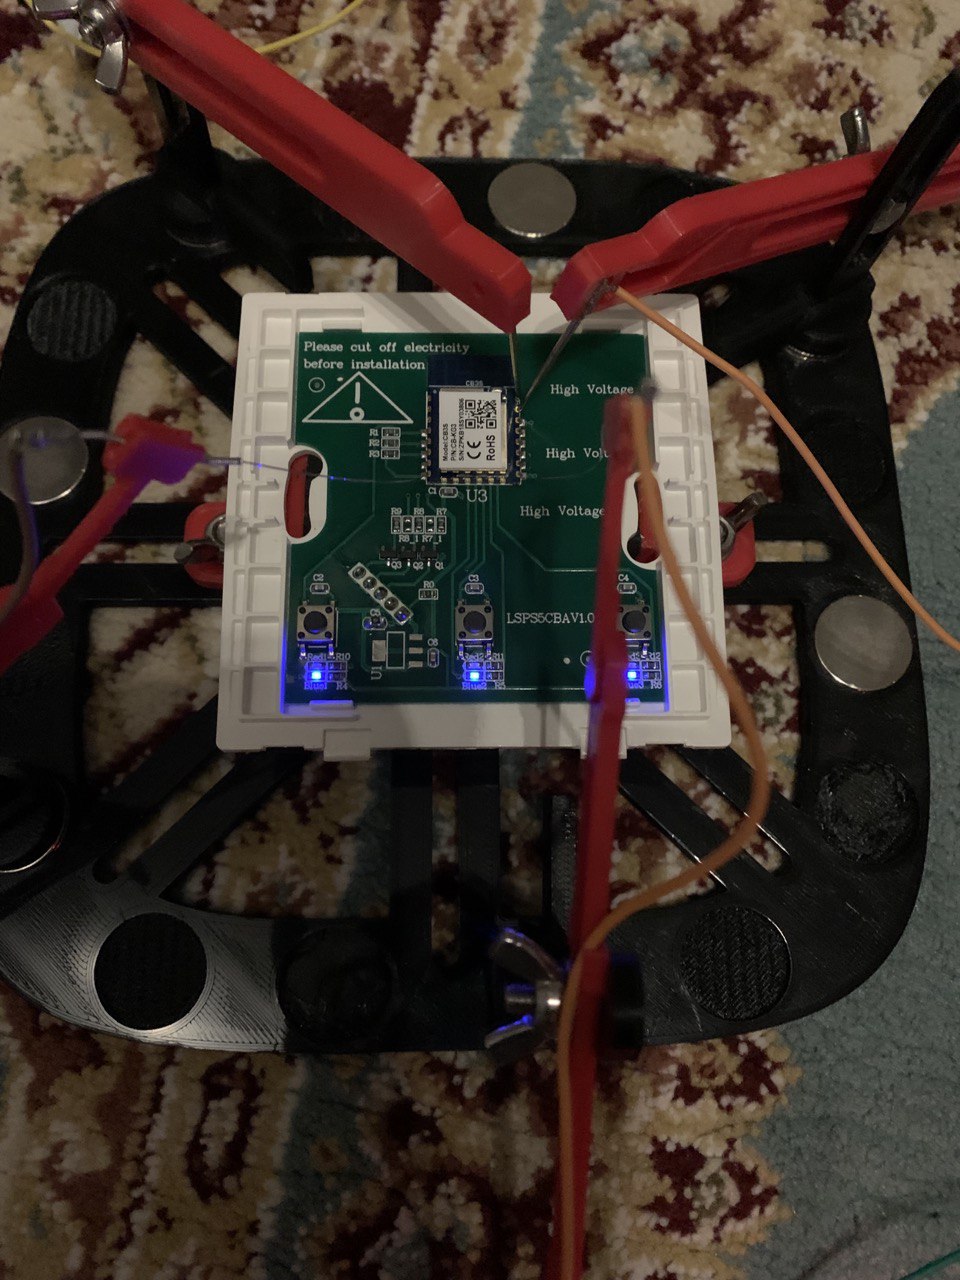
Connect your USB-to-Serial converter to the WB3S chip like below. NOTE: you must connect Ground to the chip directly while flashing. You will need to connect to the CEN pin to trigger Reset. See below
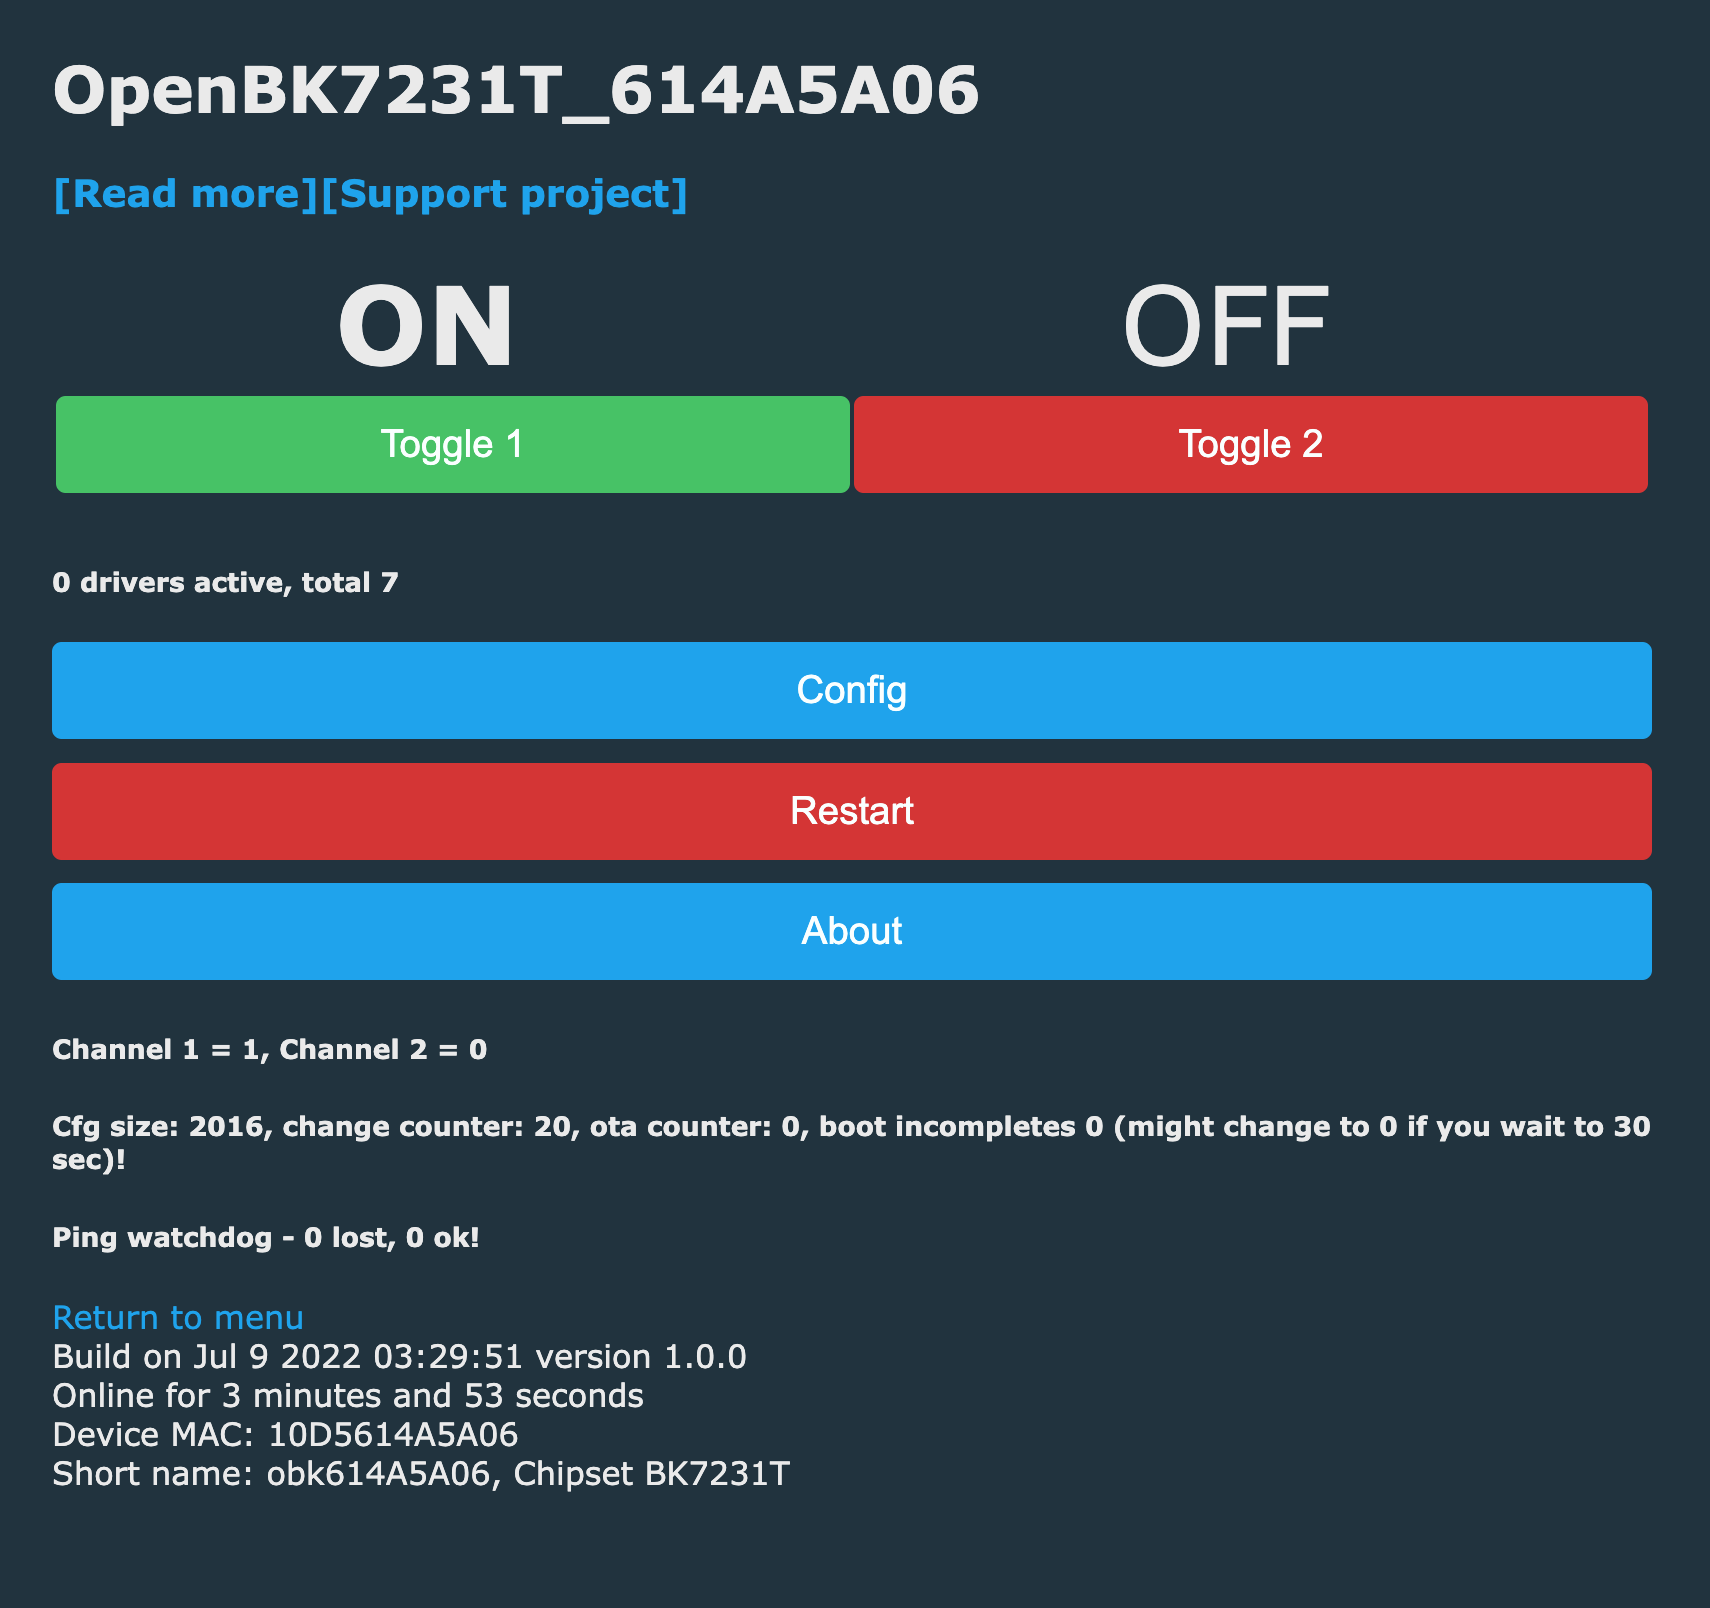
Navigate to the Firmware Webpage by going to 192.168.4.1 on your browser. NOTE: The UI looks very basic. I am in the process of submitting a pull request for better UI that will look like Tasmota .
Disconnect from the OpenBK7231T wifi and connect to the wifi you saved to the firmware. To find out the IP address of the chip you will need to go to your router and find it in the DHCP list.
Navigate to the OpenBK7231T APP by entering the IP address in the browser address bar. You can click on Configure Module to start configuring the device (Unfortunately there is no templates like blackader templates for this yet) or you can use the one of the Quick Config devices. I have added the configuration for this DETA switch to the quick config.
You can now configure other things like Naming the device and configuring MQTT settings. Once you have done this you can now get the Home Assitant configurations by clicking on the Generate Home Assistant cfg button.
It would be nice to include this guide in the main README.md of OpenBKT7321T. If you ask, I’m sure the author will happily add the link in the “Detailed flashing guides along with device teardowns” section.
Yes, you can flash via ota after applying the cloudcutter patch.
There’s a list of devices you can pick (most have similar chip, cbu, cb3s etc) and if the patch doesn’t work you can just dump the tuya firmware bin for the devs to update.
Makes it easy for the next device without having to solder again.
Thanks for the guide. I’m new to HA, but I’ve been watching a heap of HA-related videos for the last month or two. I was completely unaware of a reflash alternative for the WB3S until I came across the ‘Australian certified hardware’ thread the other day. I was half-prepared to buy a solder heat gun and start replacing modules.
I tried getting LocalTuya set up via the iot.tuya integration method the other day, and it’s a major nightmare. It wouldn’t let me retrieve my API password, so I gave up on that. I’d much prefer a cloudless approach.
I tried hooking up my 3-gang Deta wall switch last night, but I think my USB to TTL device from Jaycar doesn’t cut it. I’ve ordered one on eBay that was recommended by the creator of OpenBeken. I just wish I had a 3D printer so that I could print one of those little push-pin jumper templates to avoid soldering altogether.
I’ll report back here once the new CH340G arrives.
BTW, does OpenBeken support power monitoring yet? I have a single Deta power point with power monitoring that I want to use to trigger some more reliable automations when my TV is powered on and off. The LG integration is too slow.
Hi, is there steps for restoring tuya firmware if I ever need to?
I backed up the firmware.bin from a bk7321n device using bk7231tools from here, extracted the rbl files
But now I’m not sure what’s the next step is.
Do I just flash cb3s_3gang_13july2_app_1.00.bin firmware?
Reading 4k page at 0X21FE000 (99.61%)
Reading 4k page at 0X21FF000 (99.80%)

C:\Users\Keel\Desktop\openbkt\bk7231tools-main>
C:\Users\Keel\Desktop\openbkt\bk7231tools-main>python bk7231tools.py dissect_dump -e -O cb3s_3gang_13july2.bin
usage: bk7231tools dissect_dump [-h] [-l LAYOUT] [-O OUTPUT_DIR] [-e] [--rbl] file
bk7231tools dissect_dump: error: the following arguments are required: file

C:\Users\Keel\Desktop\openbkt\bk7231tools-main>python bk7231tools.py dissect_dump -e -O cb3s_test cb3s_3gang_13july2.bin
RBL containers:
        0x10f9a: bootloader - [encoding_algorithm=NONE, size=0xea20] - extracted to cb3s_test\cb3s_3gang_13july2_bootloader_1.00.bin
        0x129f0a: app - [encoding_algorithm=NONE, size=0xe3140] - extracted to cb3s_test\cb3s_3gang_13july2_app_1.00.bin```
Great project.
I almost lost hope with my new switches that use BK7231T. Switches are going offline too often with Local Tuya integration.
I have a few Gosund SW2 Dimmer switches. I installed OpenBK on one of these device, but I have no idea how to set up the configuration to make them work with OpenBK.
I also have a few SW5 Gosund switches. I didn’t try flashing them yet, but I have the same question. How to find hot to configure them.
You can do trial and error but have a look at the devices listed in the Quick Setup. Then Google them and see if any of them are similar to your switches. Then try the quick setup as a starting point. Then change configs one at a time until you get the right config for your switch.
OpenBK is currently looking into building a javascript based database for configs which will allow you to add your new configs for others. Similar to Tasmota Blackader.
I managed to get a Deta 3 Gang Switch (6903HA Series 2) flashed and up and running today. I’ve not yet hooked it up to HA via MQTT, I’ll do that tomorrow.
Buttons, Relays, and WiFi status LED all configured after a bunch of head scratching and trial and error. I’ll add a pull request to the repo to get the device template added later. For now, these are the pinouts:
Great work! The OpenBK7231T_App should generate the MQTT settings for Home Assistant for you. Then copy that and add it to your configuration.yaml. If you have MQTT setup with Home Assistant already this should be 1 minute work. Good luck!


 .
.


 . Check it out